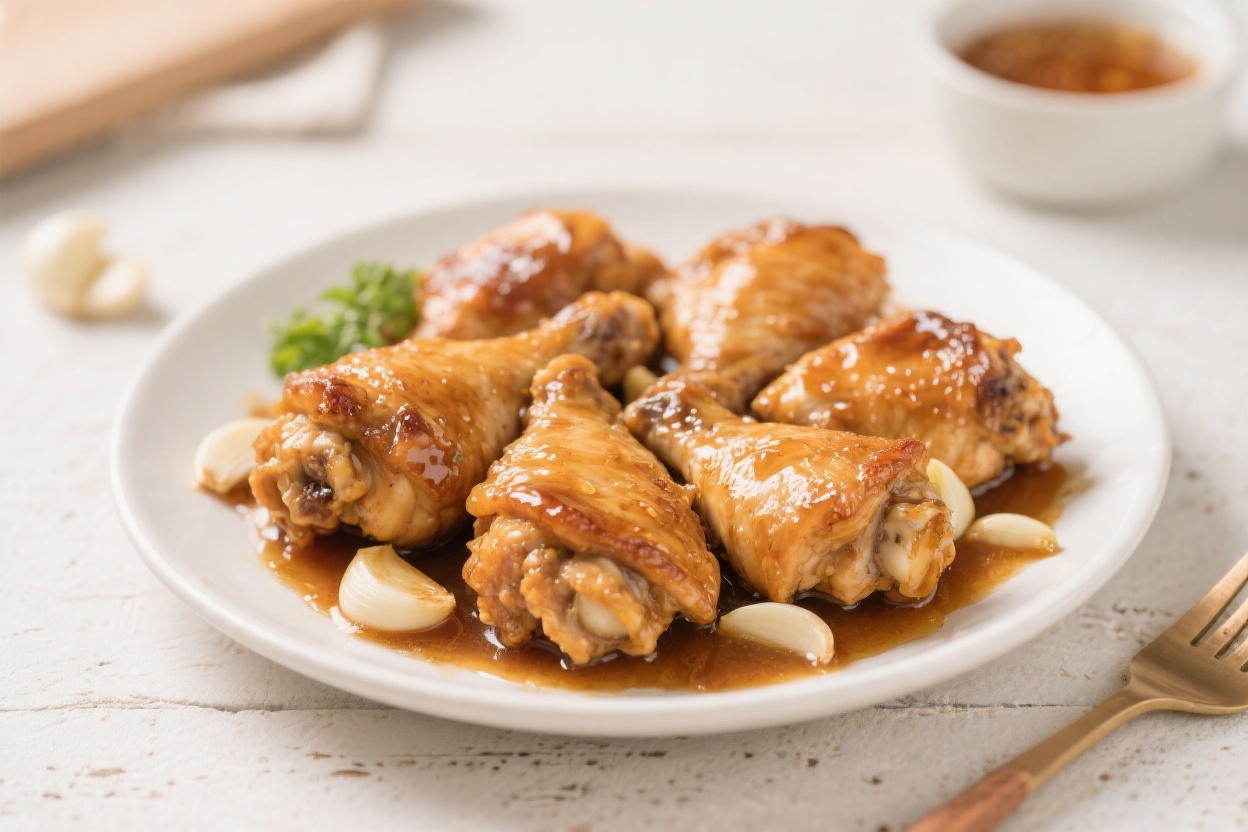
Honey Garlic Chicken Thighs for Kids – Simple, Sticky, and Family-Friendly
Chicken thighs in a sweet, garlicky glaze are a weeknight lifesaver. Kids love the glossy sauce, and you’ll love that it cooks fast and doesn’t require fancy ingredients. The flavors are familiar—sweet honey, mild garlic, and a hint of soy—without being too bold.
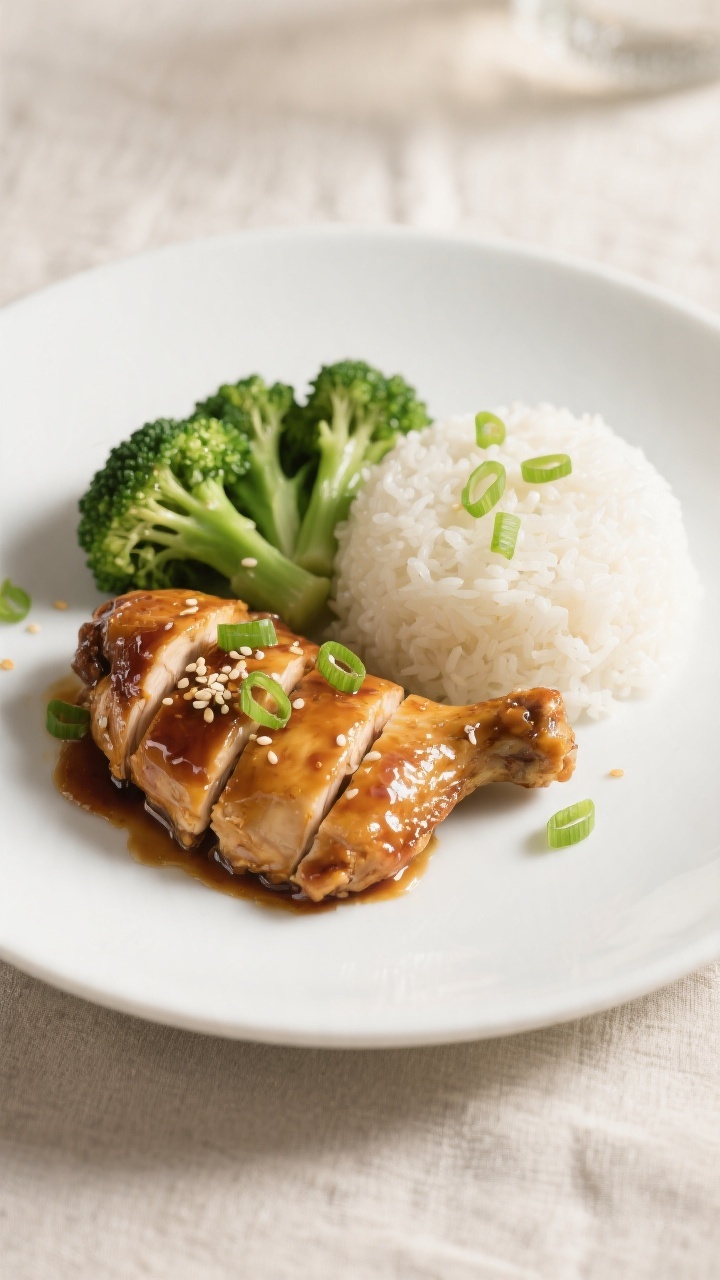
You can serve it with rice, veggies, or tuck it into lettuce cups. Clean plates and fewer dinner battles? That’s the goal.
Honey Garlic Chicken Thighs for Kids - Simple, Sticky, and Family-Friendly
Ingredients
Method
-
Prep the oven: Heat your oven to 400°F (200°C). Line a sheet pan with foil or parchment for easy cleanup.
-
Pat dry and season: Pat the chicken thighs dry with paper towels. Season both sides lightly with salt and pepper.
Dry chicken browns better and helps the glaze stick.
-
Stir the sauce: In a bowl, combine honey, soy sauce, minced garlic, vinegar, and sesame oil. Taste and adjust—add a touch more honey for sweetness or a splash more vinegar for brightness.
-
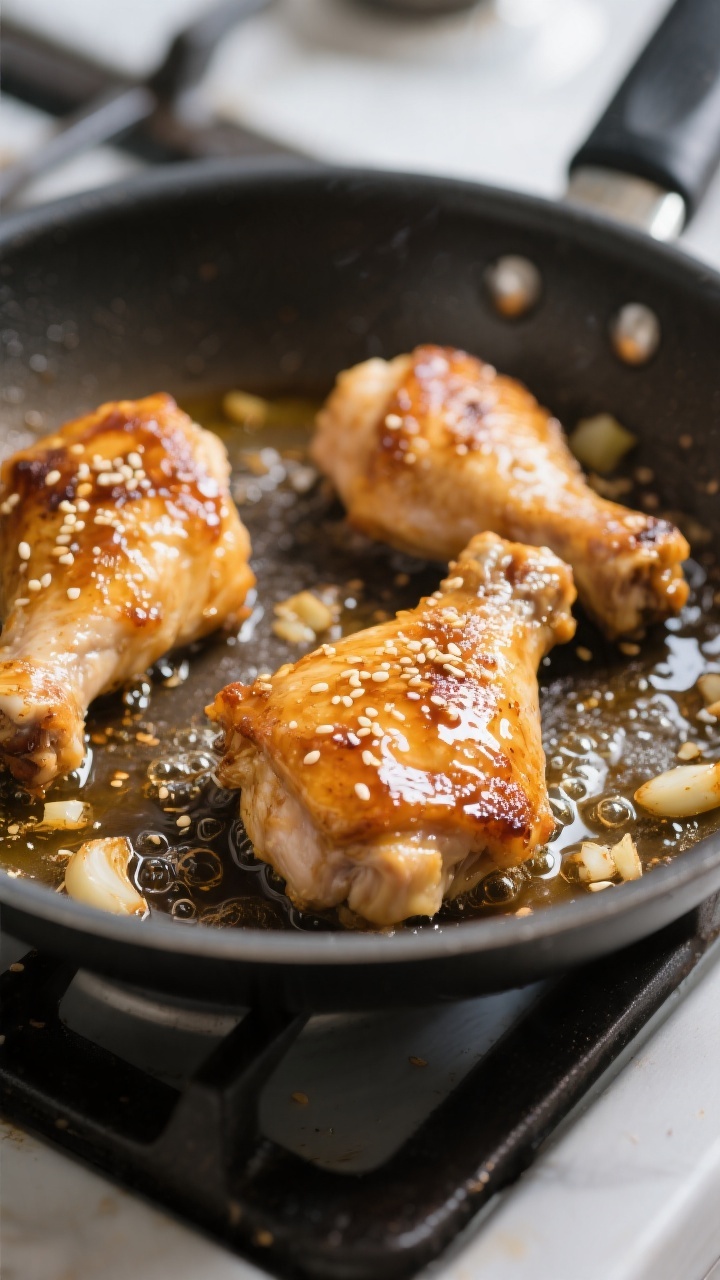
Quick sear (optional but recommended): Heat oil in a large skillet over medium-high. Sear thighs 2–3 minutes per side until lightly golden.
This step boosts flavor and texture.
-
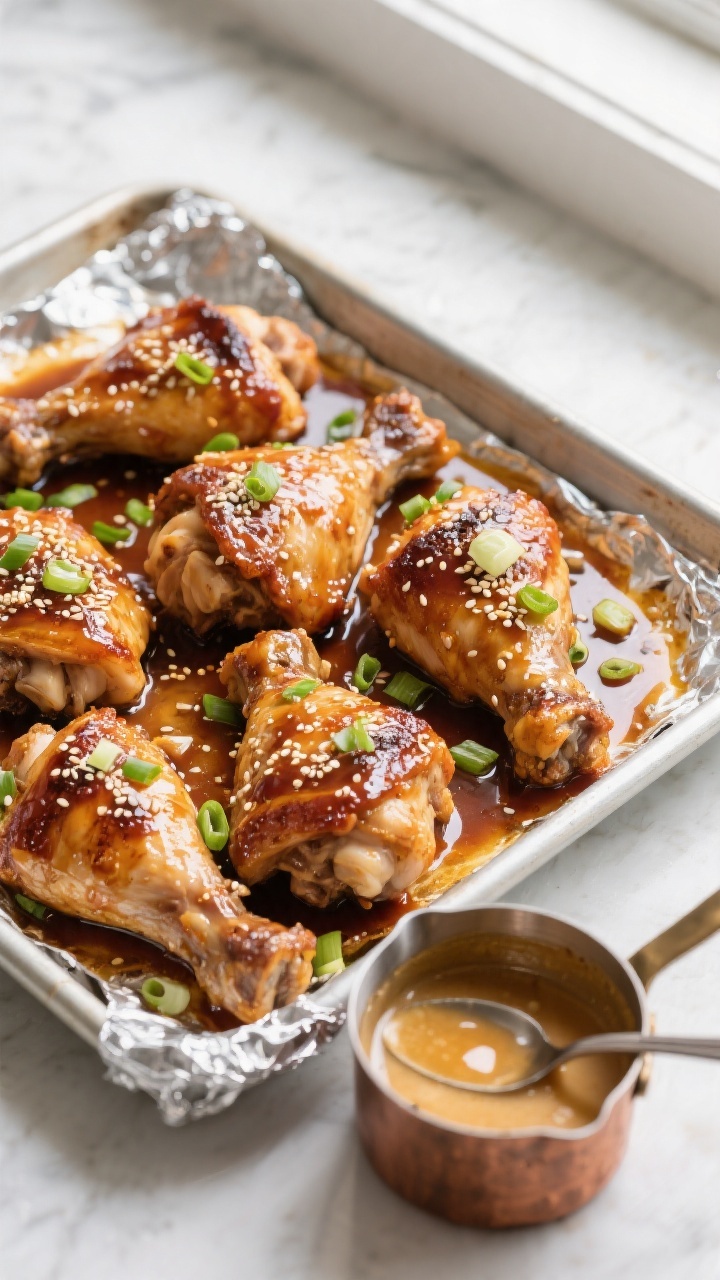
Transfer and coat: Move the thighs to the lined pan in a single layer. Pour half the sauce over the chicken, turning to coat. Reserve the remaining sauce.
-
Bake: Bake for 15 minutes (boneless) or 20 minutes (bone-in).
Remove the pan, spoon on the remaining sauce, and return to the oven.
-
Finish cooking: Continue baking until the chicken reaches an internal temperature of 165°F (74°C), about 5–10 more minutes depending on size. The sauce should be bubbly and sticky.
-
Optional glaze boost: For extra shine, simmer the pan juices with a cornstarch slurry (1 teaspoon cornstarch mixed with 2 tablespoons water) over low heat until thickened, then spoon over the chicken.
-
Rest and serve: Let the chicken rest for 5 minutes. Garnish with green onions or sesame seeds if using.
Serve with rice and a simple veggie side.
Disclosure: As Amazon Associates, we earn from qualifying purchases at no extra cost to you.
Why This Recipe Works
The magic is in the balance.
Honey brings sweetness, soy sauce adds salt and depth, and garlic gives gentle warmth without being spicy. Chicken thighs stay juicy and forgiving, even if dinner gets delayed a few minutes. A quick sear builds flavor, while a short bake finishes the cooking and thickens the glaze.
The result is a sticky, shiny sauce that clings to each bite.
Shopping List
- Chicken thighs (bone-in or boneless, skin-on or skinless) – about 2 pounds
- Honey – 1/3 cup
- Soy sauce (low sodium preferred) – 1/4 cup
- Garlic – 4 cloves, minced (or 1 teaspoon garlic powder)
- Rice vinegar or apple cider vinegar – 1 tablespoon
- Sesame oil – 1 teaspoon (optional but tasty)
- Cornstarch – 1 teaspoon (optional, for thicker glaze)
- Water – 2 tablespoons (for cornstarch slurry if using)
- Olive oil or neutral oil – 1 tablespoon
- Salt and black pepper – to taste
- Green onions or sesame seeds – for garnish (optional)
- Cooked rice or noodles – for serving
- Steamed vegetables – broccoli, carrots, or peas (optional)
Instructions
- Prep the oven: Heat your oven to 400°F (200°C). Line a sheet pan with foil or parchment for easy cleanup.
- Pat dry and season: Pat the chicken thighs dry with paper towels. Season both sides lightly with salt and pepper.
Dry chicken browns better and helps the glaze stick.
- Stir the sauce: In a bowl, combine honey, soy sauce, minced garlic, vinegar, and sesame oil. Taste and adjust—add a touch more honey for sweetness or a splash more vinegar for brightness.
- Quick sear (optional but recommended): Heat oil in a large skillet over medium-high. Sear thighs 2–3 minutes per side until lightly golden.
This step boosts flavor and texture.
- Transfer and coat: Move the thighs to the lined pan in a single layer. Pour half the sauce over the chicken, turning to coat. Reserve the remaining sauce.
- Bake: Bake for 15 minutes (boneless) or 20 minutes (bone-in).
Remove the pan, spoon on the remaining sauce, and return to the oven.
- Finish cooking: Continue baking until the chicken reaches an internal temperature of 165°F (74°C), about 5–10 more minutes depending on size. The sauce should be bubbly and sticky.
- Optional glaze boost: For extra shine, simmer the pan juices with a cornstarch slurry (1 teaspoon cornstarch mixed with 2 tablespoons water) over low heat until thickened, then spoon over the chicken.
- Rest and serve: Let the chicken rest for 5 minutes. Garnish with green onions or sesame seeds if using.
Serve with rice and a simple veggie side.
Keeping It Fresh
Leftovers keep well and often taste even better. Store cooled chicken and extra sauce in an airtight container in the fridge for up to 4 days. Reheat gently in a covered skillet with a splash of water to loosen the glaze.
You can also freeze cooked thighs for up to 2 months. Thaw overnight in the fridge and reheat until warmed through.
Benefits of This Recipe
- Kid-approved flavor: The sweet-savory combo is friendly and familiar, helping picky eaters warm up to chicken.
- Budget-friendly: Thighs are usually cheaper than breasts and stay tender.
- Flexible prep: Works with bone-in or boneless thighs, and the sauce can be mixed ahead of time.
- Balanced meal: Add rice and veggies, and you’ve got protein, carbs, and fiber on the plate.
- Quick cleanup: One pan roast and simple ingredients mean less time at the sink.
Pitfalls to Watch Out For
- Too much salt: Regular soy sauce can make it salty, especially after reducing. Choose low sodium or cut with water.
- Burnt glaze: Honey can scorch at very high heat.
If edges darken too fast, tent loosely with foil for the last minutes of baking.
- Undercooked chicken: Check doneness with a thermometer. Aim for 165°F (74°C) at the thickest part, not touching bone.
- Watery sauce: If juices thin the glaze, thicken on the stovetop with a cornstarch slurry or simmer a few extra minutes.
- Overcrowding: Give the thighs space so they roast, not steam. Use two pans if needed.
Variations You Can Try
- No-sear sheet pan version: Skip the skillet.
Place seasoned thighs on a pan, bake 10 minutes, add sauce, then bake until done.
- Milder garlic: Swap fresh garlic for 1 teaspoon garlic powder, or sauté garlic briefly to soften the bite.
- Ginger twist: Add 1 teaspoon grated fresh ginger to the sauce for a gentle zing that still feels kid-friendly.
- Citrus lift: Stir in 1 tablespoon orange juice or a little zest for brightness.
- Slow cooker: Place thighs and sauce in the slow cooker, cook on low 4–5 hours. Broil briefly at the end to caramelize.
- Gluten-free: Use tamari or certified gluten-free soy sauce and check all labels.
- Vegetable add-ins: Toss broccoli florets or snap peas with a drizzle of oil and roast on a separate pan for the last 12–15 minutes.
FAQ
Can I use chicken breasts instead of thighs?
Yes. Breasts cook faster and can dry out, so reduce the baking time and pull them as soon as they reach 165°F.
Consider slicing thick breasts in half horizontally for even cooking.
Is this recipe too sweet for kids?
The honey makes it sweet, but soy sauce and vinegar balance it. If you prefer less sweetness, reduce the honey to 1/4 cup and add a splash more vinegar.
How can I make it without soy?
Use coconut aminos and a pinch of salt to taste. The flavor will be slightly sweeter, so you may want to reduce the honey just a bit.
Can I marinate the chicken ahead?
Absolutely.
Marinate in half the sauce for up to 8 hours in the fridge. Pat dry, sear or bake as directed, and use fresh sauce for glazing to avoid cross-contamination.
What sides go well with this?
Steamed rice, quinoa, or noodles pair nicely. For veggies, try broccoli, carrots, green beans, or a quick cucumber salad.
How do I get a thicker, stickier sauce?
Simmer the pan juices with a cornstarch slurry, or let the sauce bubble in a small skillet for a few minutes to reduce.
Stir often to prevent burning.
Is it spicy?
No. This version is mild. If adults want heat, serve with chili flakes or a drizzle of sriracha on the side.
Can I make it in the air fryer?
Yes.
Cook seasoned thighs at 375°F for 14–18 minutes, brushing with sauce halfway and again near the end. Check for 165°F doneness.
How do I prevent the chicken from getting soggy?
Dry the thighs well before searing or baking, avoid overcrowding, and bake on a wire rack set over a sheet pan if you want extra crisp edges.
What if I don’t have fresh garlic?
Use 1 teaspoon garlic powder. It blends smoothly and keeps the flavor gentle for kids.
In Conclusion
Honey Garlic Chicken Thighs for Kids hits the sweet spot between easy and crowd-pleasing.
The method is simple, the ingredients are common, and the results feel special enough for a family dinner. Keep the flavors balanced, watch the glaze, and serve with a couple of simple sides. With a little planning, this can be your go-to “yes, they’ll eat it” meal any night of the week.
Printable Recipe Card
Want just the essential recipe details without scrolling through the article? Get our printable recipe card with just the ingredients and instructions.