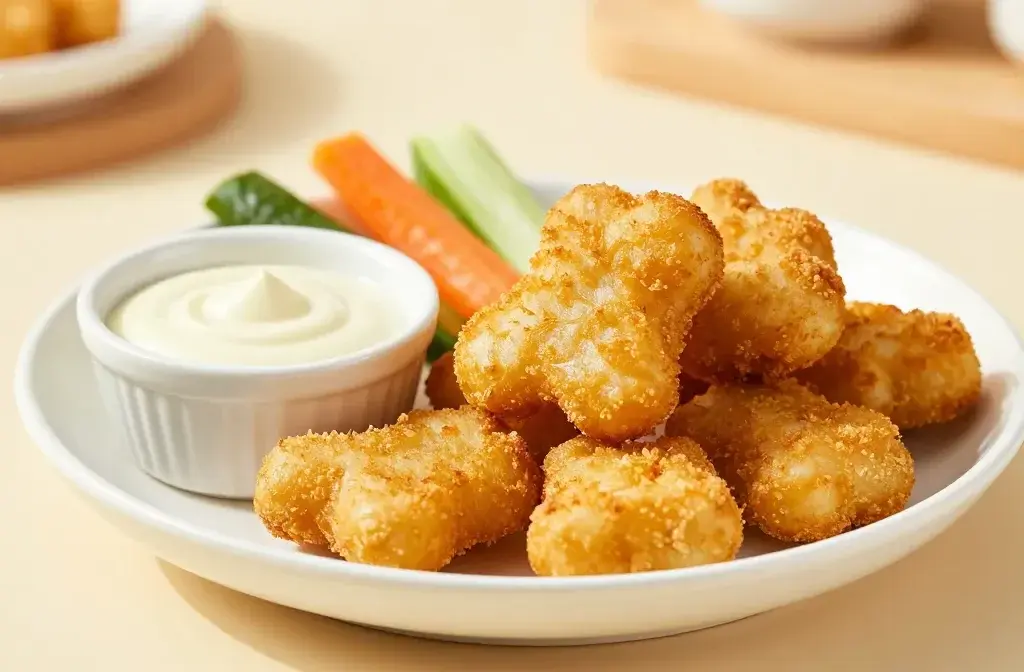
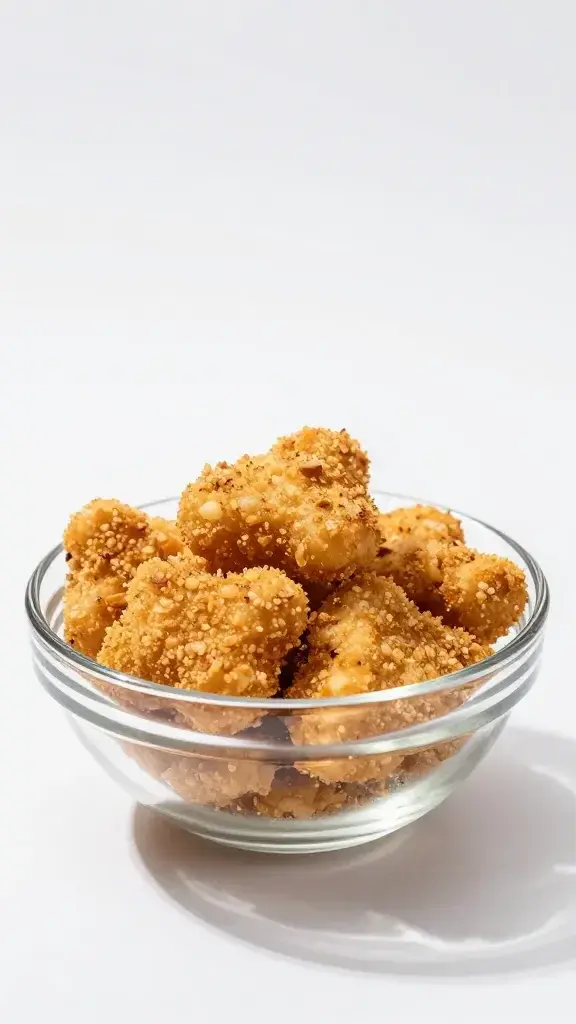
Crispy Toddler Chicken Nuggets (Healthy & Homemade!) Your Kid-Friendly Crunch
These Crispy Toddler Chicken Nuggets are not just a snack—they’re a tiny triumph you can feel good about. Juicy on the inside, golden and crunchy on the outside, and made with ingredients you can actually pronounce. Ready to ditch the freezer box? Let’s cook up something your kid (and you) will actually beg for.
Why these nuggets are a win for everyone
– They’re healthier than the drive-thru version without sacrificing flavor.
– They’re easy to customize for picky eaters or adventurous eaters alike.
– You control the ingredients, the salt, and the spice level—no mystery additives here.
What makes a great toddler nugget anyway? A balanced bite: sturdy coating that stays crispy, a juicy center, and a mild, kid-approved flavor. These nuggets hit that sweet spot, with pantry-friendly ingredients and steps that feel almost effortless. FYI, you’ll feel a tiny bit like a magician when the first tray comes out perfect.
Key ingredients that actually work

Chicken is the star. Use boneless, skinless chicken breast or thighs for juiciness. Thighs stay more tender, breasts stay a touch leaner, so pick your poison—your toddler wins either way.
Coating matters more than you’d think. Here’s the practical trio:
– A crunchy base: breadcrumbs, crushed crackers, or a mix.
– A binding agent: a beaten egg or a small pat of mayonnaise works wonders.
– Flavor boosters: a pinch of garlic powder, paprika, or dried herbs—optional, but they boost kid-friendly flavor.
Healthy fats help with crunch. A light spray of olive oil or avocado oil gives you crisp without deep-frying. Not all heroes wear capes, some wear oil sprayers.
Secret weapon: texture balance You want enough coating to stay crisp, but not so thick that it becomes a hard shell. Aim for a gentle, even layer that hugs the chicken.
Disclosure: As Amazon Associates, we earn from qualifying purchases at no extra cost to you.
Step-by-step: how to make them without chaos
- Prep like a pro: Slice chicken into bite-sized nuggets, about the size of a pinky finger. Dry the pieces well so the coating sticks. No soggy nuggets here.
- Set up your little assembly line: bowl of beaten egg, plate of coating mix, and a parchment-lined tray for the bake. The more organized, the less drama.
- Dip, coat, dip again: Dip each nugget in egg, roll in coating, then go for a light second coat for maximum crunch.
- Spritz with oil: A quick mist over the tray helps the top layer crisp evenly.
- Bake to perfection: 400°F (200°C) for 12–15 minutes, flip, and bake another 6–8 minutes until golden. No peeking obsession needed—okay, a little peek is fine.
- Rest and serve: Let them rest for a few minutes so the juices settle. Then dip away with kid-friendly sauces.
Flavor tweaks for tiny taste buds

– Keep it simple: a whisper of salt, garlic powder, and paprika works wonders without scaring taste buds.
– Cheese lovers unite: sprinkle a pinch of parmesan into the coating for a cheesy crunch that kids love (and parents tolerate).
– Herbaceous boost: a pinch of dried thyme or oregano can make the nuggets feel fancy without overwhelming their palate.
– Dipping delight: offer yogurt-based ranch, a mild honey-mustard, or a smooth avocado dip for a fun variety.
What about sauces?
Sauces aren’t just for fun—they can be a teaching moment. Let your kid choose between a few mild options. FYI, sweet sauces like maple yogurt dip or applesauce-based dips can be surprisingly popular with toddlers who aren’t sure about “grown-up” sauces yet.
Two-ingredient kids’ favorite dip ideas
– Yogurt + honey + a dash of lemon zest for brightness
– Avocado + lime + pinch of salt
Texture tricks: keeping that crunch without frying
– Use a two-step coating: dry coat (coat in breadcrumbs) and optional wet coat (eggs or mayo) for extra adhesion.
– Don’t crowd the pan or tray. Airflow is the friend of crispness; give each nugget space.
– Finish with a quick broil for 1–2 minutes if you want ultra-crispy edges. Keep a close eye so they don’t burn.
Why not deep fry?
Deep frying is seductive but adds unnecessary fat and a messy cleanup. Baking with a light oil spray delivers crunch with far less fuss. Your kitchen stays sane, and so do your cholesterol numbers. IMO, it’s a win.
Make-ahead magic and practical meal planning
– Make a batch, freeze, and bake later: Assemble the nuggets, freeze on a tray, then transfer to a freezer bag. Bake from frozen at 400°F (200°C) for 18–20 minutes, flipping halfway.
– Lunchbox-friendly options: cut the nuggets smaller for toddlers, pack with a veggie stick and a dip, and you’ve got a balanced mini-meal.
– Batch with variety: swap coatings (panko for extra crunch, crushed cereal for a honey-sweet twist) to keep lunchtime interesting.
Storage tips
– Fridge: store cooked nuggets up to 3 days in an airtight container. Reheat in the oven for best crunch.
– Freeze: up to 3 months. Defrost in the fridge overnight before reheating.
Kid-tested, parent-approved: real-life tips
– Involve your little chef: let them press the coating onto the nuggets. It’s messy but it builds engagement and pride.
– Keep the portion sizes realistic: toddlers don’t need a giant plate. Start with 4–6 nuggets and add if they’re still hungry.
– Watch the salt: homemade means you control it. Aim for a modest pinch in the whole batch, and skip the extra salt at the table.
Handling fussy eaters
If your kid balks at the texture, offer the same nugget with a different coating the next day. Sometimes a change in crunch makes all the difference. And if they reject it entirely, don’t sweat it—try again in a week with a slightly different spice profile.
Allergen-aware and family-friendly
– Gluten-free option: use gluten-free breadcrumbs or crushed gluten-free crackers.
– Dairy-free tweak: swap egg for a chickpea flour wash or a thin layer of dairy-free mayo. Your kid won’t even notice the difference.
– Nut-free: stick with seeds or plain breadcrumbs to avoid nut cross-contact.
FAQ
Can I bake these nuggets and still get crunch?
Yes. Use a hot oven (400°F/200°C), a light oil spray, and don’t overcrowd the tray. Flip halfway through to crisp both sides. The result should be a satisfying crunch without being oily.
What if my toddler won’t eat chicken?
Try shredding the chicken and forming small, bite-sized balls rolled in the same coating. Shape matters for toddlers who prefer familiar textures. Also, involve them by letting them pick a dip—sometimes taste comes with choice.
How do I know when they’re cooked through?
Chicken is cooked to an internal temperature of 165°F (74°C). Use a quick meat thermometer if you’re unsure. Otherwise, the juices should run clear, and the coating should be deeply golden.
Any tips for extra nutrition without losing kid appeal?
Add a little finely grated vegetables into the coating mix or puree a bit of carrot or zucchini into the egg wash. It stays hidden but boosts nutrition. You’ll thank yourself later for the stealth health move.
Can I air-fry these?
Absolutely. Preheat the air fryer, spray with oil, and cook at 400°F (200°C) for 8–10 minutes, turning once. You’ll get a lighter, just-as-crispy result with even less fat.
Conclusion
Crispy Toddler Chicken Nuggets are the kind of recipe you’ll reach for on busy weeknights and snack-attack weekends alike. They’re simple, flexible, and genuinely tasty—no hidden vegetables required to win your kid’s heart. So grab some chicken, stock up on coatings, and embrace the little win of a plate emptying itself with zero drama. IMO, you’ve earned a high-five from your future self. Ready to bake a batch and see the smiles? Let’s do this.