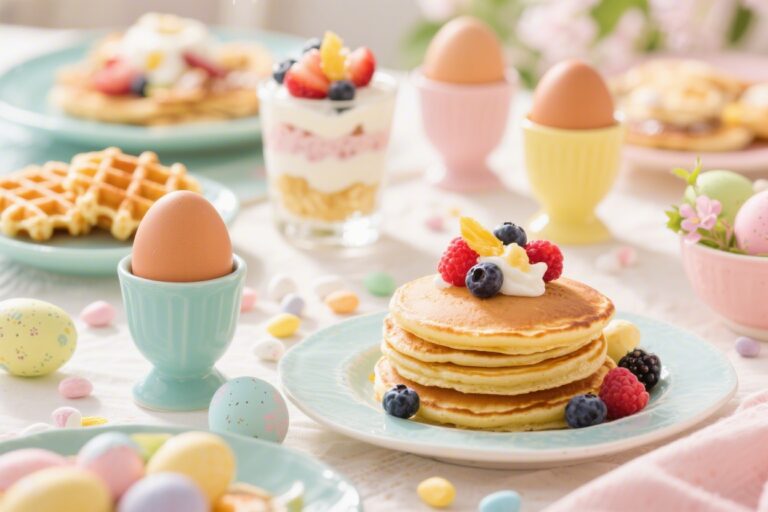
5 Cute Easter Desserts for Kids That Practically Decorate Themselves
Ready to win Easter with treats that are adorable, easy, and totally kid-approved? These desserts are colorful, playful, and built for tiny helpers with sticky fingers and big imaginations. We’re talking no-stress sweets that look like you spent hours on them—but didn’t. Let’s hop to it.
1. Bunny Butt Cupcakes That Make Everyone Giggle

These cupcakes are the ultimate crowd-pleaser because they’re silly, sweet, and super photogenic. Picture a fluffy bunny diving headfirst into a frosting “burrow.” Kids go wild for the decorations, and honestly, adults can’t resist either.
⭐ These are the Easter cookie cutters we use every year to make simple cookies look festive and fun. These are the silicone candy molds I use for homemade Easter chocolates and yogurt bites. These bunny molds are what I use to make adorable homemade chocolate treats. This silicone bunny cake mold turns a simple cake into a festive Easter dessert.
Disclosure: As Amazon Associates, we earn from qualifying purchases at no extra cost to you.
Ingredients:
- 12 chocolate cupcakes (boxed mix or your favorite recipe), cooled
- 1 1/2 cups vanilla frosting
- 1 cup shredded sweetened coconut
- Pink sanding sugar (optional, for sparkle)
- 6 large marshmallows (for bunny butts)
- 12 mini marshmallows (for tails)
- 24 white candy melts (for feet)
- Pink gel icing or melted pink candy coating (for paw pads)
- Green food coloring (optional, for grassy effect)
Instructions:
- Frost the cupcakes generously with vanilla frosting. If you want grassy “burrows,” tint the frosting pale green.
- Press shredded coconut onto the frosting to make a fluffy surface. Sprinkle with pink sanding sugar if you’re feeling extra.
- Cut each large marshmallow in half crosswise to create 12 “bunny butts.” Press the cut side into the coconut so it sticks.
- Attach a mini marshmallow tail to each butt with a dab of frosting.
- Make feet: Pipe pink gel icing onto each candy melt to create a large center pad and three tiny toe pads. Let set 5 minutes.
- Place two candy-melt feet under each marshmallow butt at a slight angle so they look like they’re kicking.
Pro tip: Toast the coconut lightly for a “mulch” look. Want gluten-free? Use GF cupcakes. For chocolate lovers, swap vanilla frosting for chocolate and call it “freshly dug dirt.”
2. No-Bake Mini Bird’s Nest Bites Kids Build Themselves
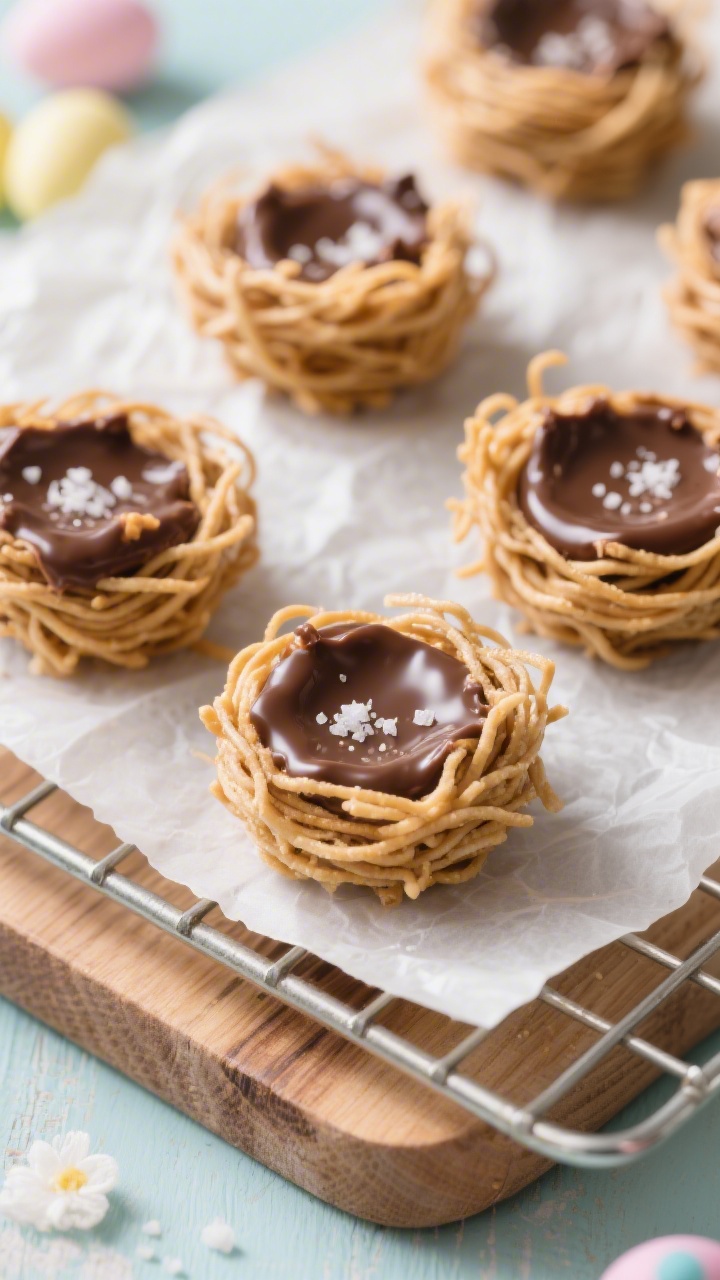
Minimal ingredients, maximum cuteness. These crunchy, chocolatey nests come together fast and don’t require an oven. Kids can shape them, fill them with candy eggs, and try not to eat them all before they set—good luck with that.
⭐ These are the Easter cookie cutters we use every year to make simple cookies look festive and fun. These are the silicone candy molds I use for homemade Easter chocolates and yogurt bites. These bunny molds are what I use to make adorable homemade chocolate treats. This silicone bunny cake mold turns a simple cake into a festive Easter dessert.
Ingredients:
- 3 cups crispy chow mein noodles or cornflake cereal
- 1 1/2 cups semisweet chocolate chips
- 1/2 cup peanut butter (or sunflower seed butter for nut-free)
- 1 teaspoon vanilla extract
- Pinch of salt
- 1–2 cups mini candy-coated chocolate eggs or jelly beans
- Nonstick spray or parchment paper
Instructions:
- Line a baking sheet with parchment. Lightly spray a muffin tin if you prefer tidy nests.
- Melt chocolate chips and peanut butter together in a microwave-safe bowl in 20–30 second bursts, stirring until smooth. Add vanilla and salt.
- Gently fold in noodles or cornflakes until fully coated.
- Scoop heaping tablespoons onto the parchment or press into muffin cups. Use the back of a spoon to make an indent for the “nest.”
- Top each nest with 2–4 candy eggs. Chill 20–30 minutes until set.
Switch it up: Use white chocolate with a drop of orange food coloring for a warmer “twig” vibe. Sprinkle with toasted coconut for texture. For a salty-sweet hit, add a few crushed pretzels to the mix—seriously addictive.
3. Carrot Patch Pudding Cups With “Soil” You Can Eat
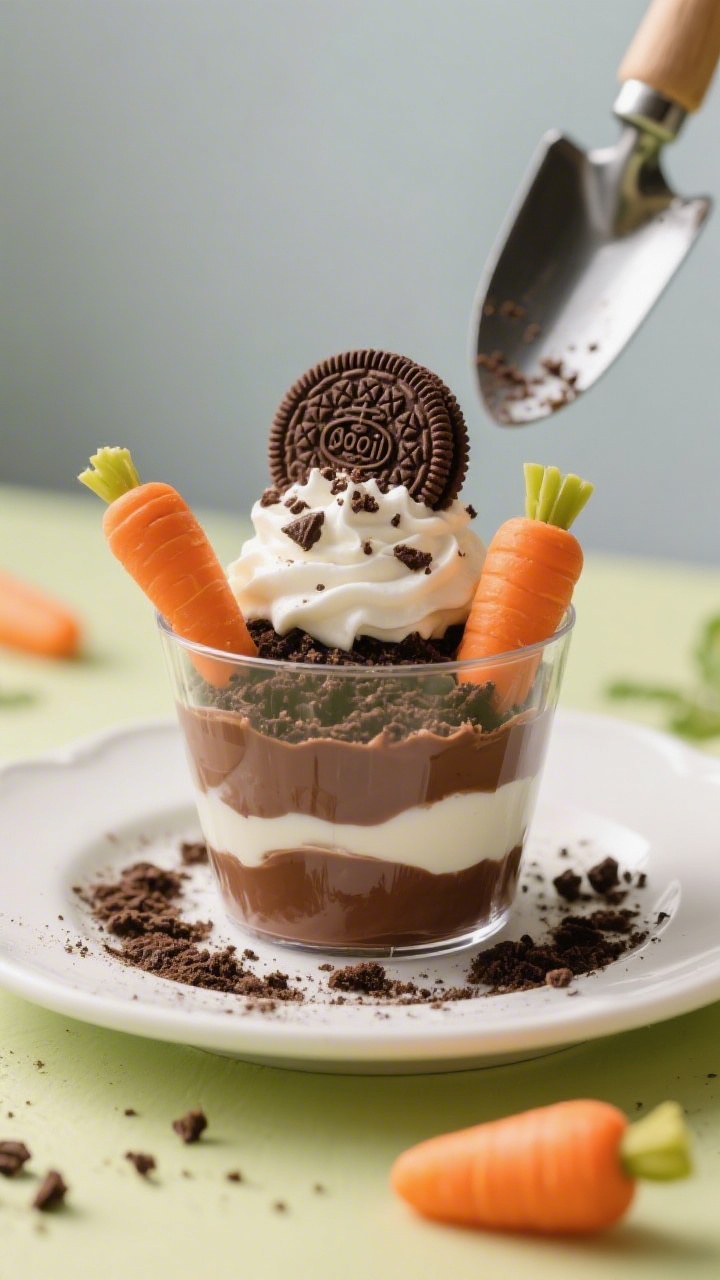
These single-serve cups look like mini garden plots and taste like creamy chocolate heaven. They’re perfect for parties, bake sales, or an after-dinner surprise. Bonus: No plates needed, and cleanup is a breeze.
⭐ These are the Easter cookie cutters we use every year to make simple cookies look festive and fun. These are the silicone candy molds I use for homemade Easter chocolates and yogurt bites. These bunny molds are what I use to make adorable homemade chocolate treats. This silicone bunny cake mold turns a simple cake into a festive Easter dessert.
Ingredients:
- 1 (3.9 oz) box instant chocolate pudding mix
- 2 cups cold milk
- 1 cup whipped topping (plus more for layering, optional)
- 16 chocolate sandwich cookies, crushed into fine crumbs (“dirt”)
- 8–10 strawberries, tops removed
- 6 oz orange candy melts
- Green candy melts or green licorice strings (for carrot tops)
- 8–10 small clear cups (6–8 oz size)
Instructions:
- Whisk pudding mix and cold milk for 2 minutes until thick. Fold in 1 cup whipped topping for extra fluff.
- Spoon a layer of pudding into each cup. Optional: Add a small layer of whipped topping for contrast.
- Top with a generous layer of crushed cookie “soil.”
- Melt orange candy melts according to package directions. Dip strawberries, letting excess drip off, to make “carrots.” Place on parchment to set.
- For tops: Pipe little green stems with green candy melts onto the cooled “carrots,” or poke in short pieces of green licorice.
- Nestle one carrot into each pudding cup, pointy side down, so it looks freshly “planted.”
Make-ahead magic: Assemble cups up to 24 hours ahead and add the strawberry “carrots” just before serving. For lighter cups, use chocolate Greek yogurt instead of pudding. Want dairy-free? Choose plant-based pudding and whipped topping.
4. Marshmallow Peep S’mores Pops That Steal the Basket
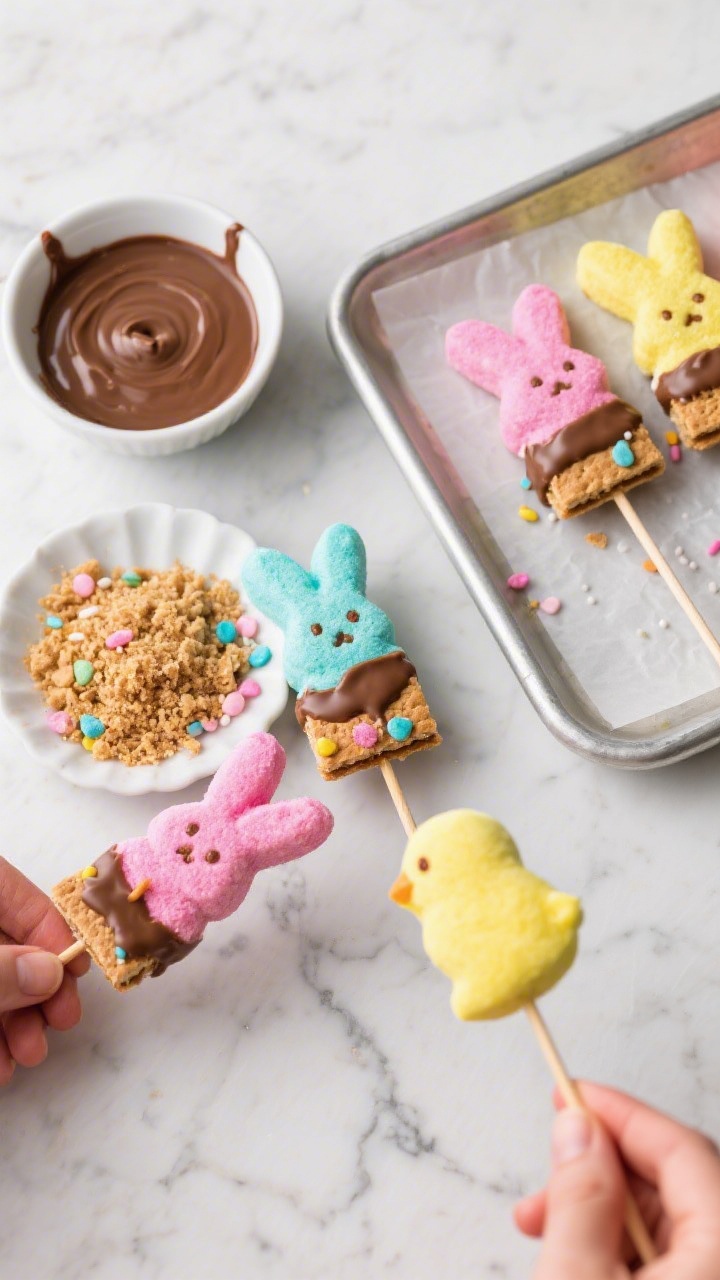
If a s’more and a cake pop had a pastel baby, this would be it. These are handheld, dunkable, and ridiculously cute on an Easter dessert table. Kids can pick their favorite Peep color and go wild with sprinkles.
⭐ These are the Easter cookie cutters we use every year to make simple cookies look festive and fun. These are the silicone candy molds I use for homemade Easter chocolates and yogurt bites. These bunny molds are what I use to make adorable homemade chocolate treats. This silicone bunny cake mold turns a simple cake into a festive Easter dessert.
Ingredients:
- 12 marshmallow Peeps (bunnies or chicks)
- 12 lollipop sticks or paper straws
- 8 oz milk or dark chocolate melting wafers
- 1/2 cup graham cracker crumbs
- Assorted pastel sprinkles
- 1 tablespoon coconut oil or shortening (optional, for smoother dipping)
- Parchment paper or a foam block for drying
Instructions:
- Insert a lollipop stick into the base of each Peep. Set aside on parchment.
- Melt chocolate wafers with coconut oil (if using) until smooth and glossy.
- Dip each Peep halfway or fully in melted chocolate. Let the excess drip off.
- Immediately sprinkle with graham cracker crumbs and add pastel sprinkles. Stand pops upright in a foam block or lay on parchment to set.
- Chill for 10 minutes to firm up. Serve at room temperature for the best bite.
Variations: Use white chocolate dyed pale yellow, pink, or mint green. Drizzle with contrasting chocolate for stripes. For an extra s’more vibe, sandwich a dipped Peep between two mini graham crackers before the chocolate sets.
5. Easter Egg Sugar Cookies You Can Actually “Paint”
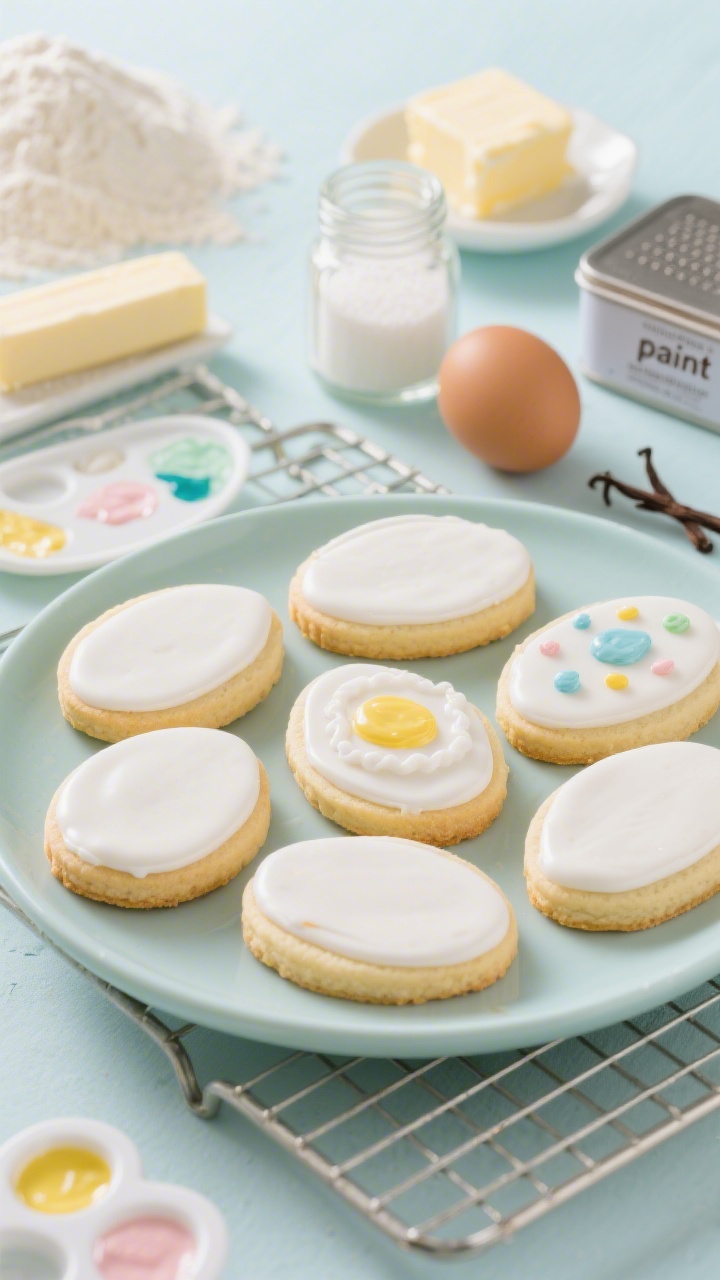
These are part art project, part dessert. You’ll bake soft, buttery cookies, then let the kids paint them with pastel icing. The result? A cookie “gallery” you’ll want to show off before you eat it.
⭐ These are the Easter cookie cutters we use every year to make simple cookies look festive and fun. These are the silicone candy molds I use for homemade Easter chocolates and yogurt bites. These bunny molds are what I use to make adorable homemade chocolate treats. This silicone bunny cake mold turns a simple cake into a festive Easter dessert.
Ingredients:
- 2 3/4 cups all-purpose flour
- 1 teaspoon baking powder
- 1/2 teaspoon salt
- 1 cup unsalted butter, softened
- 1 cup granulated sugar
- 1 large egg
- 2 teaspoons vanilla extract (or 1 tsp vanilla + 1/2 tsp almond extract)
- Royal Icing: 4 cups powdered sugar, 3 tablespoons meringue powder, 6–7 tablespoons water
- Gel food coloring in assorted pastel shades
- Small paintbrushes (food-safe) or squeeze bottles
- Egg-shaped cookie cutter
Instructions:
- Whisk flour, baking powder, and salt in a bowl.
- Cream butter and sugar until light and fluffy, 2–3 minutes. Beat in egg and extracts.
- Add dry ingredients to wet in two additions, mixing just until combined. Divide dough in half, flatten into discs, and chill 30 minutes.
- Preheat oven to 350°F (175°C). Roll dough to 1/4 inch thick on a lightly floured surface. Cut out egg shapes and transfer to lined baking sheets.
- Bake 8–10 minutes until edges are just set and pale. Cool completely.
- Make royal icing: Beat powdered sugar, meringue powder, and water for 2–3 minutes until glossy. Adjust with a few drops of water for flood consistency (like honey).
- Outline and flood each cookie with white icing. Let set 30–60 minutes until surface is dry to the touch.
- Divide remaining icing into bowls. Tint with pastel gel colors. Thin slightly with water for “paintable” icing.
- Using clean, food-safe brushes, paint stripes, dots, zigzags, and flowers. Let dry fully before stacking.
Pro tip: For a watercolor effect, add a drop of clear extract (like vodka or lemon extract) to thin the colored icing—it dries faster. No meringue powder? Use your favorite glaze icing (powdered sugar + milk + corn syrup) for a softer finish.
Kid Helper Tips
- Set up a “decor station” with sprinkles, mini candies, and icing in squeeze bottles.
- Use silicone mats for easy cleanup.
- Give each kid a baking tray as their workspace to keep the chaos contained—trust me.
Make It a Party
- Create a dessert board with all five treats for a stunning centerpiece.
- Add bowls of pastel M&M’s, chocolate bunnies, and fresh berries for color.
- Label each dessert with cute tags—kids love picking by name.
If your Easter dessert table needs more joy, these five recipes deliver it by the basketful. They’re fun to make, adorable to look at, and even better to eat. Grab the sprinkles and let the kids loose—memories (and crumbs) incoming.
Printable Recipe Card
Want just the essential recipe details without scrolling through the article? Get our printable recipe card with just the ingredients and instructions.