5 Easy Desserts for Kids to Make That Disappear Fast
Kids in the kitchen? Yes, please. These sweet little projects are simple, low-mess, and big on fun—perfect for tiny hands and short attention spans. We’re talking no-fuss ingredients, quick wins, and plenty of chances to taste along the way. Bonus: every recipe is tasty enough that the adults will “sample” generously.
1. No-Bake Peanut Butter Cereal Bars That Stick (In A Good Way)

These chewy, crunchy bars are a total crowd-pleaser and take just minutes to mix together. No oven, no drama—just pantry staples and a little stirring. They set up in the fridge and slice like a dream for lunchbox treats or after-school snacks.
Disclosure: As Amazon Associates, we earn from qualifying purchases at no extra cost to you.
Ingredients:
- 3 cups crispy rice cereal
- 1/2 cup creamy peanut butter (or sunflower butter for nut-free)
- 1/2 cup honey or maple syrup
- 1/4 teaspoon vanilla extract
- Pinch of salt
- Optional mix-ins: 1/3 cup mini chocolate chips, 1/4 cup chopped pretzels, or 2 tablespoons sprinkles
Instructions:
- Line an 8×8-inch pan with parchment, letting some hang over the sides for easy lifting.
- In a medium microwave-safe bowl, combine peanut butter and honey. Microwave 30–45 seconds until warm and loose, then stir in vanilla and salt.
- Pour in the cereal and gently fold until evenly coated. If using, fold in chocolate chips last so they don’t fully melt.
- Press the mixture firmly into the pan with a spatula or the back of a measuring cup. Pack it tight so the bars hold together.
- Chill for 30–45 minutes until set, then lift out and cut into 12 bars.
Serve these with cold milk or break them into bite-size cubes for tiny snackers. Swap cereal types (corn flakes, O’s, or a gluten-free blend) and play with add-ins like dried fruit or crushed freeze-dried berries. Pro tip: lightly oil your spatula so nothing sticks while pressing.
2. 10-Minute Mug Cake Sundaes For Instant Gratification
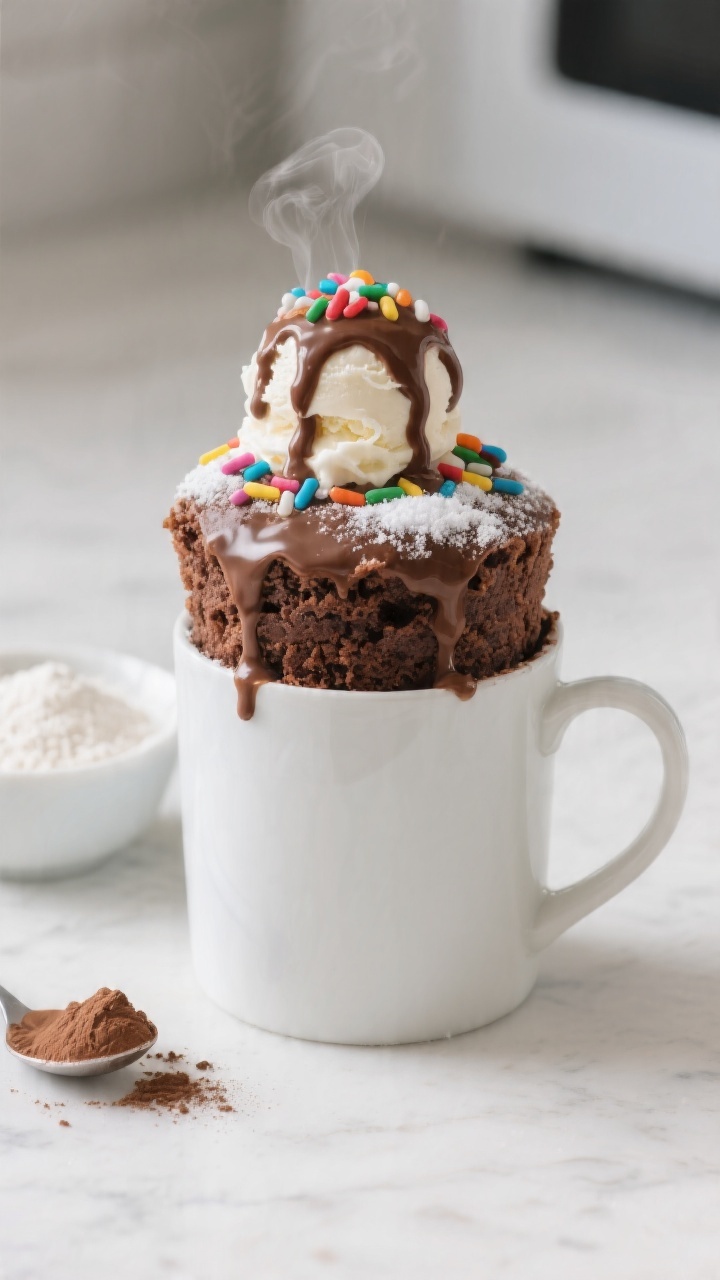
Got a dessert emergency? These fluffy microwave mug cakes come to the rescue in one bowl, one mug, and one minute. Top with ice cream and you’ve got a mini sundae that’s part science experiment, part sugar rush.
Ingredients:
- 4 tablespoons all-purpose flour
- 2 tablespoons sugar
- 1 tablespoon unsweetened cocoa powder (for chocolate version) or 1 teaspoon vanilla extract (for vanilla version)
- 1/4 teaspoon baking powder
- Pinch of salt
- 3 tablespoons milk
- 1 tablespoon neutral oil or melted butter
- Optional: 1 tablespoon mini chocolate chips or rainbow sprinkles
- Toppings: 1 scoop ice cream, chocolate syrup, whipped cream, cherries
Instructions:
- In a large microwave-safe mug (12–14 oz), whisk flour, sugar, cocoa (or vanilla), baking powder, and salt.
- Stir in milk and oil until smooth. Fold in chips or sprinkles if using.
- Microwave on high for 60–80 seconds, until the top looks set and springs back lightly. Do not overcook.
- Cool 1–2 minutes. Top with ice cream, syrup, and whipped cream.
Let kids decorate like it’s a sundae bar—crushed cookies, berries, or a drizzle of peanut butter. Want funfetti? Skip cocoa, add vanilla and sprinkles. Safety tip: the mug gets hot; use a napkin or oven mitt when removing it.
3. Frozen Yogurt Bark With Swirls And Crunch
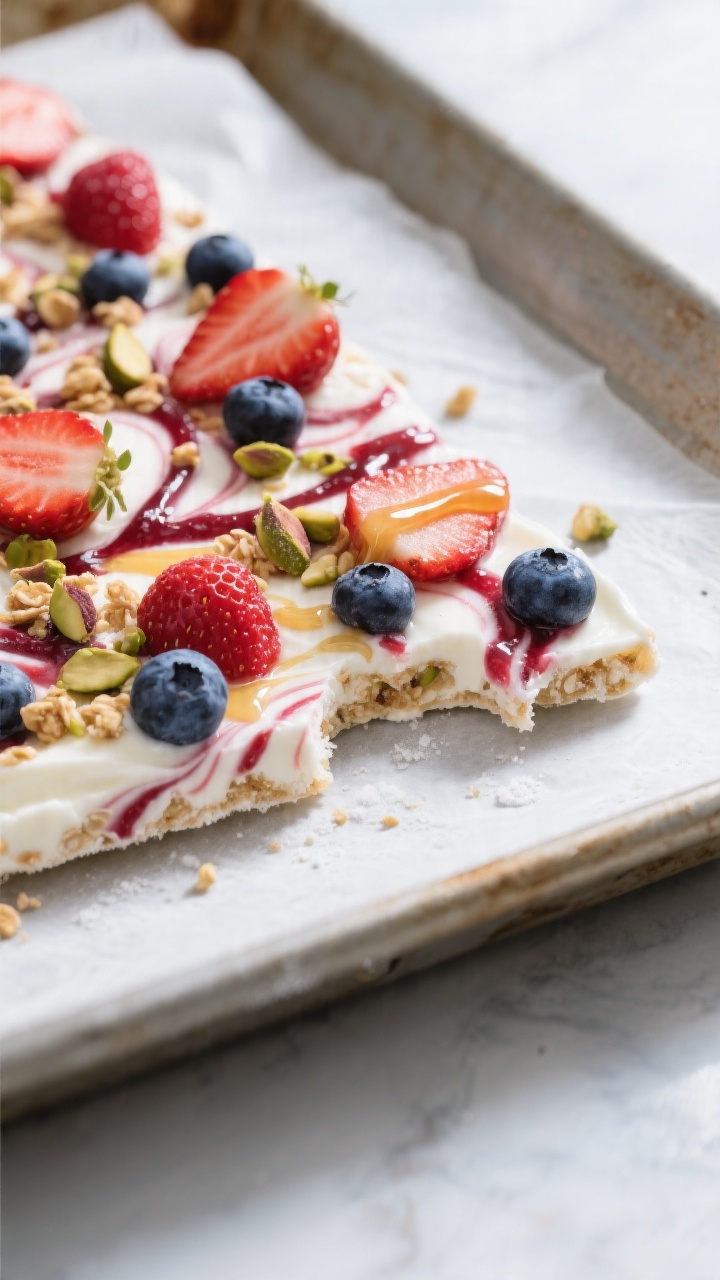
Think of this as a no-churn ice cream that kids can paint. It’s creamy, tangy, and sweet with crunchy bits, and it freezes into snappy shards. Perfect for hot afternoons or a cool-down dessert after dinner.
Ingredients:
- 2 cups Greek yogurt (vanilla or plain)
- 2–3 tablespoons honey or maple syrup (to taste)
- 1/2 teaspoon vanilla extract
- 1/3 cup fruit jam (strawberry, raspberry, or blueberry)
- 1/2 cup sliced strawberries or blueberries
- 1/4 cup granola or crushed graham crackers
- 2 tablespoons mini chocolate chips or chopped dark chocolate
- Pinch of sea salt (optional)
Instructions:
- Line a rimmed baking sheet (approx. 9×13 inches) with parchment.
- In a bowl, mix yogurt, sweetener, and vanilla until smooth.
- Spread yogurt in an even 1/4-inch layer on the parchment.
- Warm jam slightly if thick, then dollop over yogurt. Swirl with a spoon or skewer to make colorful ribbons.
- Scatter berries, granola, and chocolate evenly. Add a tiny pinch of sea salt for contrast.
- Freeze 3–4 hours until solid. Break into pieces and serve immediately.
Keep leftovers in a freezer bag for up to 1 month. Swap in mango, kiwi, or peaches, or go tropical with toasted coconut and pineapple. For dairy-free, use a thick coconut yogurt and maple syrup—seriously creamy.
4. Apple Nachos With Caramel Drizzle And Everything Nice
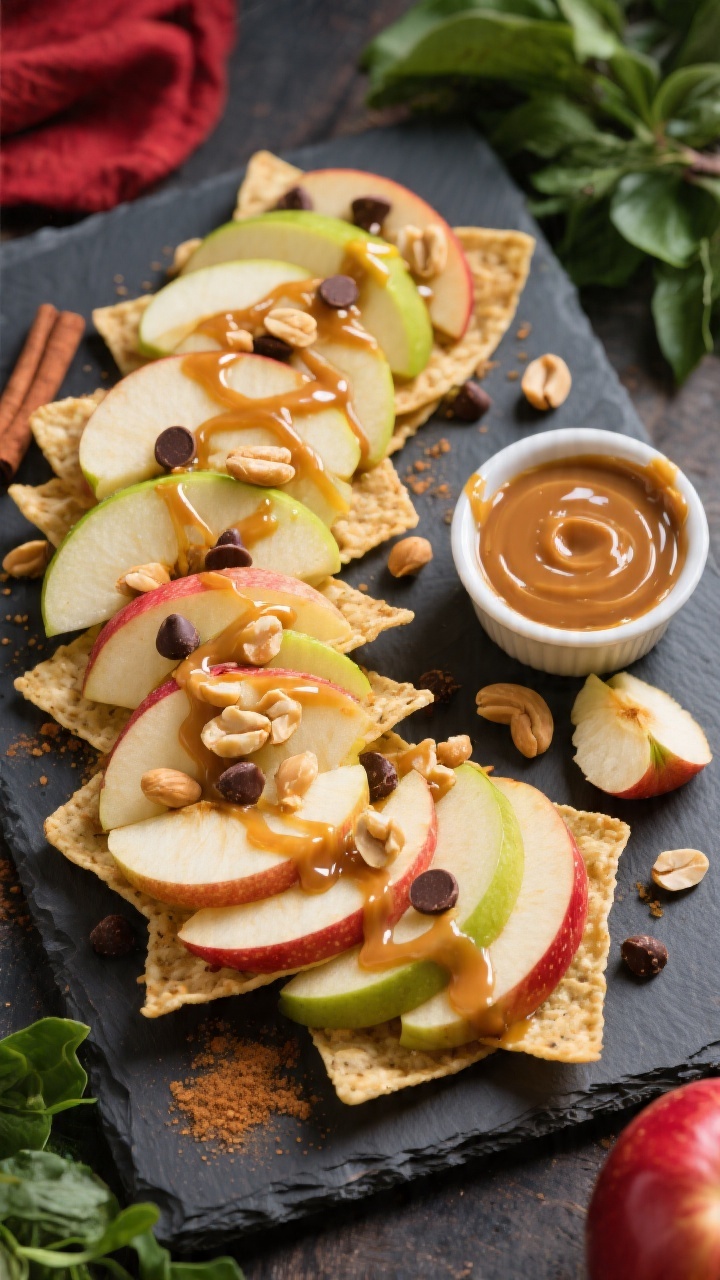
Snack plate, but make it dessert. Crisp apple slices get layered with sweet drizzles and crunchy toppings—no cooking, all fun. It’s a great way to use up odds and ends from the pantry and let kids build their own “nacho” piles.
Ingredients:
- 3 crisp apples (Honeycrisp, Gala, or Granny Smith), cored and thinly sliced
- 1 tablespoon lemon juice (to prevent browning)
- 1/4 cup caramel sauce (store-bought or homemade)
- 2 tablespoons peanut butter or almond butter, warmed
- 2 tablespoons chocolate sauce or melted chocolate
- 1/4 cup mini marshmallows
- 1/4 cup chopped nuts or seeds (peanuts, pecans, pumpkin seeds)
- 2 tablespoons shredded coconut (optional)
- 2 tablespoons mini chocolate chips or crushed toffee
- Pinch of flaky salt (optional)
Instructions:
- Toss apple slices with lemon juice to keep them fresh and bright.
- Arrange slices on a large platter in overlapping layers.
- Warm caramel and peanut butter until pourable (10–15 seconds in the microwave). Drizzle both over the apples.
- Finish with chocolate sauce, marshmallows, nuts or seeds, coconut, and chips. Add a pinch of flaky salt if you like sweet-salty vibes.
Serve immediately for peak crunch. For nut-free, use sunflower butter and pumpkin seeds. Try a s’mores version with crushed grahams and toasted marshmallows—or go “PB&J” with warmed jam instead of caramel. Trust me, it’s dangerously snackable.
5. Mini No-Bake Cheesecake Cups Kids Can Decorate
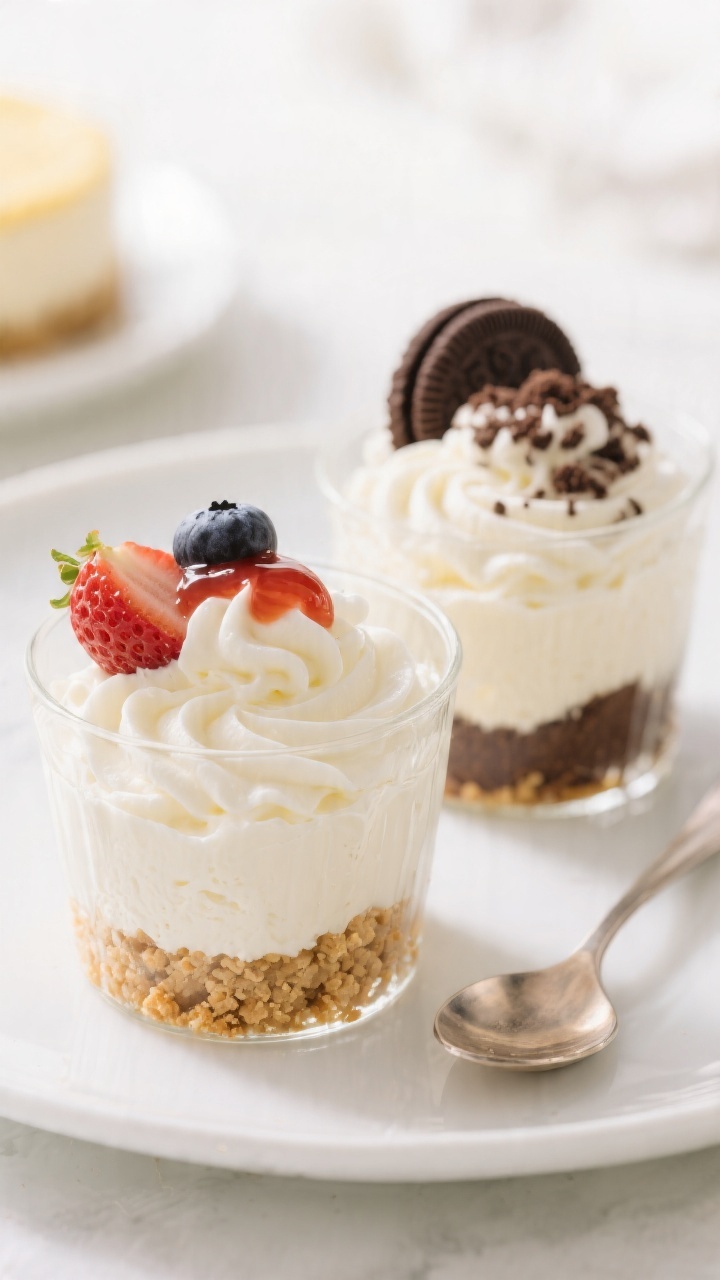
These creamy cheesecake cups feel fancy but come together with a mixing bowl and some spoons. The no-bake filling sets quickly and tastes like classic cheesecake without the fuss. They’re perfect for parties, playdates, or anytime a tiny dessert feels just right.
Ingredients:
- 8 ounces cream cheese, softened
- 1/3 cup powdered sugar
- 1 teaspoon vanilla extract
- 1 cup cold heavy cream
- 1 cup graham cracker crumbs
- 3 tablespoons melted butter
- 1 tablespoon sugar (for crust)
- Pinch of salt
- Toppings: fruit pie filling, fresh berries, lemon curd, mini cookies, or chocolate shavings
Instructions:
- In a bowl, mix graham crumbs, melted butter, sugar, and salt until the texture resembles wet sand.
- Divide crust mixture among 8 small cups or jars (about 2 tablespoons each). Press gently to compact.
- In a separate bowl, beat cream cheese, powdered sugar, and vanilla until smooth and fluffy.
- In another bowl, whip the heavy cream to soft peaks. Fold it into the cream cheese mixture until silky.
- Spoon or pipe the filling over the crusts. Chill 30–60 minutes to set.
- Top with berries, dollops of lemon curd, or a spoon of cherry pie filling. Add a mini cookie if you’re feeling extra.
Make them ahead up to 24 hours (add toppings right before serving). For chocolate lovers, mix 2 tablespoons cocoa into the crust and sprinkle with chocolate shavings. Dairy-free? Use vegan cream cheese and a coconut whipped topping—it’s surprisingly lush.
Tips For Cooking With Kids (Without Losing Your Mind)
- Prep like a pro: Measure ingredients into small bowls before calling the kids over.
- Delegate: Stirring, sprinkling, and pressing are kid gold. Save knife work for adults or use kid-safe knives.
- Clean as you go: Keep a damp towel nearby and assign the “crumb patrol” role—it works.
- Make it visual: Clear cups, colorful toppings, and drizzle bottles keep them engaged.
There you have it—5 easy desserts for kids to make that are fun, fast, and delicious enough for repeat requests. Pick one, pull out the sprinkles, and let the tiny chefs take over. Dessert tonight? Absolutely.
Printable Recipe Card
Want just the essential recipe details without scrolling through the article? Get our printable recipe card with just the ingredients and instructions.