5 Fun Fruit Ideas for Kids That Make Healthy Snacks Exciting
Let’s make fruit the cool kid on the snack table. These five fruity ideas are bright, crunchy, slurpable, and totally packable—without the sugar crash. We’re talking quick prep, minimal mess, and flavors kids actually beg for. Ready to turn snack time into a mini party? Grab a cutting board and let’s play with your produce.
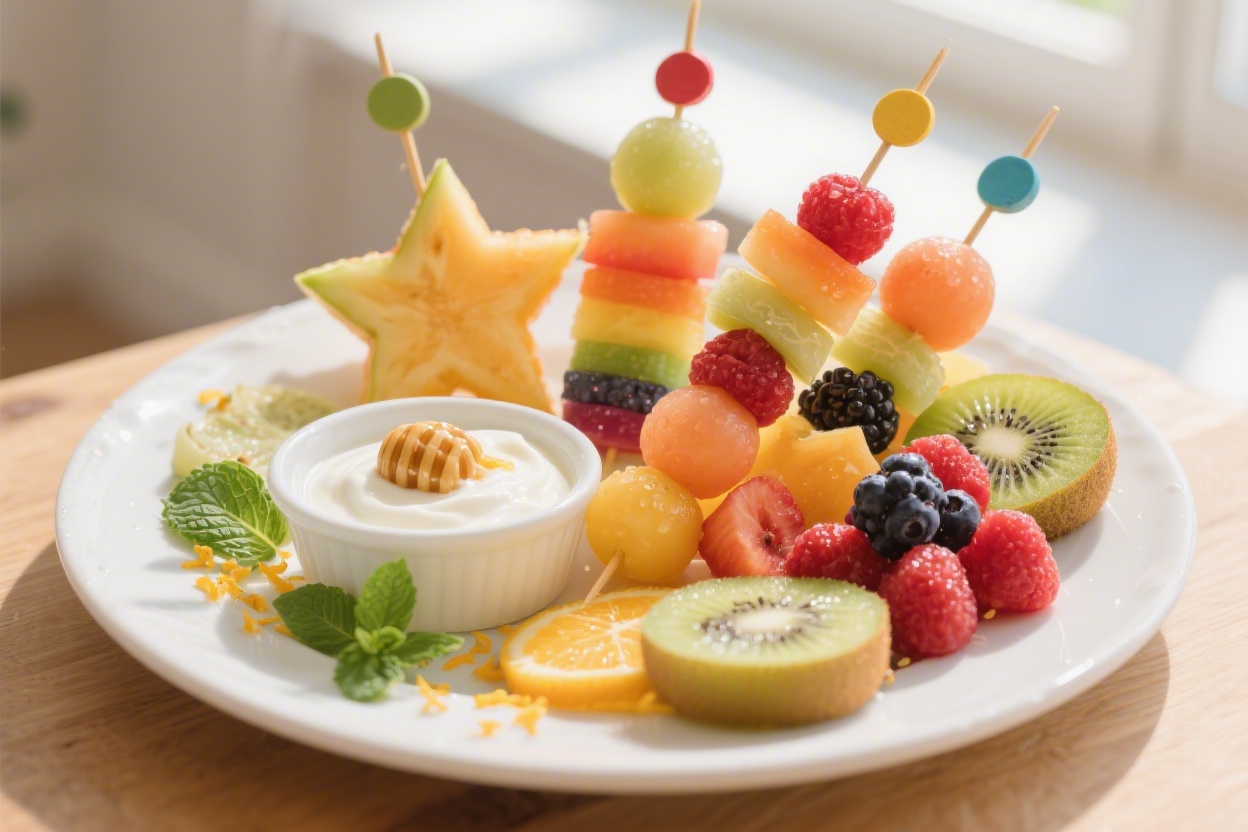
1. Rainbow Fruit Wands With Yogurt “Magic” Dip
These are as fun to build as they are to eat, and they look like a craft project that wandered into the kitchen. Skewers stacked with a full rainbow make fruit feel like a treat, and the creamy, lightly sweet dip seals the deal. Perfect for after-school snacking, birthday spreads, or any day you need a little sparkle at the table.
Disclosure: As Amazon Associates, we earn from qualifying purchases at no extra cost to you.
Ingredients:
- 8–10 wooden skewers (6–8 inches long)
- 1 cup strawberries, hulled and halved
- 1 cup clementine segments (or peeled mandarin slices)
- 1 cup pineapple chunks
- 1 cup green grapes
- 1 cup blueberries
- 1 cup purple grapes (or blackberries)
- 1 cup plain Greek yogurt (or dairy-free yogurt)
- 1–2 tablespoons honey or maple syrup
- 1 teaspoon vanilla extract
- Optional: rainbow sprinkles or chia seeds for topping
Instructions:
- Make the dip: In a small bowl, whisk together yogurt, honey, and vanilla until smooth and slightly glossy. Chill while you build the wands.
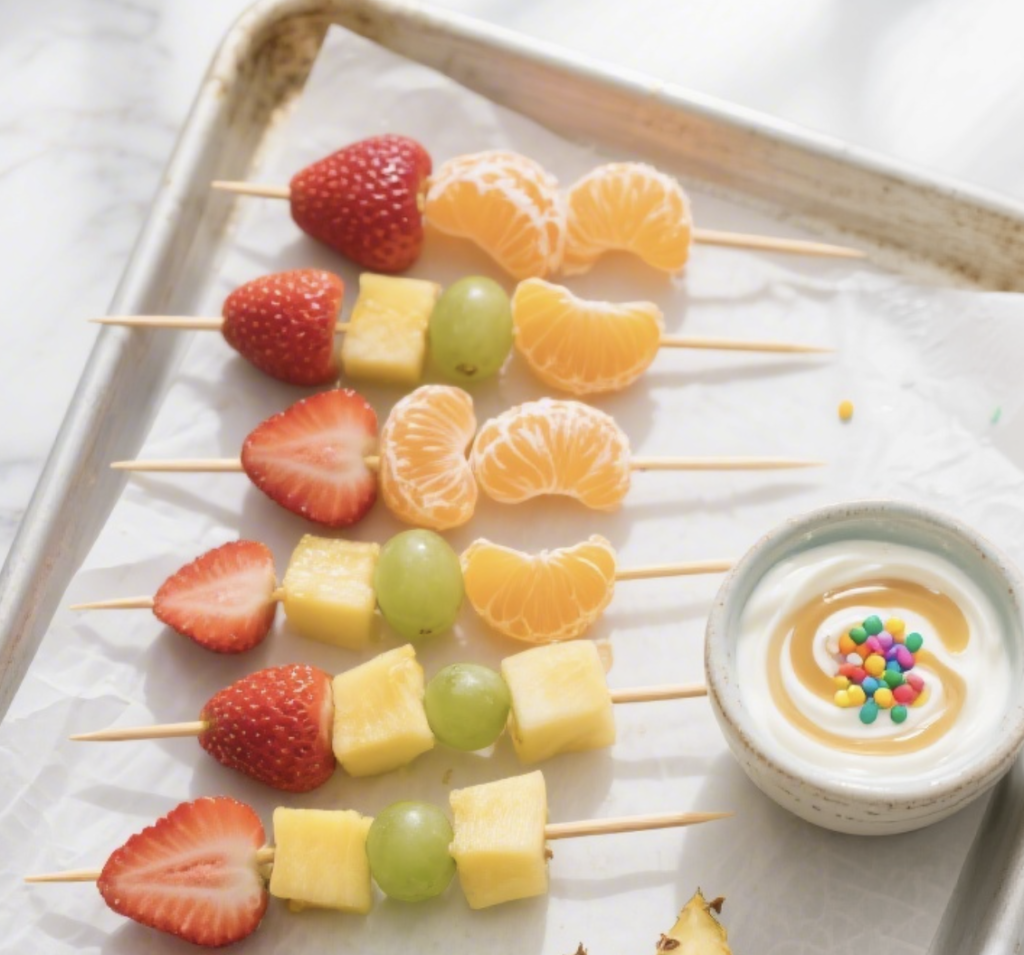
- Assemble the rainbow: Thread fruit in rainbow order—red strawberry, orange clementine, yellow pineapple, green grape, blue blueberry, purple grape—repeating until the skewer is nearly full. Leave a little space for gripping.
- Tidy the ends: If using younger kids, snip off the sharp skewer tip with kitchen shears after assembly for safer snacking.
- Serve: Dollop the yogurt “magic” dip into a bowl and, if you like, sprinkle with chia or rainbow sprinkles to make it feel extra celebratory.
Pro tip: Swap in kiwi for green or mango for yellow if that’s what you’ve got. Serve chilled with a mini cup of dip per kid to avoid the dreaded double-dip. For lunchboxes, slide the fruit onto shorter cocktail picks and pack the yogurt in a lidded cup.
2. Frozen Yogurt Bark With Fruit Confetti
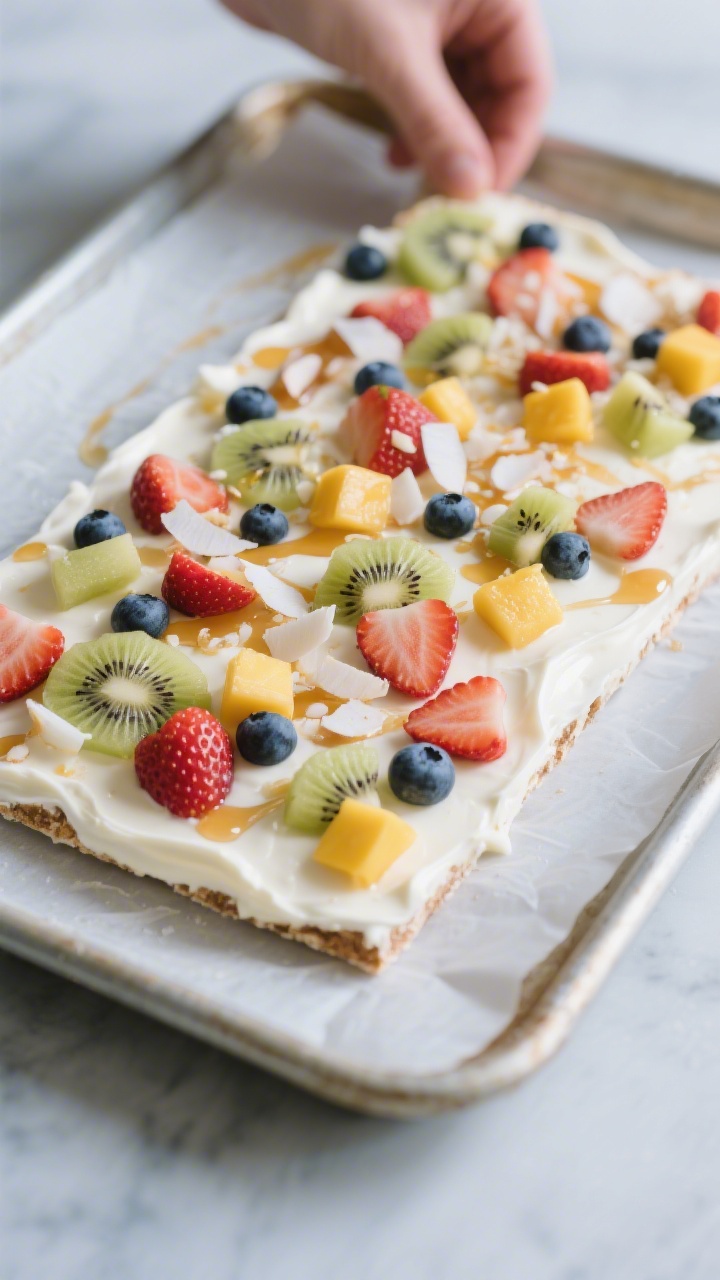
Think of this like a kid-approved fruit-and-yogurt bar that breaks into shards—light, crunchy, and cooling. It takes five minutes to prep, lives in your freezer, and tastes like dessert without the sugar overload. Bonus: kids can decorate it like a canvas.
Ingredients:
- 2 cups plain or vanilla Greek yogurt
- 2 tablespoons honey or maple syrup (skip if using sweetened yogurt)
- 1 teaspoon vanilla extract (optional)
- 1 cup diced mixed fruit (strawberries, kiwi, mango, blueberries)
- 2 tablespoons mini chocolate chips or cacao nibs (optional)
- 1 tablespoon unsweetened shredded coconut (optional)
- 1 tablespoon chia seeds or crushed freeze-dried fruit for color (optional)
- Pinch of flaky sea salt (optional but delightful)
Instructions:
- Prep the pan: Line a rimmed baking sheet (quarter or half sheet) with parchment paper.
- Spread the base: In a bowl, mix yogurt with honey and vanilla. Pour onto the lined sheet and spread to about 1/4-inch thick.
- Decorate: Scatter diced fruit evenly over the yogurt. Sprinkle chocolate chips, coconut, chia, or freeze-dried fruit on top. Add a tiny pinch of sea salt to make the flavors pop.
- Freeze: Slide into the freezer for 2–4 hours, until completely firm.
- Break and serve: Lift the bark by the parchment, break into pieces, and serve immediately.
Pro tip: Store bark pieces in a freezer-safe bag for up to 1 month. For school snacks, wrap a piece in parchment and pack with an ice pack. Try a swirl of peanut butter or sunflower seed butter over the yogurt before topping—trust me, it’s next level.
3. No-Bake Apple Nachos With Peanut Butter Drizzle
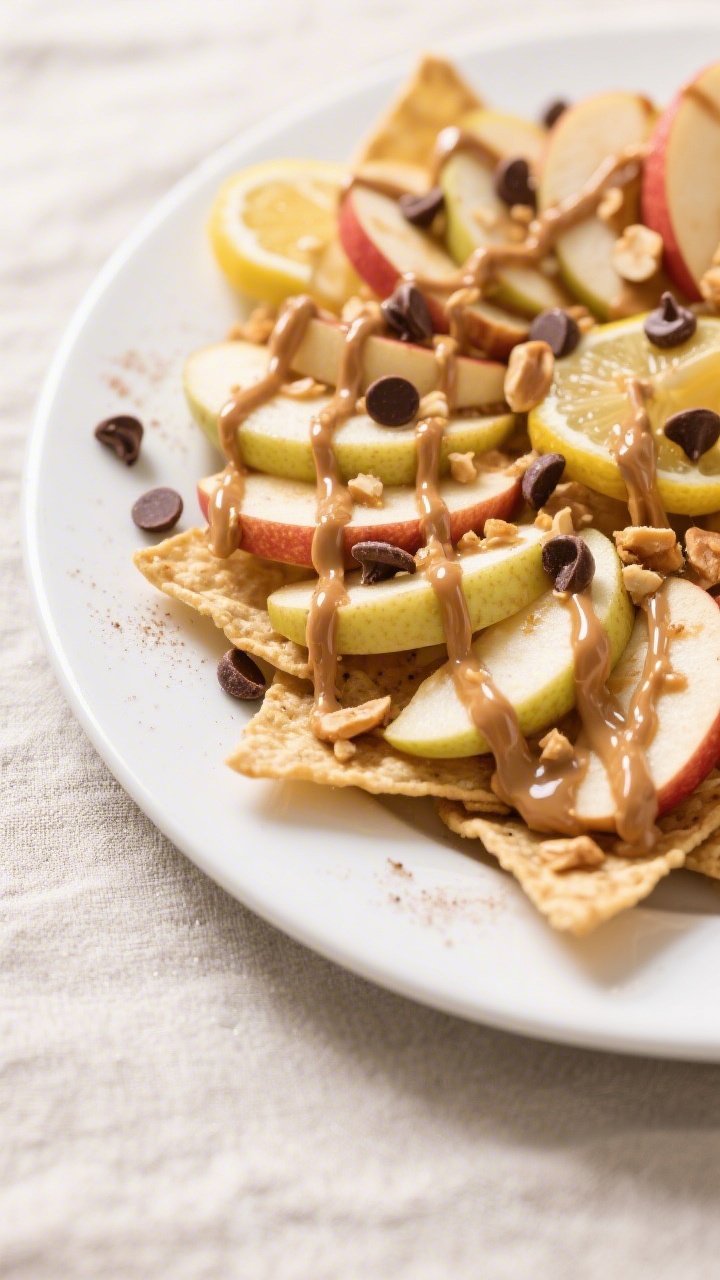
These are crunchy, saucy, and wildly fun to share. You get the feel of nachos, but it’s all fruit and pantry goodies in disguise. Great for a fast after-practice snack or a movie-night sweet bite that keeps sugar balanced with protein.
Ingredients:
- 3 crisp apples (Honeycrisp, Gala, or Pink Lady), cored and thinly sliced
- 1 tablespoon lemon juice (to keep apples from browning)
- 1/3 cup peanut butter or almond butter (use sunflower seed butter for nut-free)
- 1–2 tablespoons warm water (to thin the nut butter)
- 2 tablespoons mini chocolate chips
- 2 tablespoons granola or crushed whole-grain cereal
- 1 tablespoon unsweetened shredded coconut (optional)
- 1 tablespoon raisins or dried cranberries (optional)
- Pinch of cinnamon (optional but cozy)
Instructions:
- Prep the apples: Toss apple slices with lemon juice in a big bowl to prevent browning.
- Make the drizzle: In a small bowl, whisk nut butter with warm water until it’s pourable and smooth.
- Assemble: Fan apple slices on a large plate or platter. Drizzle generously with the nut butter.
- Top it off: Sprinkle with mini chocolate chips, granola, coconut, raisins, and a dusting of cinnamon.
Pro tip: Want extra crunch? Toss in roasted pumpkin seeds. If allergies are a concern, use yogurt mixed with a touch of honey for the drizzle instead. Serve immediately for best texture—though if you must prep ahead, slice apples thicker and store with lemon-water in the fridge up to 1 hour.
4. Tropical Fruit Sushi With Coconut “Rice”
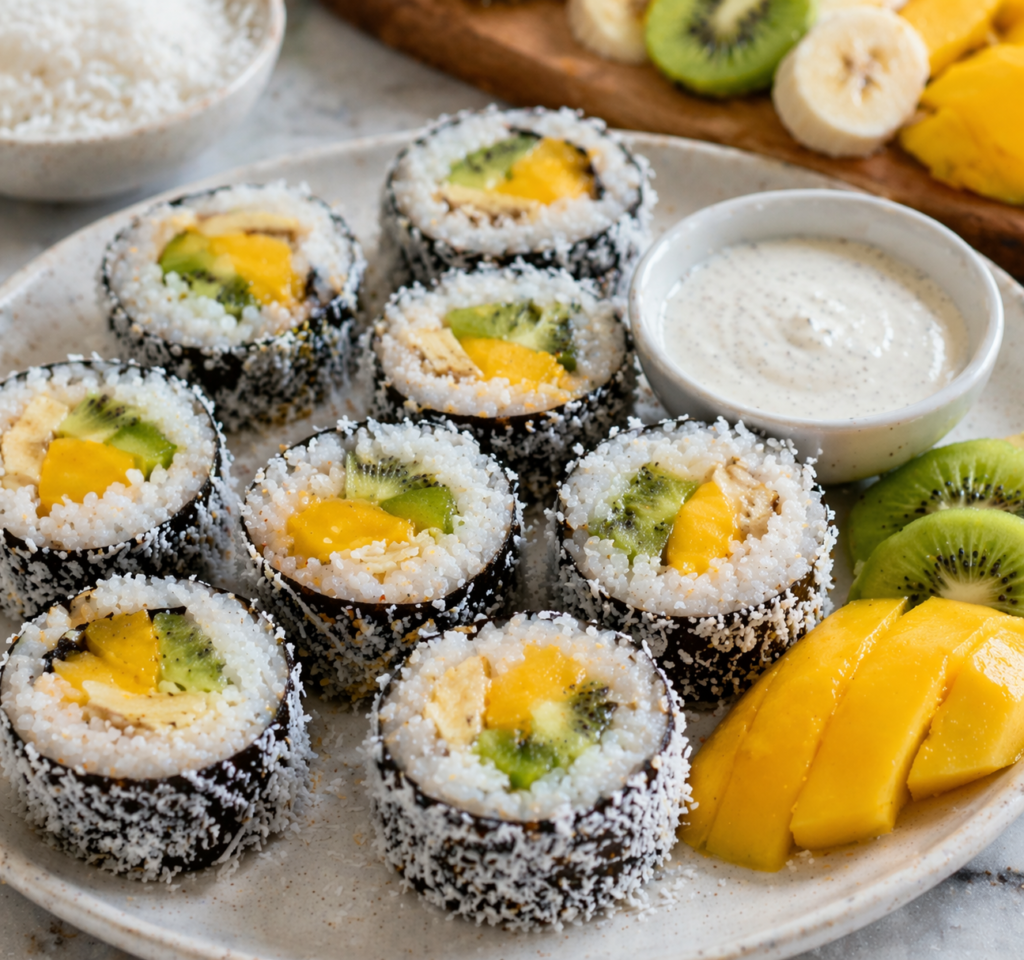
It’s sushi night, minus the fish and plus a whole lot of sunshine. Sweet coconut rice hugs tender fruit, and the roll-and-slice moment makes kids feel like mini chefs. This is snack theatre—hands-on, bright, and bite-sized.
Ingredients:
- 1 cup short-grain rice (sushi or arborio)
- 1 cup water
- 3/4 cup canned coconut milk (well shaken)
- 1 tablespoon honey or maple syrup
- 1 teaspoon vanilla extract
- Pinch of salt
- 2 nori sheets (optional for classic sushi look; can skip for nori-averse kids)
- 1 ripe mango, cut into thin strips
- 1 small banana, cut into thin strips
- 1 kiwi, peeled and thinly sliced
- 1/4 cup shredded coconut (for rolling)
- Optional dips: vanilla yogurt, warm chocolate drizzle (just a teaspoon per serving), or raspberry puree
Instructions:
- Cook the rice: Rinse rice until water runs clear. Combine rice and water in a saucepan, bring to a simmer, cover, and cook on low 15 minutes. Remove from heat; let steam, covered, 10 minutes.
- Sweeten it: Stir in coconut milk, honey, vanilla, and a pinch of salt while rice is warm. Cool to room temperature so it’s easy to handle.
- Prepare the station: Lay out a piece of parchment. If using nori, place it shiny-side down. If skipping nori, spread coconut rice directly on parchment.
- Assemble: Spread a thin, even layer (about 1/2 cup) of coconut rice, leaving a 1-inch border at the top. Line fruit strips along the bottom edge.
- Roll: Use the parchment to help roll tightly away from you, like a cinnamon roll. Press gently to seal. Roll the log in shredded coconut for a fun finish.
- Slice and serve: With a sharp, damp knife, slice into 1-inch pieces. Plate with a small cup of yogurt or fruit puree for dipping.
Pro tip: For a faster, no-cook version, use rice cakes topped with a smear of coconut yogurt and fruit strips—cut into “nigiri” squares. Add a thin strip of fruit leather on top to mimic the nori belt. Seriously adorable.
5. Watermelon Pizza With Lime-Honey Drizzle
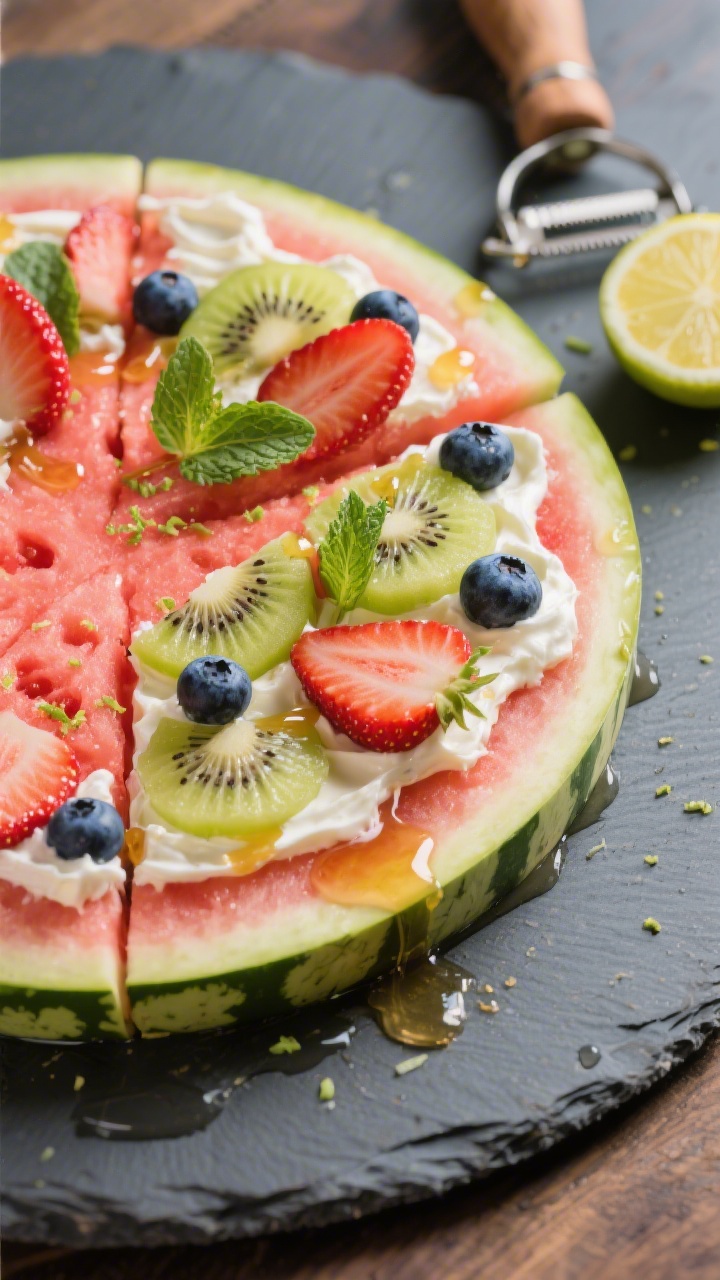
This is peak summer energy, but honestly, it slaps year-round whenever watermelon shows up. A big, juicy watermelon “crust” gets topped like a fruit pizza—creamy spread, bright berries, crunchy bits, and a tangy-sweet drizzle. It’s a showstopper that takes less than 10 minutes.
Ingredients:
- 1 large round slice of seedless watermelon (about 1-inch thick), rind on
- 3/4 cup whipped cream cheese or Greek yogurt
- 1 tablespoon honey or maple syrup
- 1 teaspoon lime zest
- 1 tablespoon fresh lime juice
- 1 cup mixed berries (strawberries, blueberries, raspberries)
- 1 small peach or nectarine, thinly sliced (optional)
- 2 tablespoons chopped pistachios or sunflower seeds (nut-free)
- 1 tablespoon shredded coconut or mini chocolate chips (optional)
- Fresh mint leaves for garnish (optional)
Instructions:
- Make the spread: In a small bowl, mix cream cheese or yogurt with half the honey and the lime zest until smooth.
- Prep the drizzle: In another small bowl, whisk remaining honey with lime juice.
- Build the pizza: Spread the creamy mixture over the watermelon slice, leaving a little green “crust” showing.
- Top it off: Arrange berries and peach slices, scatter pistachios or seeds, and sprinkle coconut or chocolate chips if using. Drizzle with lime-honey and add mint leaves.
- Slice: Cut into 6–8 wedges with a large knife. Serve immediately.
Pro tip: Freeze the watermelon slice for 15 minutes before topping to keep everything extra crisp. For party platters, make mini pizzas using small rounds cut with a biscuit cutter—tiny hands, zero mess.
How to Keep Fruit Snacks Fun (and Fuss-Free)
Want kids to chase fruit instead of you chasing them? Keep it relaxed and playful. A few small tweaks make a huge difference:
- Cut for success: Bite-sized, easy-to-grab pieces vanish fastest.
- Dips are magic: Yogurt, nut or seed butters, and pureed fruit turn simple slices into an “activity.”
- Let them build: Assembly stations = instant buy-in. Kids love control.
- Color counts: Rainbows win. Mix at least three colors for instant appeal.
- Keep it cold: Chilled fruit tastes sweeter and feels more snacky.
Ingredient Swaps That Still Nail It
- Dairy-free: Use coconut or almond yogurt; swap cream cheese with whipped coconut cream.
- Nut-free: Sunflower or pumpkin seed butter stands in beautifully for peanut butter.
- Low-sugar: Lean on naturally sweet fruits (mango, grapes, ripe berries) and skip added sweeteners.
- Seasonal shifts: In winter, use citrus, apples, pears, pomegranate; in summer, go wild with stone fruit and melons.
Smart Storage and Make-Ahead Tips
- Yogurt bark: Break and store in freezer bags up to 1 month.
- Fruit wands: Assemble 1 day ahead; store covered in the fridge with a damp paper towel to keep fruit perky.
- Apple nachos: Slice apples just before serving or store briefly in lemon-water (1 tablespoon per cup of water).
- Fruit sushi: Roll, slice, and chill up to 4 hours. Keep covered to prevent drying.
- Watermelon pizza: Assemble right before eating for best texture.
There you go—five easy, colorful, and seriously fun ways to turn fruit into the snack kids (and honestly, adults) get excited about. Pick one, let the kids help, and watch what happens when healthy meets happy. Your snack game just went from “meh” to “more, please.”
Printable Recipe Card
Want just the essential recipe details without scrolling through the article? Get our printable recipe card with just the ingredients and instructions.