5 Fruit Recipes for Kids That Turn Everyday Snacks Into Something Fun
Kids bored of the same banana and apple slices? Let’s fix that—fast. These five playful, colorful recipes transform basic fruit into edible crafts kids can build (and devour) in minutes.
They’re low-fuss, high-fun, and secretly packed with good stuff. Expect crunchy textures, juicy bites, and just enough sweetness to win over picky snack critics. Ready to make snack time the best part of the day?
Disclosure: As Amazon Associates, we earn from qualifying purchases at no extra cost to you.
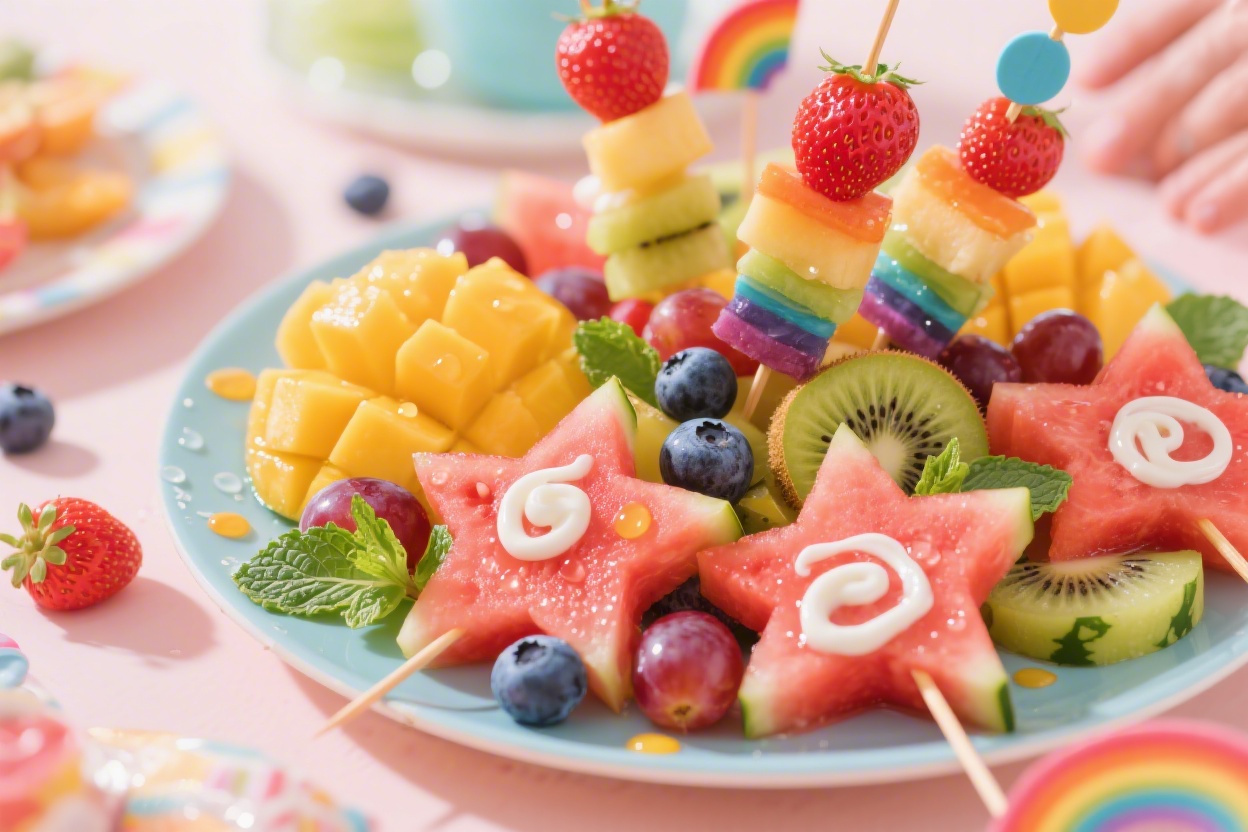
1. Rainbow Fruit Wands With Vanilla Yogurt Clouds
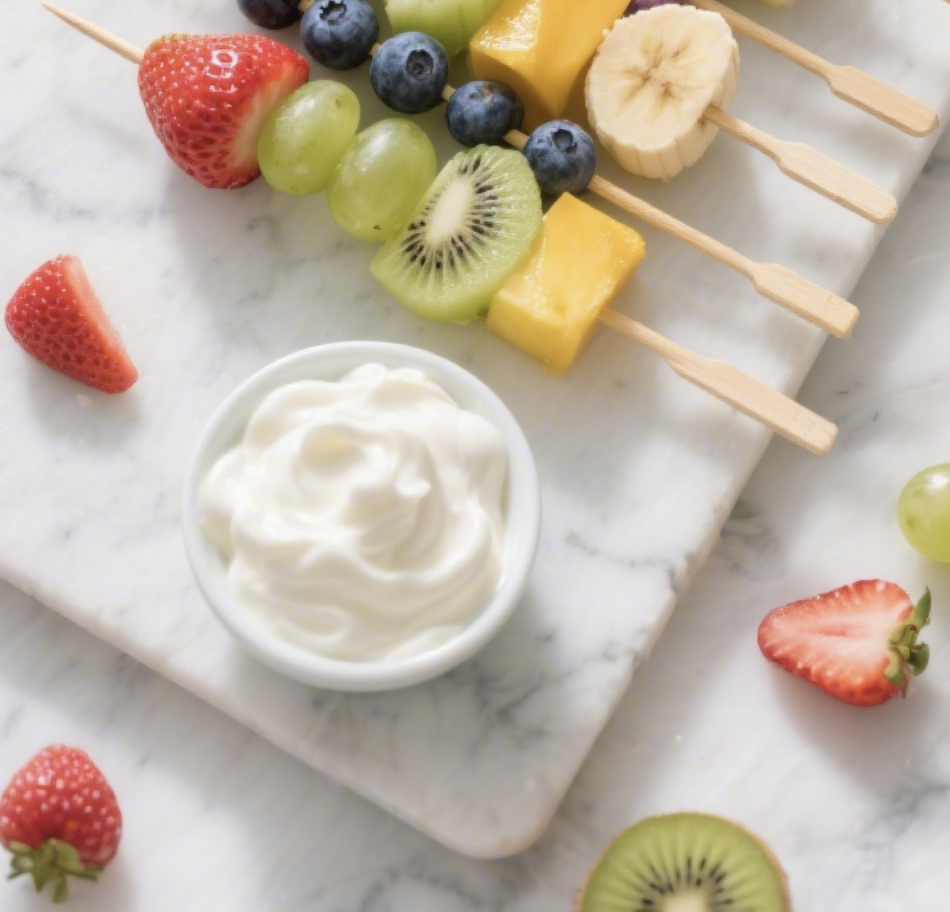
These DIY fruit wands feel like magic—bright, customizable, and perfect for parties or after-school snacks. Kids assemble their own colors, and you sneak in a variety of vitamins. The creamy “cloud” dip seals the deal.
Ingredients:
- 1 cup strawberries, hulled and halved
- 1 cup pineapple chunks
- 1 cup green grapes
- 1 cup blueberries
- 1 large kiwi, peeled and sliced
- 1 small mango, peeled and cubed
- 1 banana, thickly sliced
- 8-10 wooden skewers (8–10 inches)
- 1 cup vanilla Greek yogurt
- 1 tablespoon honey or maple syrup (optional)
- 1/2 teaspoon pure vanilla extract (if using plain yogurt)
- Rainbow sprinkles or crushed freeze-dried strawberries for topping (optional)
Instructions:
- Prep your fruit: Wash, peel, and cut into bite-size pieces. Keep shapes uniform so the wands look neat and stack cleanly.
- Thread the skewers: Start with a blueberry “tip,” then add banana, kiwi, grape, mango, pineapple, and strawberry to create a rainbow gradient. Repeat the pattern if the skewer allows.
- Make the clouds: Stir yogurt with honey and vanilla until silky. Spoon into a small bowl and top with a pinch of sprinkles or crushed berries for color.
- Serve immediately or chill: Lay wands on a platter and chill for 10 minutes for a refreshing cool bite.
Pro tip: For a party trick, freeze the assembled wands for 30 minutes to firm them up. Swap fruit as needed—melon cubes, blackberries, or clementine segments all work. Want dairy-free? Use coconut yogurt and a drizzle of agave. These pack well for school if you skip the skewers and layer in a lidded cup.
2. No-Bake Apple Nachos With Peanut Butter Drizzle
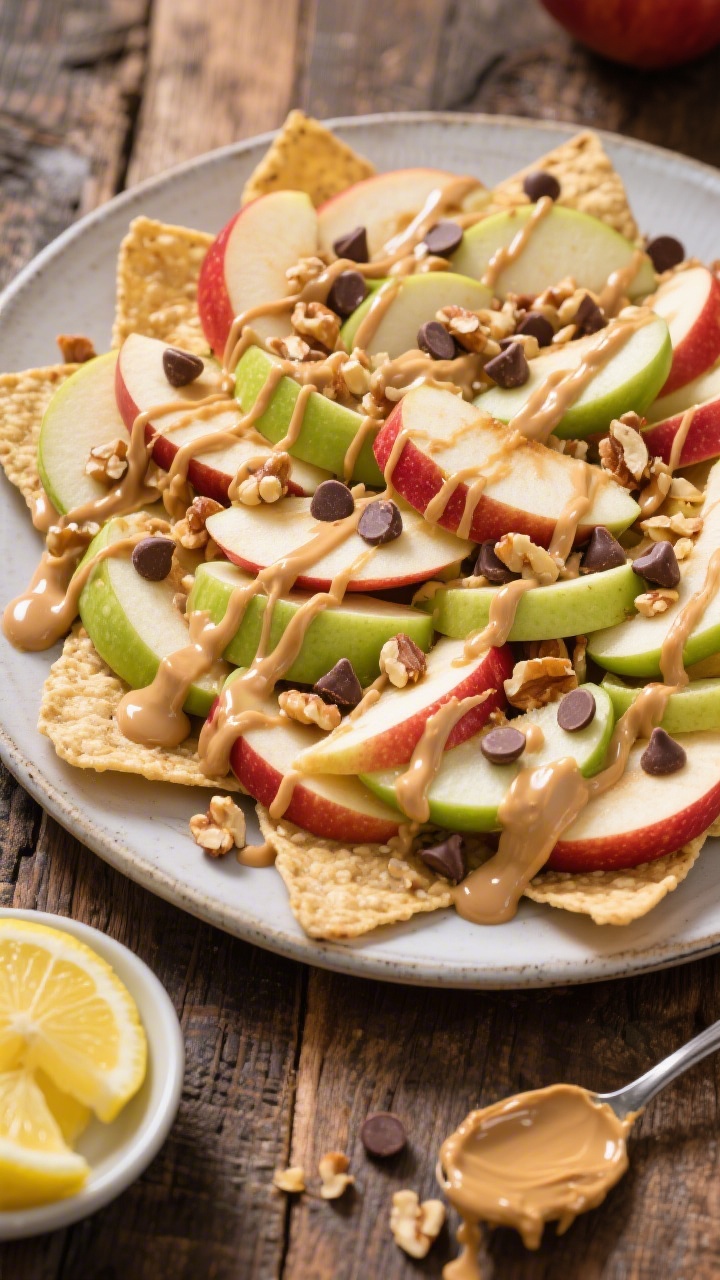
It’s dessert, snack, and science experiment in one: crunchy apples plus warm, melty drizzles. This is a five-minute fix that looks like a treat board—but it’s secretly balanced and super shareable.
Ingredients:
- 3 crisp apples (Honeycrisp, Fuji, or Granny Smith), cored and thinly sliced
- 1 tablespoon lemon juice (to prevent browning)
- 1/3 cup creamy peanut butter (or almond/sunflower seed butter)
- 2 tablespoons warm water or milk (to thin)
- 1 tablespoon honey or maple syrup
- 1/4 teaspoon cinnamon
- 1/4 cup mini chocolate chips or cacao nibs
- 1/4 cup granola or crushed pretzels
- 2 tablespoons chopped peanuts or toasted coconut (optional)
Instructions:
- Toss apple slices with lemon juice. Fan them on a large plate or platter, overlapping like classic nachos.
- Make the drizzle: In a small bowl, whisk peanut butter with warm water or milk until pourable. Add honey and cinnamon; whisk again until smooth.
- Drizzle generously over apples. Scatter chocolate chips, granola, and any extra toppings for texture and crunch.
- Serve right away while the drizzle is glossy and the apples are crisp.
Variation: Turn it into “s’mores nachos” by using mini marshmallows and crushed graham crackers. Need nut-free? Go with sunflower seed butter. For extra staying power, add a handful of Greek yogurt chips or a sprinkle of hemp seeds. Seriously, this one disappears fast.
3. Frozen Yogurt Fruit Bark You Can Break Like Chocolate
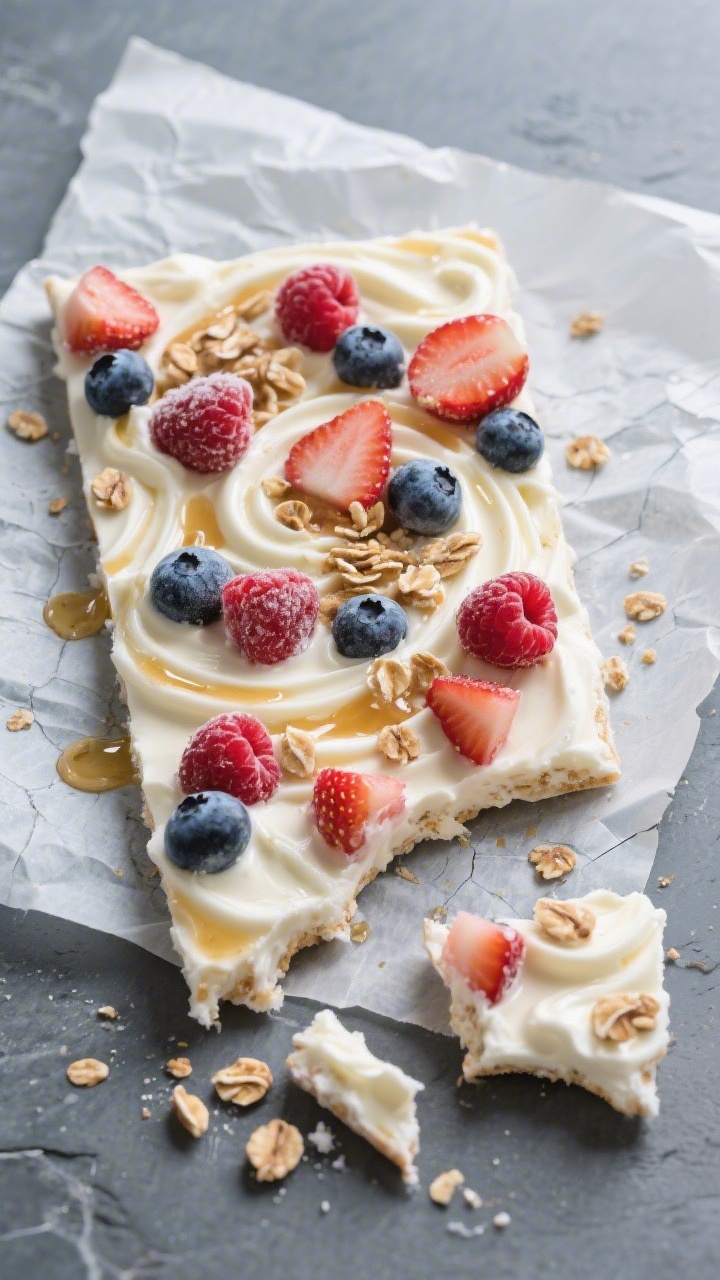
Think of this as snackable confetti: creamy yogurt bark studded with fruit and crunchy add-ins. It’s freezer-friendly, make-ahead, and perfect for hot afternoons or post-soccer pick-me-ups.
Ingredients:
- 2 cups Greek yogurt (vanilla or plain)
- 2 tablespoons honey or maple syrup (more to taste)
- 1 teaspoon vanilla extract (omit if using vanilla yogurt)
- 1 cup mixed berries (strawberries diced, blueberries, raspberries)
- 1/3 cup granola (choose a low-sugar option)
- 2 tablespoons mini chocolate chips or chopped dark chocolate
- Zest of 1 lemon or orange (optional, but bright and delicious)
- Parchment paper for lining
Instructions:
- Line a rimmed baking sheet (9×13-inch works well) with parchment. Make sure it fits flat in your freezer.
- Whisk yogurt with honey and vanilla until smooth. Spread into an even 1/4–1/3-inch layer on the lined sheet.
- Scatter berries, granola, chocolate, and citrus zest evenly over the yogurt. Gently press toppings so they adhere when frozen.
- Freeze 2–3 hours, until completely solid. Break into shards like chocolate bark.
- Store in a freezer-safe bag or container for up to 1 month. Eat straight from the freezer.
Serving ideas: Dip pieces into a quick chocolate shell (melt 1/2 cup chocolate chips with 1 teaspoon coconut oil) for extra crunch. For tropical vibes, use pineapple, mango, and toasted coconut. Kids love choosing their own “sprinkle zone,” so set out toppings like chia seeds, dried cherries, or crushed freeze-dried raspberries.
4. Banana Sushi Rolls With Chocolate “Soy” Drizzle

Adorable, bite-size, and wildly customizable—these banana rolls are a lunchbox legend. They look fancy but take less than 10 minutes. The best part? You can sneak in whole grains and protein without a battle.
Ingredients:
- 2 large ripe but firm bananas, peeled
- 2 whole-wheat tortillas (8–10 inches)
- 1/3 cup creamy peanut butter (or almond/sunflower seed butter)
- 2 tablespoons honey or strawberry jam
- 1 tablespoon chia seeds or ground flaxseed (optional)
- 2 tablespoons mini chocolate chips
- 1 tablespoon coconut flakes or crushed cereal (optional)
- 1/4 cup chocolate chips + 1 teaspoon coconut oil (for drizzle)
Instructions:
- Warm tortillas for 10 seconds to make them pliable. Spread each with a thin layer of peanut butter. Add a swirl of honey or a stripe of jam. Sprinkle chia or flax if using.
- Place a banana at one edge of each tortilla and roll up tightly like a sushi roll. Press gently to seal.
- Slice into 1-inch rounds with a sharp knife. Arrange “sushi” on a plate cut-side up.
- Melt chocolate chips with coconut oil in 20-second bursts, stirring until smooth. Drizzle lightly over the rolls to mimic soy sauce. Sprinkle with mini chips or coconut flakes.
Tips and swaps: Use a thin layer—too much filling makes slicing messy. Go nut-free with sunflower seed butter or cream cheese and a dusting of cinnamon. Want “tempura crunch”? Roll the outside in crushed cornflakes before slicing. Serve with a yogurt “dipping sauce” sweetened with a touch of honey.
5. Watermelon Pizza With Creamy Lime “Cheesecake” Spread
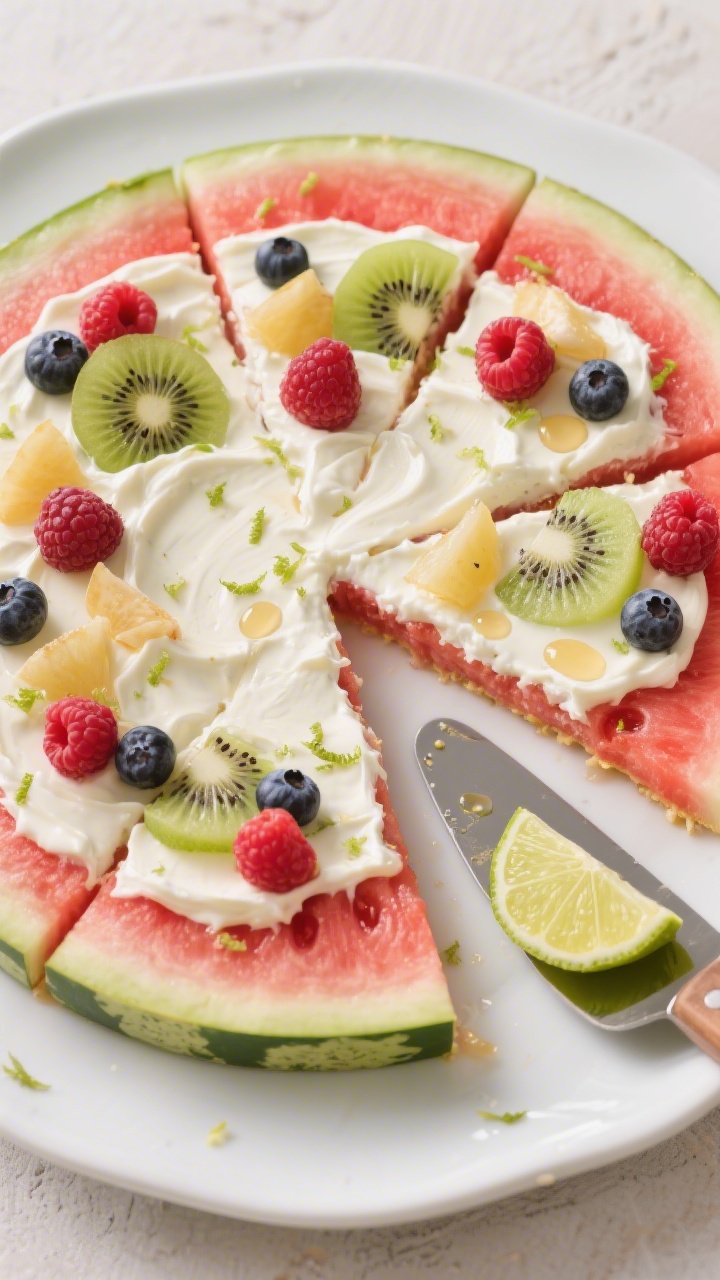
This is summer on a plate. A juicy round of watermelon becomes your “pizza crust,” topped with a tangy, slightly sweet spread and piles of fruit. It’s a showstopper for picnics and the easiest way to get kids excited about slicing fruit.
Ingredients:
- 1 large round slice of seedless watermelon, about 1 inch thick (rind on)
- 4 ounces cream cheese, softened (or dairy-free cream cheese)
- 1/2 cup vanilla Greek yogurt
- 1–2 tablespoons honey or maple syrup, to taste
- Zest and juice of 1/2 lime
- 1/2 teaspoon vanilla extract
- 1 cup mixed fruit toppings: sliced strawberries, blueberries, kiwi, blackberries, mango
- 1 tablespoon shredded fresh mint or basil (optional)
- 2 tablespoons toasted coconut or crushed pistachios (optional)
Instructions:
- Pat the watermelon slice dry with paper towels so the topping adheres. Place it on a cutting board.
- Beat cream cheese until smooth, then mix in yogurt, honey, lime zest and juice, and vanilla. Taste and adjust sweetness or lime.
- Spread a generous layer over the watermelon, leaving a small border like a pizza crust.
- Top with fruit in colorful clusters. Sprinkle mint and coconut or pistachios if using.
- Slice into 6–8 wedges with a large sharp knife. Serve immediately.
Make-ahead magic: Mix the spread up to 2 days ahead and chill. Assemble just before serving to keep everything crisp. For mini versions, cut smaller watermelon rounds with a large cookie cutter and let kids decorate their own “personal pizzas.” Trust me, it’s a crowd-pleaser.
How to Get Kids Involved (Without Chaos)
- Prep bar setup: Put fruit in small bowls with spoons so little hands can scoop.
- Assign “jobs”: Skewer captain, drizzle artist, sprinkle boss. Kids love titles.
- Use safe tools: Kid-friendly knives for soft fruits, and blunt skewers.
- Color missions: Ask them to build a rainbow or pick three textures.
Smart Storage and Leftovers
- Yogurt bark: Store in the freezer in a zip-top bag with parchment layers.
- Apple nachos: Best fresh, but you can keep components separate and assemble in 1 minute.
- Fruit wands: Keep fruit prepped in airtight containers; assemble right before eating.
- Banana sushi: Refrigerate up to 6 hours; brush banana with lemon juice to prevent browning.
- Watermelon pizza: Assemble and eat ASAP; leftover topping doubles as dip for graham crackers.
These recipes aren’t fancy—they’re just fun, fast, and kid-approved. Pick one, grab a cutting board, and turn snack time into a tiny celebration. Your fruit bowl won’t know what hit it.
Printable Recipe Card
Want just the essential recipe details without scrolling through the article? Get our printable recipe card with just the ingredients and instructions.