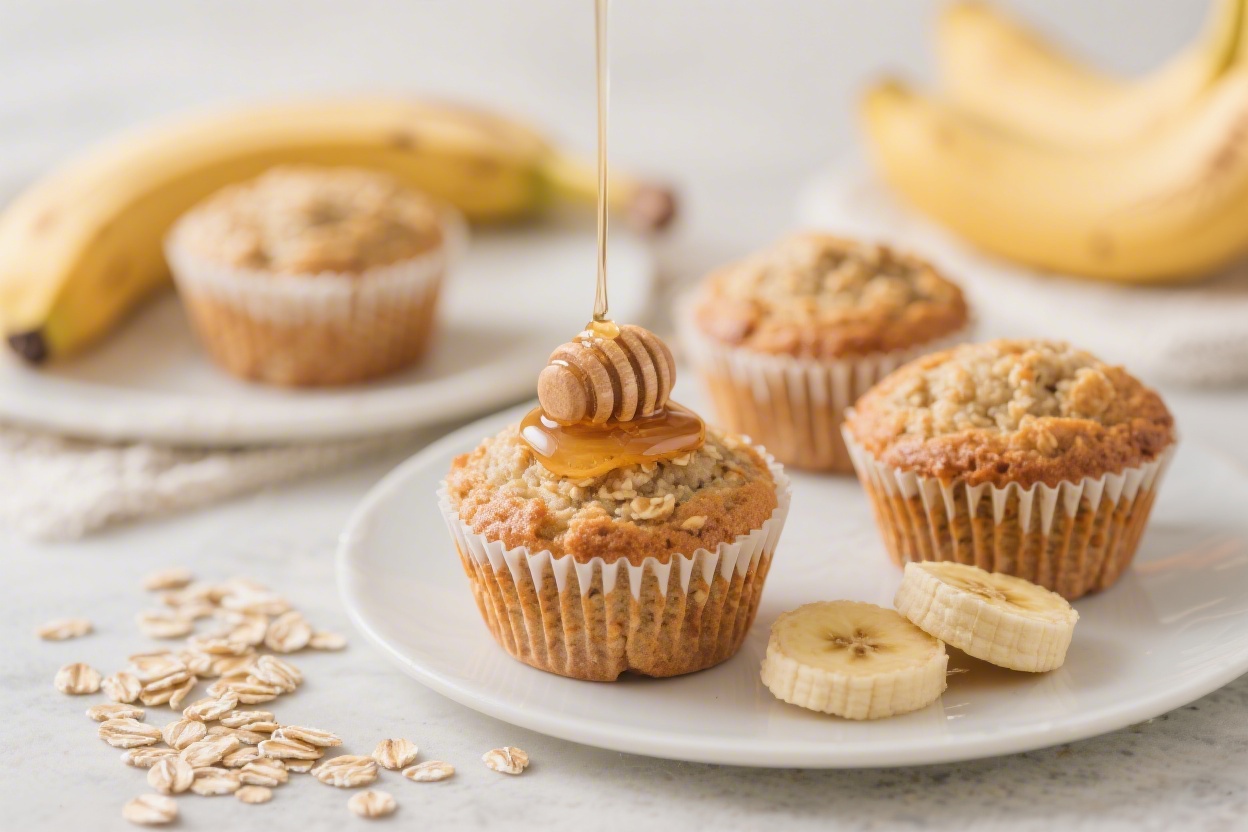
Healthy Muffins for Kids: Banana Oat Muffins With Honey – A Simple, Wholesome Snack
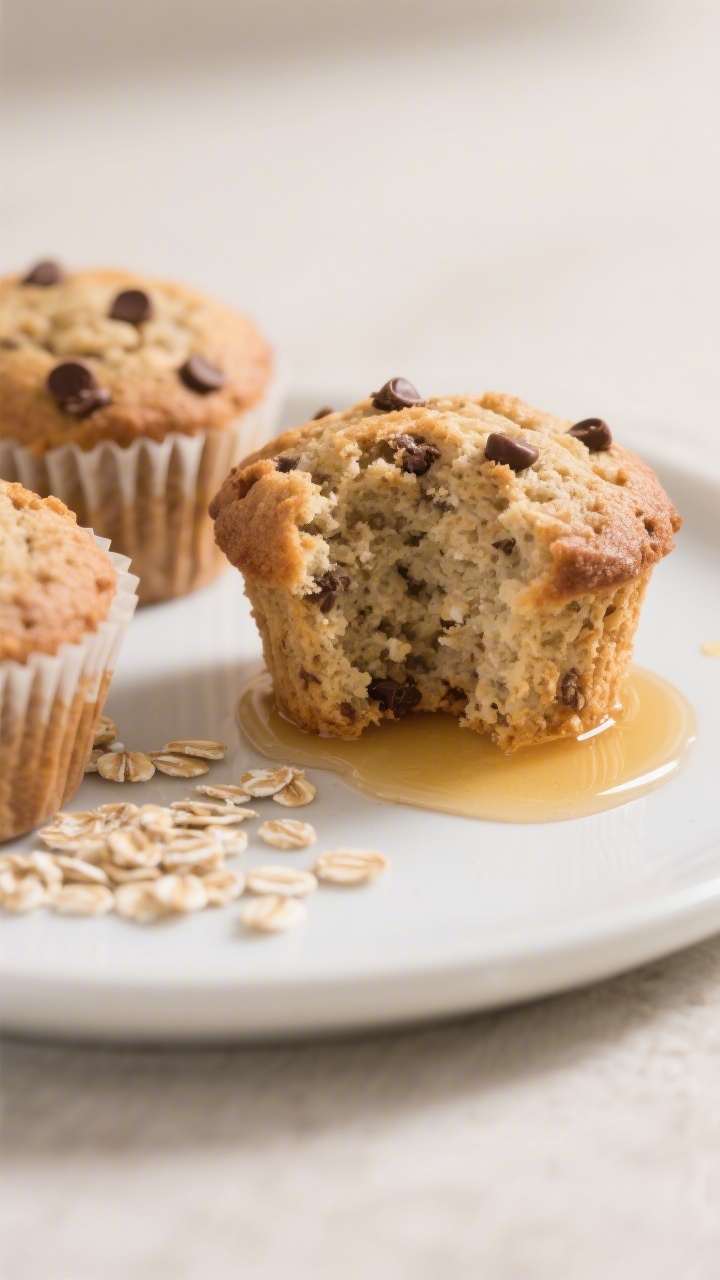
Banana oat muffins with honey are the kind of snack that makes mornings easier and afternoons calmer. They’re naturally sweet, soft, and perfect for little hands. You can mix them in one bowl, bake a batch in under 30 minutes, and feel good about what’s inside.
No refined sugar, no complicated steps—just real ingredients that taste great. If you’re looking for an easy win for lunchboxes or quick breakfasts, these muffins deliver.
Healthy Muffins for Kids: Banana Oat Muffins With Honey - A Simple, Wholesome Snack
Ingredients
Method
-
Prep your pan and oven: Heat the oven to 350°F (175°C).
Line a 12-cup muffin tin with paper liners or lightly grease it.
-
Mash the bananas: In a large bowl, mash the bananas with a fork until mostly smooth. A few small lumps are fine.
-
Whisk in the wet ingredients: Add eggs, honey, oil (or melted butter), and vanilla. Whisk until well combined and glossy.
-
Combine the dry ingredients: In a separate bowl, stir together oats, flour, baking powder, baking soda, cinnamon, and salt.
-
Bring it together: Add the dry ingredients to the banana mixture.
Stir gently until just combined. If using chocolate chips, nuts, or blueberries, fold them in now. Do not overmix.
-
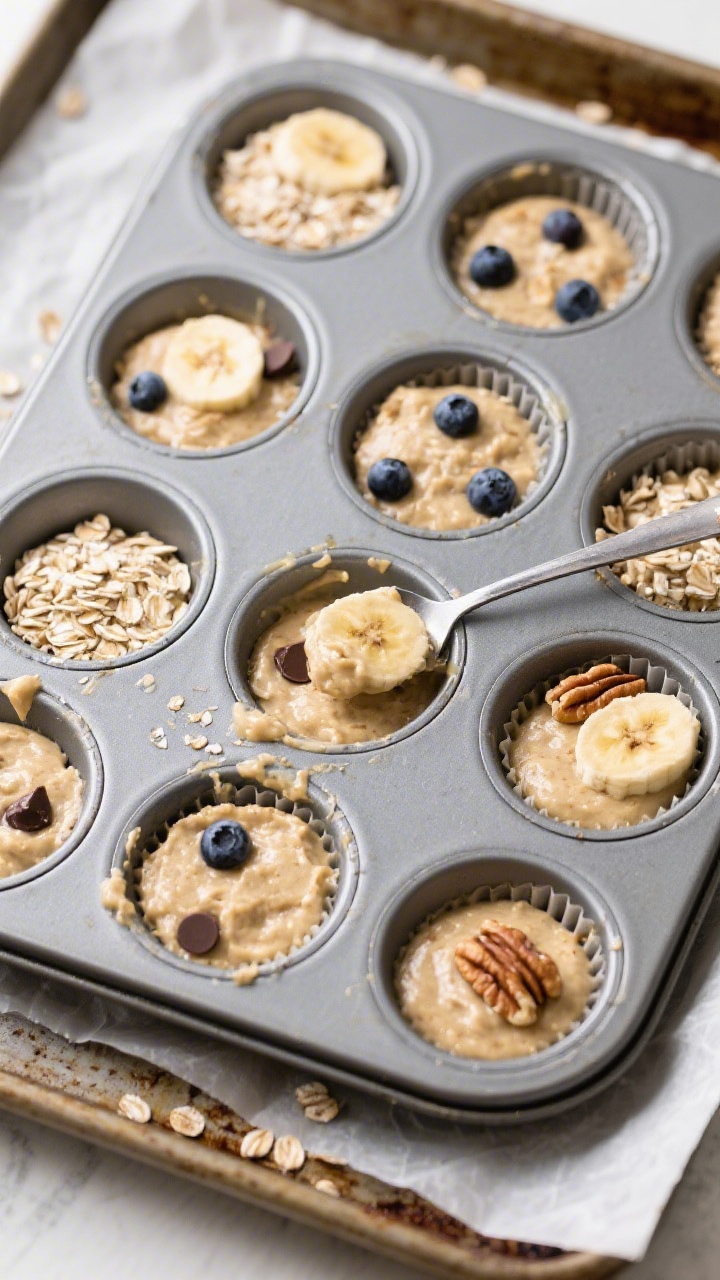
Fill the cups: Divide the batter evenly among the 12 muffin cups.
Sprinkle a few oats on top for a simple finish.
-
Bake: Place in the center of the oven and bake for 16–20 minutes, or until the tops are set and a toothpick comes out clean or with a few moist crumbs.
-
Cool: Let muffins rest in the pan for 5 minutes, then transfer to a wire rack to cool completely. This helps them set and prevents sogginess.
Disclosure: As Amazon Associates, we earn from qualifying purchases at no extra cost to you.
What Makes This Special
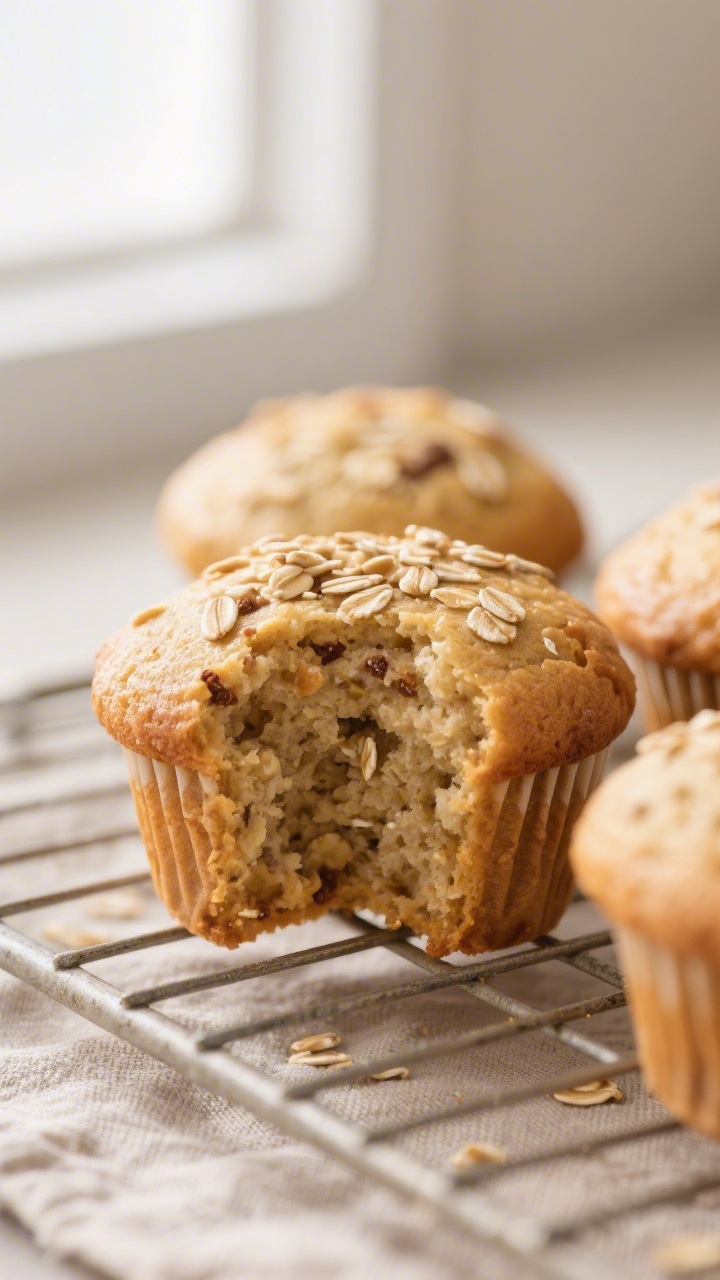
These muffins lean on ripe bananas and a touch of honey for sweetness, so they’re not overloaded with sugar. Oats bring a hearty texture and fiber, making each bite more satisfying.
The batter mixes quickly and uses pantry staples, which is key on busy days. They also freeze well, reheat nicely, and hold up in backpacks. Most of all, kids love them, and parents appreciate the simple ingredient list.
What You’ll Need
- 3 very ripe bananas (the spottier, the better)
- 2 large eggs
- 1/3 cup honey (adjust to taste)
- 1/3 cup neutral oil (such as avocado or light olive oil) or melted butter
- 1 teaspoon vanilla extract
- 1 cup rolled oats (old-fashioned)
- 1 cup whole wheat flour (or all-purpose flour)
- 1 teaspoon baking powder
- 1/2 teaspoon baking soda
- 1/2 teaspoon ground cinnamon
- 1/4 teaspoon salt
- Optional add-ins: 1/3 cup mini chocolate chips, chopped walnuts, or blueberries
- Optional topping: a few oats to sprinkle on top
Step-by-Step Instructions
- Prep your pan and oven: Heat the oven to 350°F (175°C).Line a 12-cup muffin tin with paper liners or lightly grease it.
- Mash the bananas: In a large bowl, mash the bananas with a fork until mostly smooth. A few small lumps are fine.
- Whisk in the wet ingredients: Add eggs, honey, oil (or melted butter), and vanilla. Whisk until well combined and glossy.
- Combine the dry ingredients: In a separate bowl, stir together oats, flour, baking powder, baking soda, cinnamon, and salt.
- Bring it together: Add the dry ingredients to the banana mixture.Stir gently until just combined. If using chocolate chips, nuts, or blueberries, fold them in now. Do not overmix.
- Fill the cups: Divide the batter evenly among the 12 muffin cups.Sprinkle a few oats on top for a simple finish.
- Bake: Place in the center of the oven and bake for 16–20 minutes, or until the tops are set and a toothpick comes out clean or with a few moist crumbs.
- Cool: Let muffins rest in the pan for 5 minutes, then transfer to a wire rack to cool completely. This helps them set and prevents sogginess.
Keeping It Fresh
Store cooled muffins in an airtight container at room temperature for up to 2 days. For longer storage, refrigerate for up to 5 days.
To freeze, wrap each muffin in plastic or place them in a freezer-safe bag, then freeze for up to 3 months. Reheat in the microwave for 15–25 seconds or warm them in a 300°F (150°C) oven for 5–8 minutes. Always cool completely before storing to avoid excess moisture.
Benefits of This Recipe
- Whole grains and fiber: Oats and whole wheat flour support steady energy and keep kids satisfied longer.
- Naturally sweetened: Ripe bananas and honey add sweetness without refined sugar.
- Kid-friendly texture: Soft, moist, and easy to chew—great for toddlers and school-age kids.
- One-bowl convenience: Less mess, faster cleanup, and simple steps you can do with kids.
- Customizable: Add fruit, seeds, or mini chocolate chips to suit your child’s taste.
Pitfalls to Watch Out For
- Overmixing: This can make muffins dense or tough. Stir until ingredients are just combined.
- Underbaking: A gummy center means they need a few more minutes.Check with a toothpick.
- Too much moisture: Extra-large bananas can make the batter wet. If it looks very loose, add 1–2 tablespoons of flour.
- Skipping the cool-down: Packing warm muffins can trap steam and lead to soggy tops.
- Using quick oats: They’ll work, but the texture may be softer. Rolled oats hold up better.
Recipe Variations
- Blueberry Burst: Fold in 1/2 cup fresh or frozen blueberries (no need to thaw).Toss in a teaspoon of flour first to minimize bleeding.
- Chocolate Chip Treat: Stir in 1/3 cup mini chocolate chips. Minis spread the chocolate more evenly per bite.
- Nutty Crunch: Add 1/3 cup chopped walnuts or pecans for a bit of healthy fat and crunch.
- Seed Boost: Mix in 2 tablespoons ground flaxseed or chia seeds for extra fiber and omega-3s. Add a tablespoon of milk if the batter seems thick.
- Dairy-Friendly Swap: Replace half the oil with plain Greek yogurt for more protein and a tender crumb.
- Gluten-Free: Use certified gluten-free oats and a 1:1 gluten-free flour blend.Check doneness carefully, as bake times can vary.
- No Honey Option: For children under one year old, use pure maple syrup instead of honey.
FAQ
Can I make these muffins without eggs?
Yes. Replace each egg with a flax egg (1 tablespoon ground flaxseed mixed with 3 tablespoons water, rest 5 minutes). The texture will be slightly more tender, but still delicious.
How ripe should the bananas be?
Very ripe with plenty of brown spots.
The riper the bananas, the sweeter and more flavorful your muffins will be. Green or just-yellow bananas won’t give the same result.
Can I reduce the honey?
You can. Try 1/4 cup honey for a lightly sweet muffin.
If you cut it further, add an extra tablespoon of oil or milk to keep the texture moist.
What’s the best way to pack these for school?
Let them cool fully, then place in a reusable container or bag. For extra appeal, slice in half and add a thin layer of nut butter or sunflower seed butter.
Do these work as mini muffins?
Yes. Spoon into a mini muffin pan and bake for 10–13 minutes, checking early.
Aim for lightly golden edges and a clean toothpick.
Can I make the batter ahead?
It’s better to bake right away. If needed, mix the wet and dry ingredients separately, refrigerate up to 12 hours, then combine and bake in the morning.
Why did my muffins sink in the middle?
They may have been underbaked, the leaveners could be expired, or the oven temperature might be off. Check baking powder and soda freshness and consider using an oven thermometer.
How do I keep muffins from sticking to the liners?
Use high-quality parchment liners or lightly grease the liners before filling. Let muffins cool fully before peeling off the paper.
Can I use steel-cut oats?
Not as a direct swap.
Steel-cut oats won’t soften enough in the batter. Stick to rolled oats for the right texture.
Are these suitable for toddlers?
Yes, for toddlers over one year old if using honey. For younger toddlers, swap honey with maple syrup and keep add-ins small and soft.
Wrapping Up
These banana oat muffins with honey are simple, dependable, and family-approved.
They offer steady energy, gentle sweetness, and a soft crumb that kids love. Keep a batch on hand for easy breakfasts, lunchbox fillers, or after-school snacks. With flexible add-ins and straightforward steps, this is a recipe you’ll come back to again and again.
Printable Recipe Card
Want just the essential recipe details without scrolling through the article? Get our printable recipe card with just the ingredients and instructions.