5 Cartoon Cakes for Kids That Are Fun and Creative (and Totally Doable!)
Kids don’t just want cake—they want a cake with personality. These five cartoon-inspired bakes are colorful, whimsical, and surprisingly simple to pull off without a pastry degree. Think bold shapes, easy decorating tricks, and flavors that make everyone go back for seconds. Ready to be the hero of the birthday party? Let’s bake some magic.
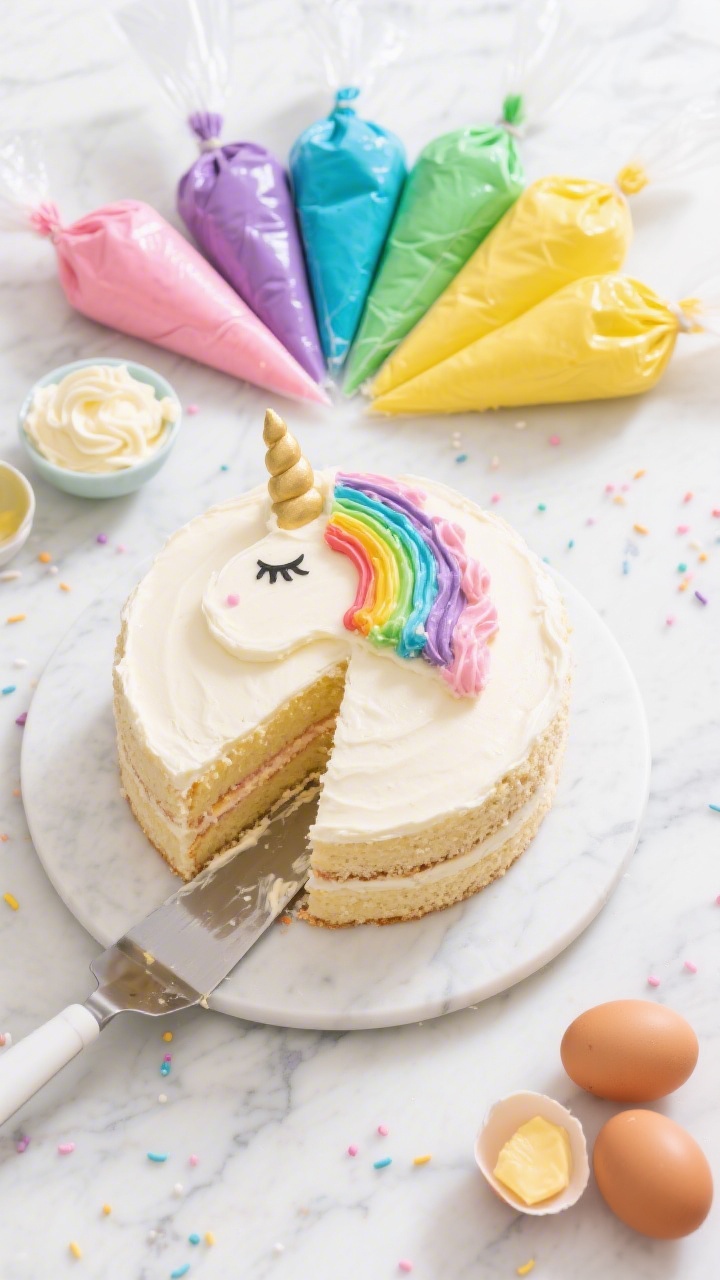
1. Rainbow Unicorn Mane Cake That Steals The Spotlight
⭐ My secret tip – Ever since we started using this kids baking set, my toddler loves helping in the kitchen and is much more willing to try new foods. ✨ This is the blender we use for protein smoothies with yogurt, peanut butter, and fruit.
This cake is a total showstopper with swirls of pastel “mane” and a shiny gold horn. It’s perfect for birthdays, classroom celebrations, or any day you feel like sprinkling glitter (edible, of course) on life. Best part? The decorating is basically controlled chaos in buttercream—fun, forgiving, and kid-approved.
Disclosure: As Amazon Associates, we earn from qualifying purchases at no extra cost to you.
Ingredients:
- 2 1/2 cups (300 g) all-purpose flour
- 2 1/2 tsp baking powder
- 1/2 tsp fine salt
- 1 3/4 cups (350 g) granulated sugar
- 3/4 cup (170 g) unsalted butter, room temp
- 4 large eggs, room temp
- 1 cup (240 ml) whole milk, room temp
- 2 tsp vanilla extract
- Butter or oil spray for pans
- 3 cups (680 g) vanilla buttercream, divided
- Gel food coloring: pink, purple, teal, yellow
- 1 sugar ice-cream cone (for the horn)
- Gold luster dust + a few drops of vodka or clear extract (for painting)
- Black fondant or black edible marker (for eyes)
- Pastel sprinkles (optional)
Instructions:
- Prep pans: Heat oven to 350°F (175°C). Grease and line two 8-inch round cake pans with parchment.
- Make the batter: Whisk flour, baking powder, and salt. In a separate bowl, beat butter and sugar until fluffy, 3 minutes. Add eggs one at a time. Mix in vanilla. Alternate dry mix and milk, ending with dry, just until combined.
- Bake: Divide batter evenly between pans. Bake 25–30 minutes, until a toothpick comes out clean. Cool 10 minutes in pans, then turn out and cool completely.
- Base coat: Level cakes if needed. Stack with a thin layer of buttercream in between. Apply a light crumb coat and chill 20 minutes. Finish with a smooth white coat.
- Color the mane: Divide remaining buttercream into 4 bowls. Tint pastel pink, purple, teal, and yellow. Place each in piping bags fitted with star or French tips.
- Make the horn: Paint the sugar cone with a mix of gold luster dust and vodka/clear extract. Let dry.
- Decorate: Pipe swoops and rosettes from the top side, cascading down the back like a mane. Add sprinkles. Press the sugar cone into the top center as the horn. Add closed “smiling eyes” using fondant or an edible marker.
Pro tip: Chill the cake 10 minutes before piping to help the mane hold shape. Want extra whimsy? Add a hint of strawberry jam between layers for a surprise pink swirl.
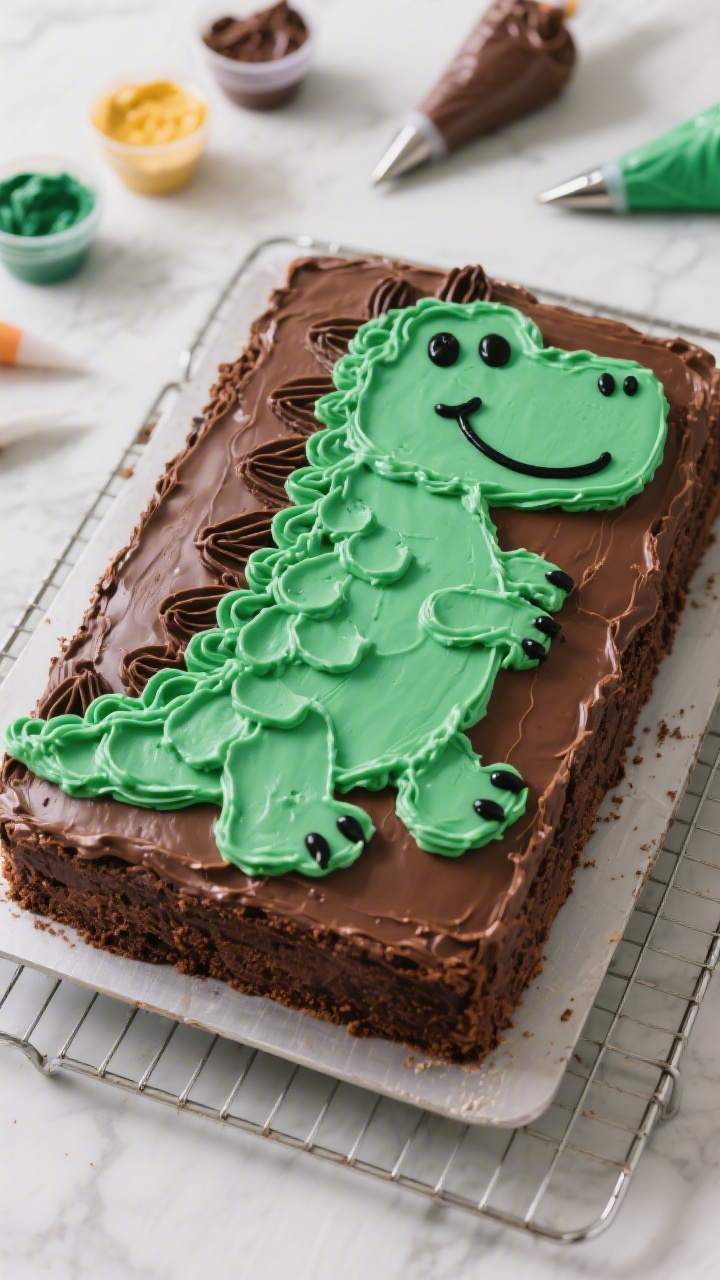
2. Friendly Dinosaur Sheet Cake With Chunky Scales
⭐ My secret tip – Ever since we started using this kids baking set, my toddler loves helping in the kitchen and is much more willing to try new foods. ✨ This is the blender we use for protein smoothies with yogurt, peanut butter, and fruit.
This dino is adorable, not scary—think big smile, bumpy scales, and bright green icing. It’s ideal when you need to feed a crowd without fiddly layers. You’ll carve a simple silhouette from a sheet cake and decorate with candy “scales.” Easy roar factor, zero stress.
Ingredients:
- 1 13×9-inch chocolate cake (box mix or homemade), fully cooled
- 3 cups (680 g) chocolate buttercream (for crumb coat and details)
- 3 cups (680 g) vanilla buttercream, tinted green
- Gel food coloring: green, lime, and a touch of blue (for depth)
- Assorted round candies or chocolate buttons (for scales)
- White fondant or white chocolate melts (for eyes/teeth)
- Black fondant or edible marker (for pupils)
- Piping bags + round and star tips
Instructions:
- Carve the dino: Print or sketch a simple dinosaur outline (brontosaurus or T-rex). Place the template on the cooled sheet cake. Use a serrated knife to cut the shape—keep offcuts for a tail or spikes if needed.
- Crumb coat: Spread a thin layer of chocolate buttercream over the entire shape. Chill 15 minutes to set.
- Color and frost: Tint vanilla buttercream a vivid green. Add a dot of blue to deepen, and a swirl of lime for brightness. Frost smoothly over the dino body.
- Add texture: Use the back of a spoon to create gentle scales by pressing and lifting. Pipe a few star clusters along the spine.
- Face time: Cut small circles of white fondant for eyes; add pupils with black fondant or an edible marker. Pipe a chocolate-mouth smile. For teeth, add tiny white triangles along the grin.
- Scales and spots: Press candies in a line down the back and randomly for spots. Chill 10 minutes to set.
Serving idea: Scatter gummy trees (green gumdrops) around the board for a “prehistoric forest.” Swap colors for a pink or purple dino if your kiddo loves a twist.
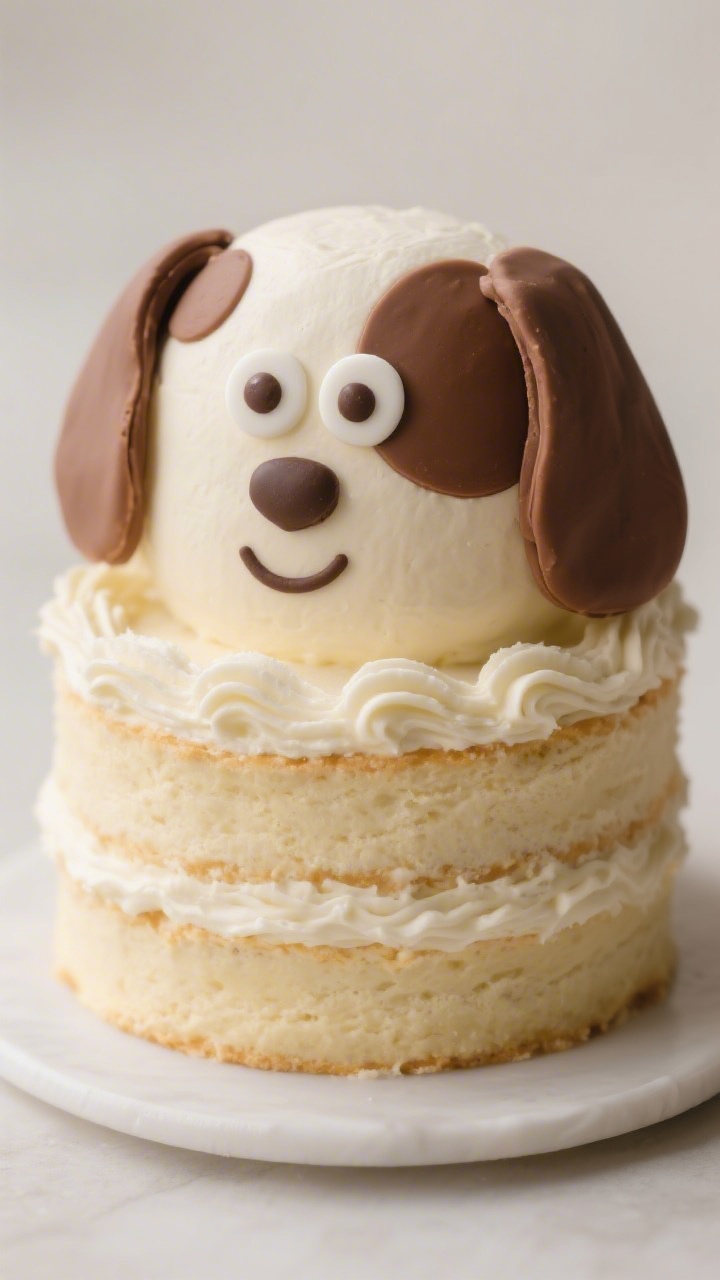
3. Cartoon Puppy Face Cake With Floppy Ears
⭐ My secret tip – Ever since we started using this kids baking set, my toddler loves helping in the kitchen and is much more willing to try new foods. ✨ This is the blender we use for protein smoothies with yogurt, peanut butter, and fruit.
If your little one loves anything with paws, this puppy cake will melt hearts. It’s a round layer cake with fondant ears and a buttercream face—simple shapes, big expression. Great for first birthdays, pet parties, or anytime you want dessert to wag its tail.
Ingredients:
- Two 7-inch vanilla cake layers
- 2 1/2 cups (565 g) vanilla buttercream
- 1/2 cup (115 g) chocolate buttercream (for spots and details)
- 8 oz (225 g) light brown fondant (for ears)
- 2 oz (55 g) black fondant (eyes, nose)
- Pink fondant or pink buttercream (tongue/cheeks)
- 2 tbsp corn syrup or water (for fondant sticking)
- Edible glitter or shimmer (optional)
Instructions:
- Build the base: Level and stack the cake layers with a thin layer of vanilla buttercream. Crumb coat and chill 20 minutes. Finish with a smooth vanilla coat.
- Make floppy ears: Roll brown fondant 1/8-inch thick. Cut two teardrop shapes about 6 inches long. Gently curve the wide ends for volume. Let dry 10–15 minutes so they hold shape.
- Face features: Roll black fondant for two oval eyes and a triangle nose with rounded corners. Shape a pink tongue or pipe with pink buttercream. Use chocolate buttercream to pipe a big smile line.
- Assemble: Attach eyes and nose with a dab of water or corn syrup. Pipe tiny white buttercream dots in the eyes for a cute “shine.” Press ears at the top sides of the cake, letting them drape down.
- Spots and blush: Pipe a chocolate buttercream patch over one eye for a cartoon look. Add small pink buttercream circles for cheeks.
Variation: Turn it into a Dalmatian with white frosting and lots of mini chocolate chips as spots. For extra stability, insert short lollipop sticks behind the fondant ears if your kitchen is warm.
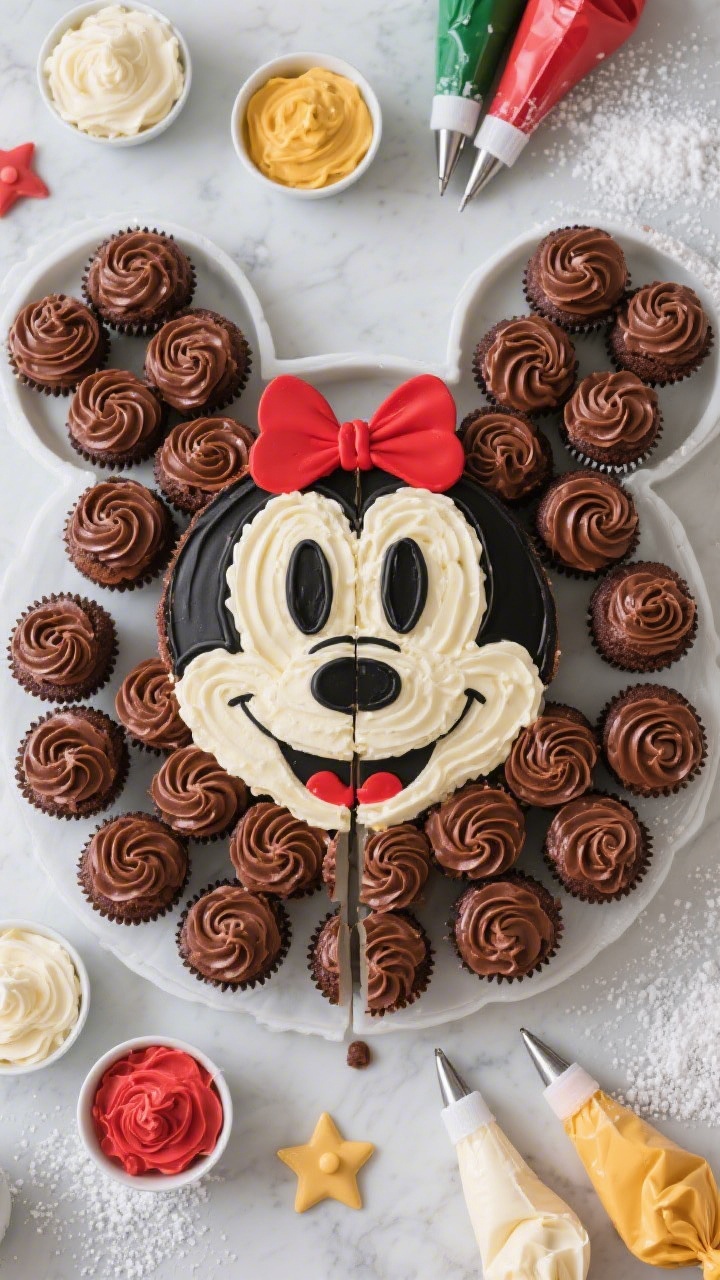
4. Classic Cartoon Mouse Cupcake Pull-Apart
⭐ My secret tip – Ever since we started using this kids baking set, my toddler loves helping in the kitchen and is much more willing to try new foods. ✨ This is the blender we use for protein smoothies with yogurt, peanut butter, and fruit.
No need to slice—this pull-apart cake is all cupcakes arranged into a familiar mouse silhouette with big ears. It’s effortless to serve (no plates required), and the look is pure childhood nostalgia. Perfect for park-themed parties and easy to transport.
Ingredients:
- 24 chocolate cupcakes, baked in standard liners
- 4 cups (900 g) chocolate buttercream
- 2 cups (450 g) vanilla buttercream, divided
- Black gel food coloring
- Red gel food coloring
- 2–3 tbsp milk or cream (to loosen frosting if needed)
- Large serving board or sheet of foam core
- Piping bags + offset spatula
Instructions:
- Arrange the cupcakes: On your board, place 12 cupcakes for the head in a rounded cluster. Add 6 for the left ear and 6 for the right ear, forming two big circles attached to the head cluster.
- Anchor them: Pipe a dot of buttercream under each cupcake to prevent sliding.
- Color frostings: Tint 3 cups chocolate buttercream with a little black gel to deepen to a near-black. Tint 1 cup vanilla buttercream red. Keep 1 cup vanilla white.
- Frost the surface: Pipe generous swirls over each cupcake, then smooth lightly with an offset spatula so the frosting connects, forming a single surface. Use near-black for the ears and top of the head, white for the face area, and red along the bottom if you want a “pants” effect.
- Details: Pipe two large white ovals for eyes and a small black dot for the nose. Add a thin black smile curve. If doing the red “pants,” add two white buttercream buttons.
Time-saver: Use a large round tip to pipe quick, even mounds before smoothing. Serving is as easy as lifting a cupcake—no knife, no mess, just happy little hands.
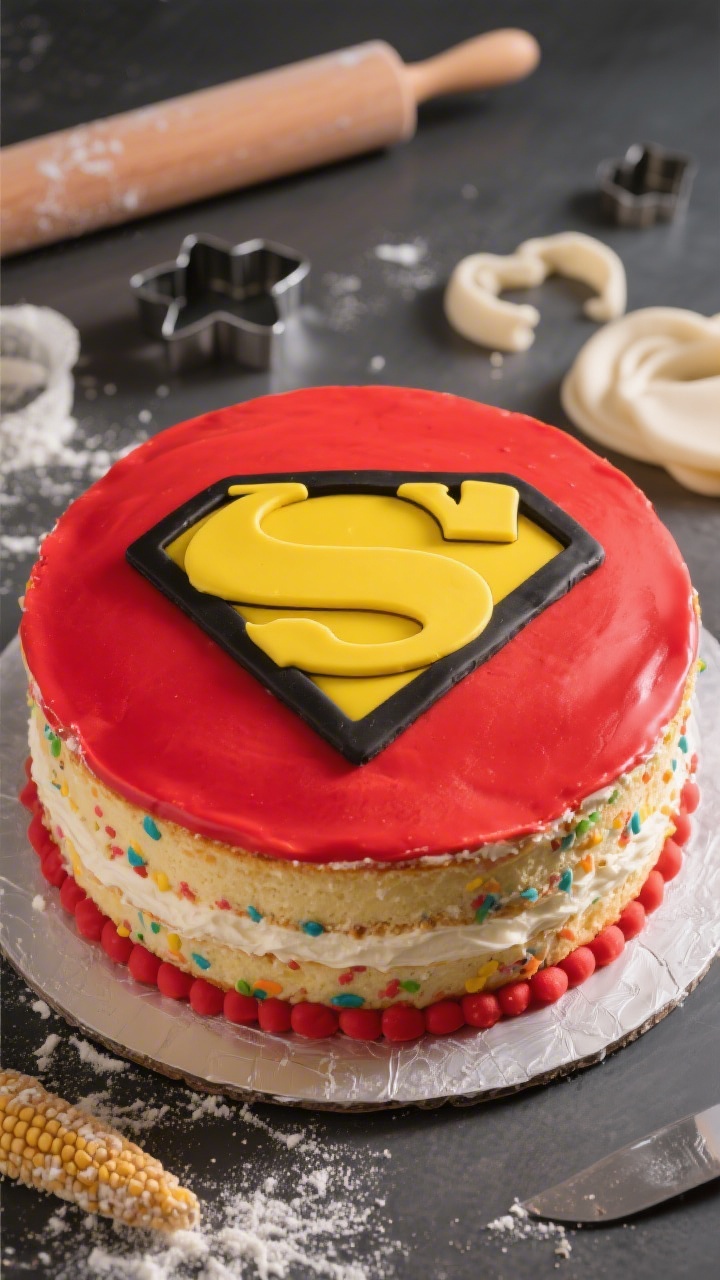
5. Superhero Emblem Layer Cake With Bold Comic Pop
⭐ My secret tip – Ever since we started using this kids baking set, my toddler loves helping in the kitchen and is much more willing to try new foods. ✨ This is the blender we use for protein smoothies with yogurt, peanut butter, and fruit.
Comic-book vibes meet buttery layers in this graphic, punchy emblem cake. The clean lines and bright colors scream “Pow!” but the technique is beginner-friendly thanks to simple fondant cutouts. Great for superhero birthdays, movie nights, or any celebration that needs a little kapow energy.
Ingredients:
- Three 8-inch vanilla or funfetti cake layers
- 4 cups (900 g) vanilla buttercream
- 8 oz (225 g) red fondant
- 6 oz (170 g) yellow fondant
- 4 oz (115 g) black fondant
- Cornstarch (for dusting rolling surface)
- Gel food coloring: blue (for buttercream exterior)
- Simple syrup: 1/4 cup sugar + 1/4 cup water, simmered and cooled (optional for moistening)
- Ruler, pizza cutter or sharp knife, circle/diamond templates
Instructions:
- Layer and crumb coat: Brush cake layers with simple syrup if desired. Stack with buttercream between each. Apply a crumb coat and chill 20 minutes.
- Color and smooth: Tint remaining buttercream a vivid blue. Apply a final smooth coat using a bench scraper for clean sides and a flat top. Chill 10 minutes.
- Roll fondant: Dust your surface with cornstarch. Roll yellow fondant 1/8-inch thick and cut a bold emblem shape (oval, diamond, or shield). Roll red fondant and cut the same shape slightly smaller to layer on top. Roll black fondant thinly for outline strips and a big initial (like a lightning bolt or letter).
- Assemble emblem: Stack red onto yellow with a light brush of water. Add black outlines and the central letter/bolt. Let rest 5 minutes to firm.
- Attach to cake: Lightly brush the back of the emblem with water and center it on the chilled cake. Smooth gently with your hands.
- Comic pop: Roll thin yellow fondant strips and place around the cake base like a “sound wave,” or pipe white buttercream speech bubbles with words like “Zap!” and “Wow!”
Pro move: For razor-sharp edges, chill the cake well before applying fondant pieces. Swap colors to match your kid’s favorite hero, and use a cookie cutter for the emblem shape if freehand cutting stresses you out—trust me, it works beautifully.
How To Nail Cartoon Cake Basics
Before you dive in, a few universal tricks make these cakes look pro with minimal effort:
- Chill between steps: A cold cake won’t shed crumbs or slide around. Ten-minute chills are your best friend.
- Go gel, not liquid: Gel food coloring gives bold color without thinning your buttercream.
- Keep it simple: Big shapes read better than tiny details, especially on busy party tables.
- Use templates: Paper cutouts are basically training wheels for clean silhouettes. No shame—only perfect lines.
Basic Vanilla Buttercream (For All 5 Cakes)
Here’s a quick, reliable buttercream you can scale up or down:
- 1 cup (227 g) unsalted butter, room temp
- 3–3 1/2 cups (360–420 g) powdered sugar, sifted
- 2–3 tbsp heavy cream or milk
- 1 1/2 tsp vanilla extract
- Pinch of salt
Cream butter until pale, 2–3 minutes. Add half the sugar and the salt; beat. Add remaining sugar, vanilla, and cream as needed for a smooth, spreadable consistency. Beat 2 minutes until fluffy. Done.
Coloring Tips For Picture-Perfect Cartoon Shades
- Pastels: Use the tiniest dot of gel color. You can always add more.
- Deep tones: Color your frosting slightly lighter than you want, then let it rest 20 minutes—shades deepen over time.
- Black: Start with chocolate buttercream, then add black gel. It’s way easier than tinting white to black.
Make-Ahead And Storage
- Layers: Bake cakes 1–2 days ahead. Wrap tightly and refrigerate, or freeze up to a month.
- Buttercream: Stores in the fridge 1 week or freezer 1 month. Bring to room temp and rewhip.
- Fondant pieces: Cut decals 1–2 days ahead and store covered at room temp. Avoid the fridge—it can cause sweating.
There you have it—five cartoon cakes that look like you hired a bakery but taste even better because you made them. Pick your favorite character vibe, crank up some party music, and have fun with the frosting. Your kid’s face when they see their cake? That’s the sweetest part of all. Now go make some birthday magic—seriously, you’ve got this.
Printable Recipe Card
Want just the essential recipe details without scrolling through the article? Get our printable recipe card with just the ingredients and instructions.