Kids Construction Cake That Is Perfect for a Truck Birthday Party – Easy, Fun, and Crowd-Pleasing
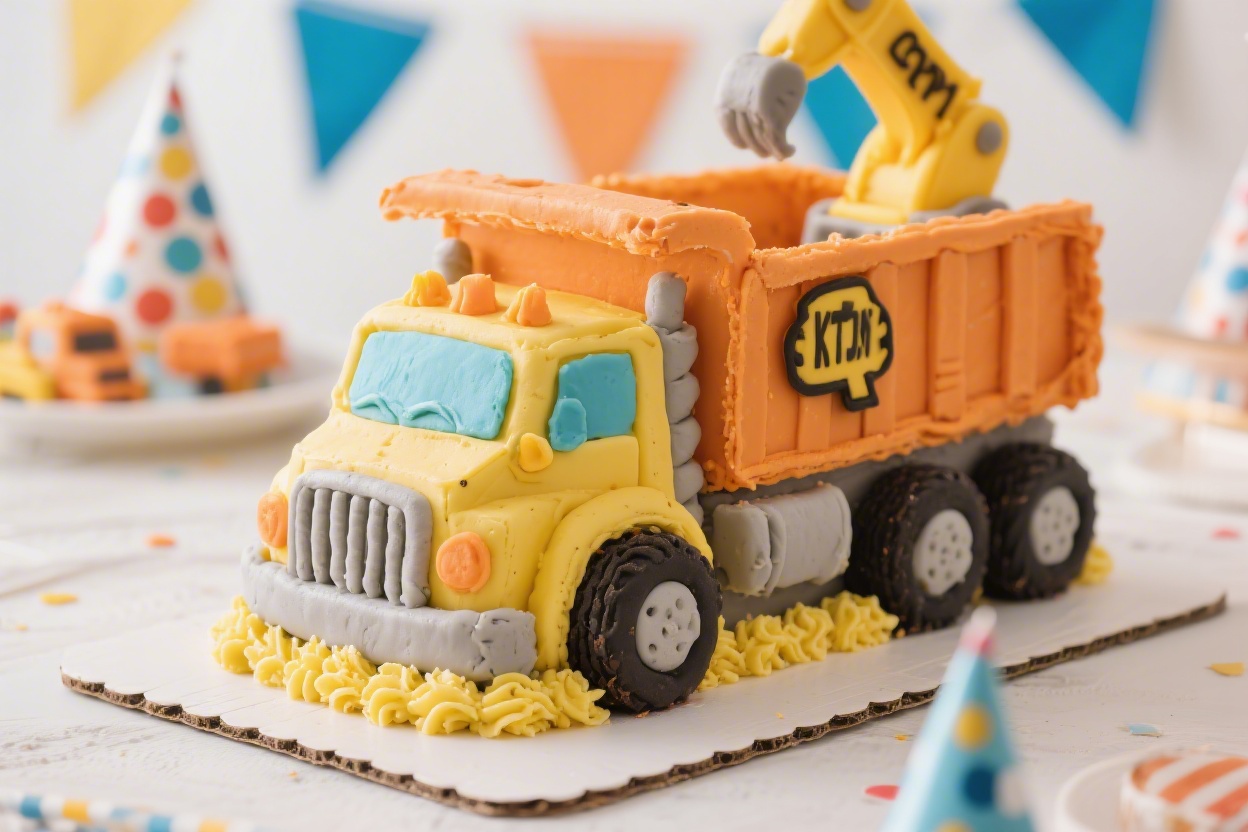
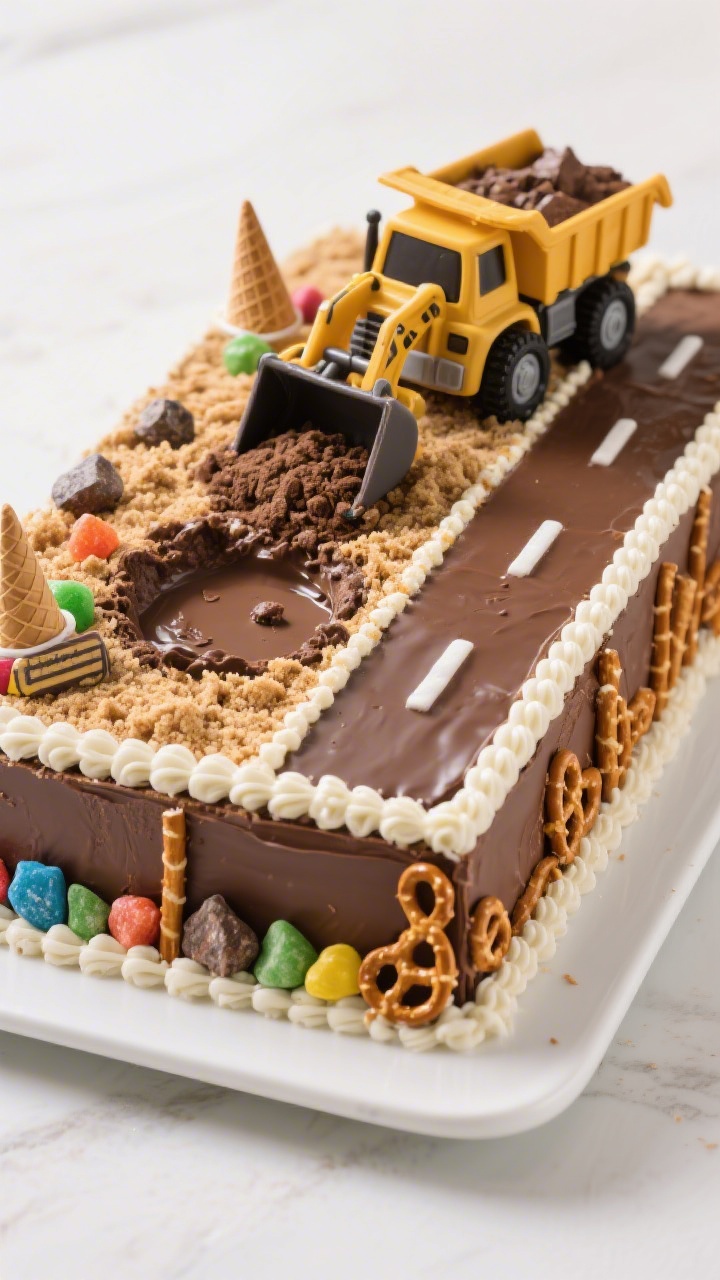
A construction-themed cake is the kind of showstopper that makes kids light up the moment it hits the table. With chocolate “dirt,” cookie “boulders,” and toy trucks doing the heavy lifting, this cake turns dessert into a mini job site. It’s simple to pull together, even if you’re not a pro baker.
You can use boxed mix, homemade cake, or even a store-bought base and still get amazing results. Best of all, the decorating is intentionally imperfect—crumbs, crumbs, and more crumbs are part of the charm.
Kids Construction Cake That Is Perfect for a Truck Birthday Party – Easy, Fun, and Crowd-Pleasing
Ingredients
Method
-
Bake the cake. Prepare the chocolate cake according to package or recipe instructions. Bake in a 9×13 pan for easy decorating or two 8-inch round pans for a tiered look. Let the cake cool completely in the pan on a rack.
-
Level if needed. If the cake domes, gently trim the top to level.
Save the scraps—crumble them for extra “dirt.”
-
Make your dirt mix. Place chocolate sandwich cookies in a plastic bag and crush with a rolling pin until you have fine crumbs and some small chunks. For texture, mix in chocolate chips or candy rocks.
-
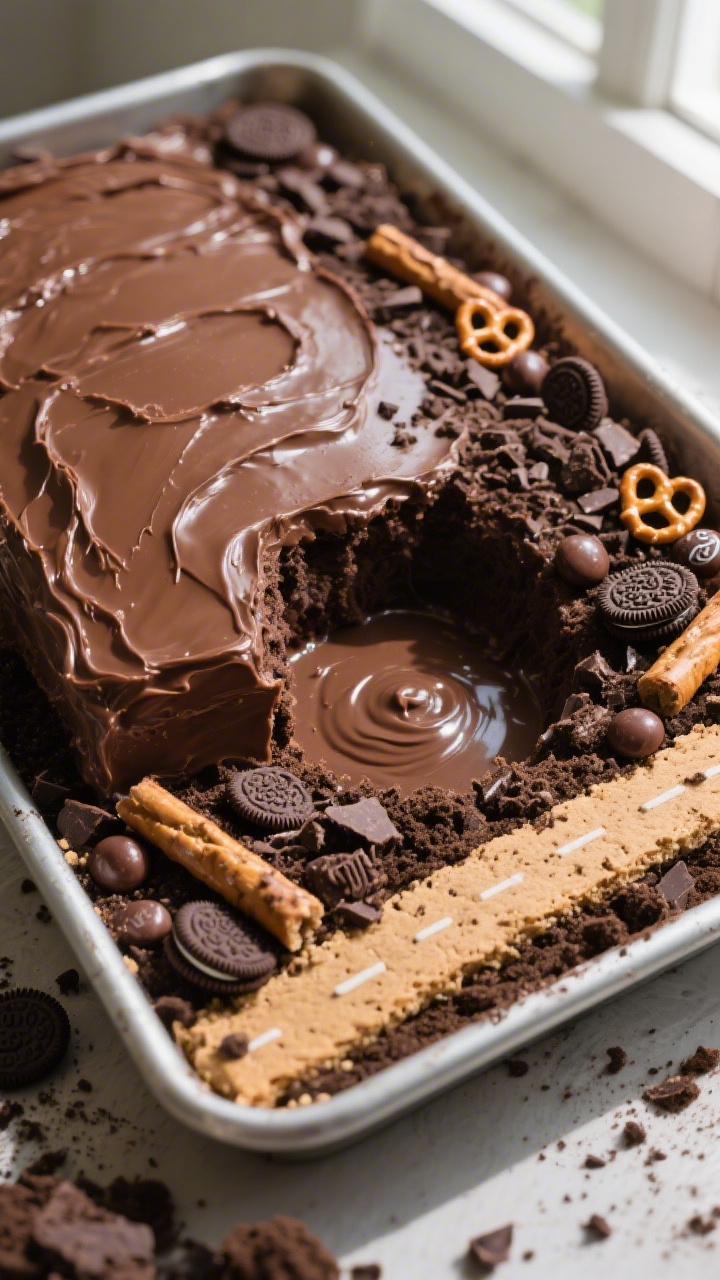
Frost the base. Spread a generous layer of chocolate frosting over the cooled cake. Don’t worry about perfect edges—rough swirls mimic natural terrain.
-
Create a “construction site.” Use a spoon to carve a small shallow trench or a corner section down to the crumb layer.
Fill it with frosting or chocolate pudding to make a “mud pit.”
-
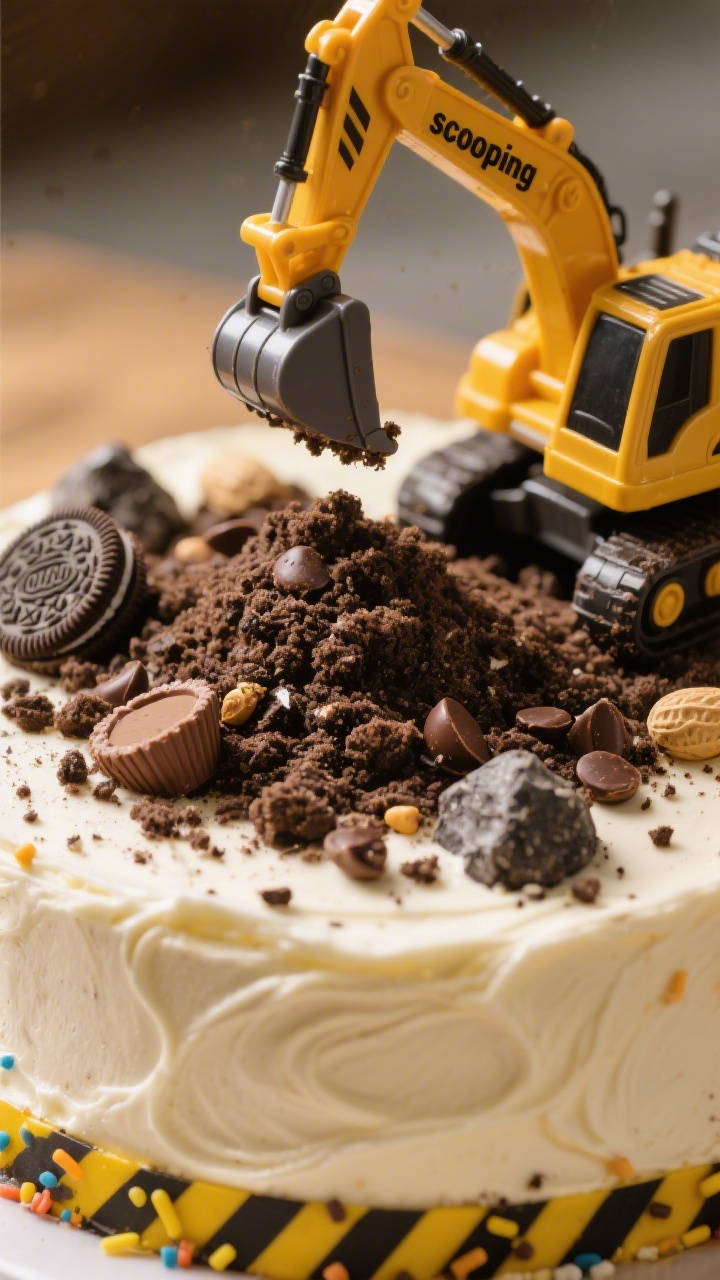
Add dirt and rocks. Sprinkle cookie crumbs liberally over the cake, focusing on the trench and “job areas.” Add clusters of candy rocks, peanut butter cups, and chocolate chunks as boulders.
-
Place the trucks. Position mini trucks so they look like they’re working: an excavator “scooping” crumbs, a dump truck “unloading” candy rocks, and a bulldozer pushing crumbs into a pile.
-
Build roadways. Press a strip of graham cracker crumbs into a path to resemble a dirt road. Line the sides with pretzel sticks as logs or barriers. Add black licorice for hoses or cables.
-
Add caution details. Use yellow and black sprinkles along an edge for hazard stripes.
If you have small cone candies or paper cones on toothpicks, place them near the trucks.
-
Clean up edges. Gently tap off loose crumbs around the pan rim. If you want a cleaner border, pipe a quick frosting bead or press chocolate chips along the edge.
-
Chill briefly. Refrigerate for 20–30 minutes to help set the frosting and keep the “dirt” in place before transporting or serving.
-
Serve and enjoy. Remove toys before slicing for very small children, or supervise as they point out their favorite trucks and pieces.
Why This Recipe Works
⭐ My secret tip – Ever since we started using this kids baking set, my toddler loves helping in the kitchen and is much more willing to try new foods. ✨ This is the blender we use for protein smoothies with yogurt, peanut butter, and fruit.
Disclosure: As Amazon Associates, we earn from qualifying purchases at no extra cost to you.
- Effortless decorating: The “construction zone” theme embraces rough textures, so you don’t need smooth frosting or fancy piping skills.
- Kid-approved flavors: Chocolate cake, chocolate frosting, cookie crumbles, and candy rocks are a guaranteed hit.
- Flexible build: Make it from scratch, use a boxed mix, or buy a plain frosted cake and add the toppings and toys.
- Interactive display: Mini toy trucks make the cake come alive. Kids love identifying diggers, dump trucks, and loaders.
- Customizable size: Works as a 9×13 sheet cake, two 8-inch rounds, or cupcakes for individual “construction sites.”
Shopping List
- Cake Base: 1 boxed chocolate cake mix (plus ingredients on the box) or your favorite homemade chocolate cake recipe
- Frosting: 2–3 cups chocolate frosting (store-bought or homemade)
- “Dirt” and “Rocks”: 1 sleeve chocolate sandwich cookies (crushed), chocolate wafer cookies or Oreos for extra crumbs, chocolate chips or chunks, chocolate-covered almonds or candy-coated chocolate “rocks”
- “Sand” option: Graham crackers or vanilla wafers (crushed), if you want a lighter dirt-sand mix
- Extras: Mini peanut butter cups (boulders), pretzel sticks (logs), black licorice strings (hoses), yellow and black sprinkles (hazard stripes), small construction cone candies or paper cones
- Toys: Clean mini construction trucks (dump truck, excavator, bulldozer).
Make sure they’re food-safe or thoroughly washed.
- Optional filling: Chocolate pudding or ganache for a “mud pit”
- Tools: 9×13 pan or two 8-inch round pans, offset spatula, mixing bowls, parchment paper, plastic bag and rolling pin (for crushing cookies)
Step-by-Step Instructions
⭐ My secret tip – Ever since we started using this kids baking set, my toddler loves helping in the kitchen and is much more willing to try new foods. ✨ This is the blender we use for protein smoothies with yogurt, peanut butter, and fruit.
- Bake the cake. Prepare the chocolate cake according to package or recipe instructions. Bake in a 9×13 pan for easy decorating or two 8-inch round pans for a tiered look. Let the cake cool completely in the pan on a rack.
- Level if needed. If the cake domes, gently trim the top to level.
Save the scraps—crumble them for extra “dirt.”
- Make your dirt mix. Place chocolate sandwich cookies in a plastic bag and crush with a rolling pin until you have fine crumbs and some small chunks. For texture, mix in chocolate chips or candy rocks.
- Frost the base. Spread a generous layer of chocolate frosting over the cooled cake. Don’t worry about perfect edges—rough swirls mimic natural terrain.
- Create a “construction site.” Use a spoon to carve a small shallow trench or a corner section down to the crumb layer.
Fill it with frosting or chocolate pudding to make a “mud pit.”
- Add dirt and rocks. Sprinkle cookie crumbs liberally over the cake, focusing on the trench and “job areas.” Add clusters of candy rocks, peanut butter cups, and chocolate chunks as boulders.
- Place the trucks. Position mini trucks so they look like they’re working: an excavator “scooping” crumbs, a dump truck “unloading” candy rocks, and a bulldozer pushing crumbs into a pile.
- Build roadways. Press a strip of graham cracker crumbs into a path to resemble a dirt road. Line the sides with pretzel sticks as logs or barriers. Add black licorice for hoses or cables.
- Add caution details. Use yellow and black sprinkles along an edge for hazard stripes.
If you have small cone candies or paper cones on toothpicks, place them near the trucks.
- Clean up edges. Gently tap off loose crumbs around the pan rim. If you want a cleaner border, pipe a quick frosting bead or press chocolate chips along the edge.
- Chill briefly. Refrigerate for 20–30 minutes to help set the frosting and keep the “dirt” in place before transporting or serving.
- Serve and enjoy. Remove toys before slicing for very small children, or supervise as they point out their favorite trucks and pieces.
Storage Instructions
- Short term: Cover and refrigerate for up to 3 days. Bring to room temperature for 20–30 minutes before serving for the best texture.
- Without toys: Remove trucks and any paper decorations before storing to avoid grease or color transfer.
- Freezing: You can freeze the unfrosted cake, tightly wrapped, for up to 2 months.
Thaw overnight in the fridge, then decorate the day of the party.
- Leftovers: Store slices in airtight containers. Keep crunchy add-ins like candy rocks separate if you prefer them crisp.
⭐ My secret tip – Ever since we started using this kids baking set, my toddler loves helping in the kitchen and is much more willing to try new foods. ✨ This is the blender we use for protein smoothies with yogurt, peanut butter, and fruit.
Health Benefits
- Portion control is easy: A 9×13 sheet cake cuts neatly into kid-friendly squares, which helps manage sugar intake at parties.
- Add fruit on the side: Serve with strawberries or orange slices for a fresh balance and a pop of color.
- Allergy-friendly swaps: Use dairy-free frosting, egg substitutes, or gluten-free cake mix to meet guests’ needs without sacrificing fun.
- Dark chocolate option: Choosing a darker chocolate frosting or cacao-heavy cake reduces overall sweetness and adds antioxidants.
What Not to Do
- Don’t decorate a warm cake. Warm cake melts frosting and turns crumbs into a paste that slides off.
- Don’t skip washing toys. Even new toy trucks need a wash. Use mild soap and water, then dry thoroughly before placing them on the cake.
- Don’t overload with heavy toppings. Too many candy “boulders” can sink into the cake.
Cluster them strategically.
- Don’t use strong dyes without a barrier. Highly pigmented decorations can bleed onto frosting. If using paper cones or signs, place a small piece of parchment underneath.
- Don’t transport unchilled. A quick chill helps everything stay in place, especially on warm days.
Variations You Can Try
- Vanilla quarry: Use vanilla cake with half graham “sand” and half chocolate “dirt” for a two-tone job site.
- Lava dig site: Add a streak of red and orange buttercream under cookie crumb “rubble” for a volcano effect. Keep it mild in flavor but bold in color.
- Cupcake fleet: Bake cupcakes, frost with chocolate, dip tops in cookie crumbs, and top each with a tiny candy rock or a mini cone.
Arrange around a small central “mud pit” cake.
- Two-tier showstopper: Stack two 8-inch rounds. Carve a small wedge from the top tier and position a truck as if it’s hauling from the cut-out.
- No-bake base: Use a brownie slab or ice cream cake if your birthday kid prefers those. Decorate the same way with crumbs and trucks.
- Personalized signs: Make mini “Crew at Work” or “Caution: Age 4” signs with cardstock and toothpicks.
FAQ
Can I make this cake the day before?
Yes.
Bake and frost the cake, add the dirt layer, and refrigerate overnight. Add the trucks and any paper or sprinkle details a few hours before the party to keep everything crisp.
What toy size works best?
Miniature trucks in the 2–4 inch range look proportional and won’t crush the cake. Larger toys can work on a 9×13 cake if you use only one or two.
How do I keep the crumbs from getting everywhere?
Press the cookie crumbs lightly into the frosting so they adhere.
A brief chill helps set them. Keep a pastry brush or paper towel handy to clean the pan edges.
Can I make it nut-free?
Absolutely. Skip peanut butter cups and check labels on candy rocks and cookies.
Use plain chocolate chips or chunks instead.
What if I don’t have an offset spatula?
A butter knife or the back of a spoon works fine. Warm it under hot water, dry it, and smooth the frosting for easy spreading.
How do I cut clean slices?
Use a sharp knife warmed under hot water and wiped dry between cuts. Lift slices with a wide spatula to keep the dirt layer intact.
Can I use a different flavor cake?
Yes.
Yellow, vanilla, or even red velvet works. Just keep the chocolate frosting and crumb topping so the “construction” look reads clearly.
How many does a 9×13 cake serve?
It typically serves 15–20, depending on slice size. For bigger crowds, make two cakes or add a cupcake fleet.
Is there a way to reduce sugar?
Use a less-sweet frosting (like whipped or Swiss meringue), opt for dark chocolate, and limit candy add-ins.
Keep portions smaller for little kids.
How do I make a mud pit that won’t leak?
Scoop a shallow well, leave a thin cake layer at the bottom, and fill with thick frosting or set chocolate pudding. Don’t overfill, and chill to firm it up.
In Conclusion
This Kids Construction Cake is playful, low-stress, and built to impress. With chocolatey “dirt,” crunchy “rocks,” and hardworking toy trucks, it turns a simple cake into a themed centerpiece.
Keep the process easy: bake, frost, crumble, and stage your scene. The charm is in the mess, the textures, and the fun details. When the birthday star sees their very own job site, you’ll know it was worth every crumb.
Printable Recipe Card
Want just the essential recipe details without scrolling through the article? Get our printable recipe card with just the ingredients and instructions.