Spiderman Birthday Cake for Kids That Is Easy to Make at Home – A Fun, No-Stress Recipe
Planning a superhero birthday? This simple Spiderman cake brings big excitement without the bakery price tag. You don’t need fancy tools or pro skills—just a few basics and a steady hand.
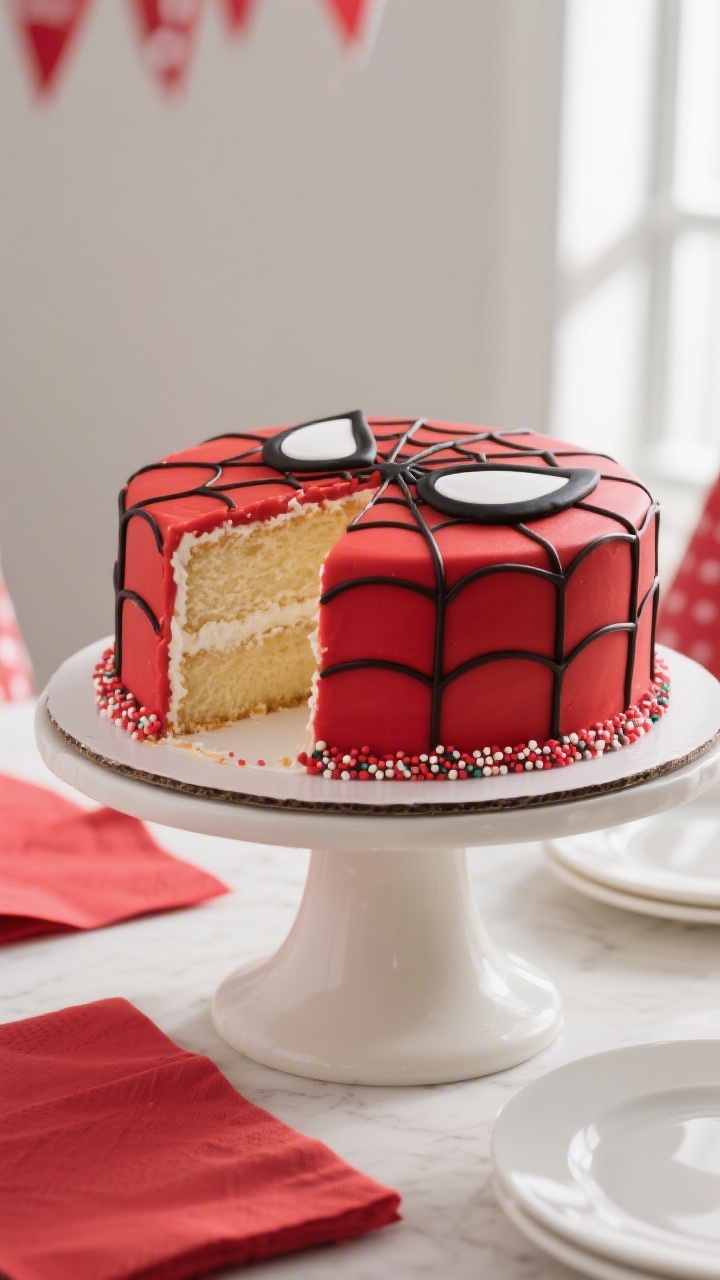
The design is kid-approved, bright, and clean. Best of all, you can bake it the day before and decorate in under an hour. Let’s make a cake that gets real wow reactions when you bring it to the table.
Spiderman Birthday Cake for Kids That Is Easy to Make at Home - A Fun, No-Stress Recipe
Ingredients
Method
-
Prep your cake layers. Level the tops with a serrated knife if needed.
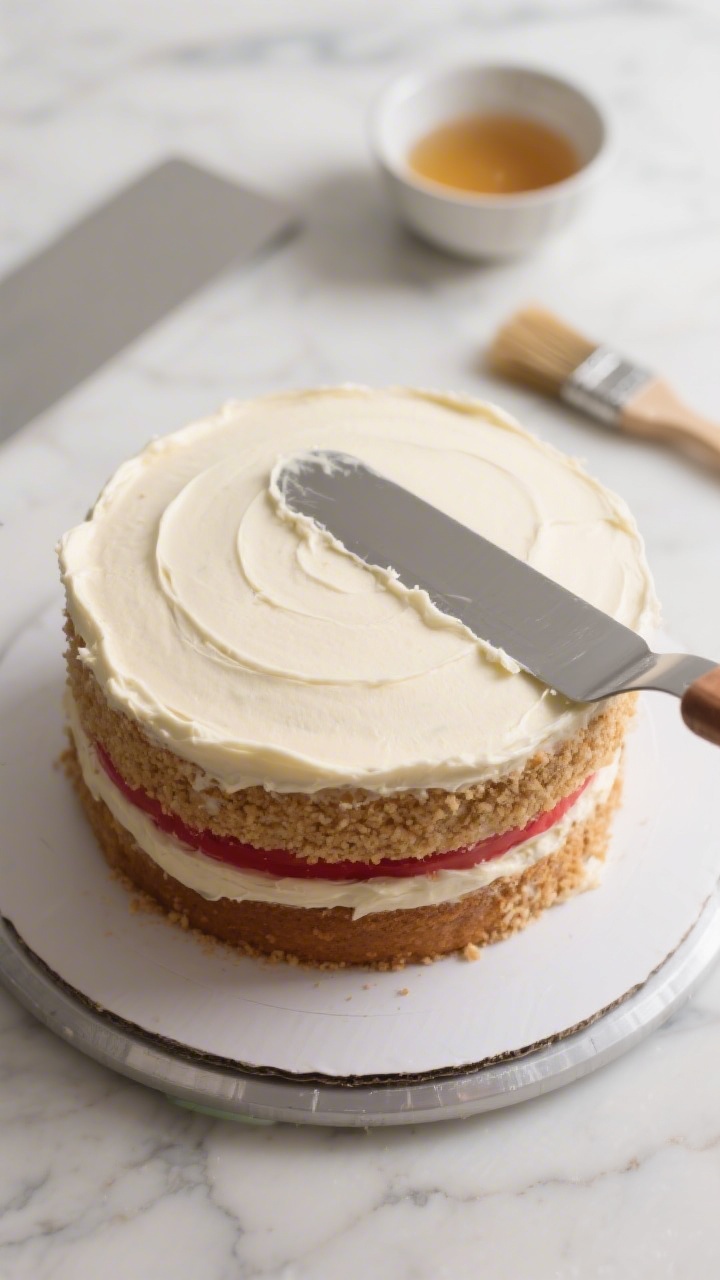
If you like extra moisture, lightly brush the tops with simple syrup. Place one layer on a cake board or a plate.
-
Make the buttercream. Beat butter until creamy, 2 minutes. Add powdered sugar in batches, mixing on low.
Add vanilla, salt, and milk a little at a time until smooth and spreadable. You want it soft but not runny.
-
Fill and stack. Spread a generous layer of buttercream on the first cake layer. Top with the second layer.
Press gently to even it out.
-
Crumb coat. Spread a thin layer of buttercream over the entire cake to lock in crumbs. Chill in the fridge 20–30 minutes until set. This step keeps your final coat neat.
-
Tint the frosting. Reserve about 1/4 cup white frosting for the eyes if you’re not using candy melts.
Tint the rest bright red using gel coloring. Add color gradually and mix well. Use no-taste red to avoid bitterness.
-
Final red coat. Frost the cake with the red buttercream.
Smooth with a spatula or bench scraper. Don’t worry if it’s not perfect—Spiderman’s web will cover small flaws. Chill 10–15 minutes.
-
Make the eyes. Option A (buttercream): Pipe two large almond-shaped eyes with white frosting.
Smooth with a clean spatula.
-
Option B (candy melts): Melt, pipe eye shapes onto wax paper using a template underneath, let set, then place on cake.
-
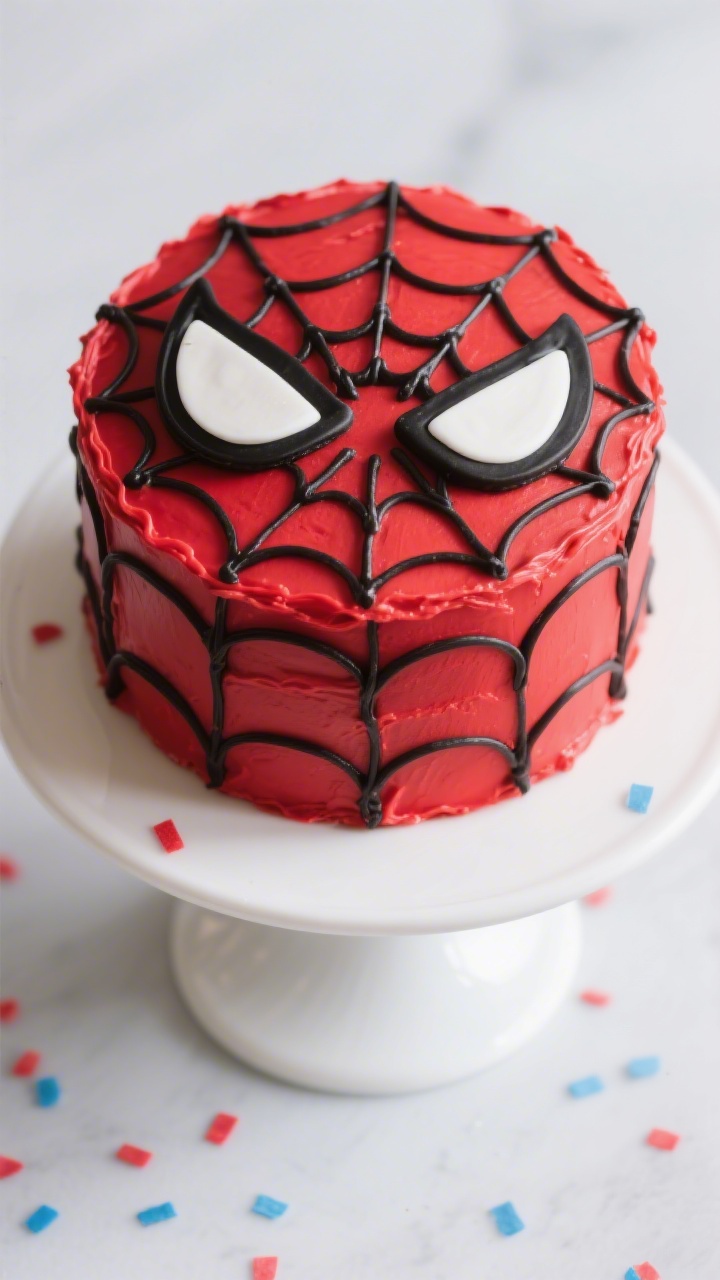
Outline the eyes. Tint a small amount of frosting black. Fit a piping bag with a small round tip. Pipe a bold black line around each white eye.
Clean edges make the face pop.
-
Draw the web. Start by piping a vertical line down the center, then a horizontal line across the middle, forming a cross. Add two diagonal lines to make a “spoke” pattern—like a wheel. Next, connect the spokes with curved lines, working from the center outward.
Keep the curves gentle and evenly spaced.
-
Clean up. Wipe any smudges with a clean, slightly warm spatula or a toothpick. Chill the cake 10 minutes to set the lines.
-
Finish and serve. Add sprinkles around the base if you like. Place on a stand and get ready for big smiles.
Disclosure: As Amazon Associates, we earn from qualifying purchases at no extra cost to you.
What Makes This Recipe So Good
⭐ My secret tip – Ever since we started using this kids baking set, my toddler loves helping in the kitchen and is much more willing to try new foods. ✨ This is the blender we use for protein smoothies with yogurt, peanut butter, and fruit.
- Beginner-friendly: Uses a standard round cake and easy buttercream—no special pans or fondant needed.
- Big visual impact: Bold red, sharp web lines, and those classic white eyes look like the real deal.
- Flexible flavors: Vanilla, chocolate, or marble cake—choose what your kid loves.
- Make-ahead friendly: Bake, cool, and freeze the layers to decorate later without stress.
- Budget-smart: Grocery-store ingredients, minimal extras, and you’ll still get a bakery-level look.
What You’ll Need
- For the Cake:
- 2 round 8-inch cake layers (homemade or boxed mix), fully cooled
- 1/2 cup simple syrup (optional, for brushing to keep moist)
- For the Buttercream:
- 1 cup unsalted butter, softened
- 3.5–4 cups powdered sugar
- 2–3 tablespoons milk or heavy cream
- 2 teaspoons vanilla extract
- Pinch of salt
- For Decorating:
- Red gel food coloring (no-taste red is best)
- Black gel food coloring
- White candy melts or white buttercream (for eyes)
- 2 piping bags
- Small round piping tip (like #3 or #4) for web lines
- Medium round or star tip for red frosting coverage
- Offset spatula or butter knife
- Bench scraper or straight edge (optional but helpful)
- Printed Spiderman eye template (optional)
- Wax paper and toothpicks (optional for tracing)
Step-by-Step Instructions
⭐ My secret tip – Ever since we started using this kids baking set, my toddler loves helping in the kitchen and is much more willing to try new foods. ✨ This is the blender we use for protein smoothies with yogurt, peanut butter, and fruit.
- Prep your cake layers. Level the tops with a serrated knife if needed.If you like extra moisture, lightly brush the tops with simple syrup. Place one layer on a cake board or a plate.
- Make the buttercream. Beat butter until creamy, 2 minutes. Add powdered sugar in batches, mixing on low.Add vanilla, salt, and milk a little at a time until smooth and spreadable. You want it soft but not runny.
- Fill and stack. Spread a generous layer of buttercream on the first cake layer. Top with the second layer.Press gently to even it out.
- Crumb coat. Spread a thin layer of buttercream over the entire cake to lock in crumbs. Chill in the fridge 20–30 minutes until set. This step keeps your final coat neat.
- Tint the frosting. Reserve about 1/4 cup white frosting for the eyes if you’re not using candy melts.Tint the rest bright red using gel coloring. Add color gradually and mix well. Use no-taste red to avoid bitterness.
- Final red coat. Frost the cake with the red buttercream.Smooth with a spatula or bench scraper. Don’t worry if it’s not perfect—Spiderman’s web will cover small flaws. Chill 10–15 minutes.
- Make the eyes.
- Option A (buttercream): Pipe two large almond-shaped eyes with white frosting.Smooth with a clean spatula.
- Option B (candy melts): Melt, pipe eye shapes onto wax paper using a template underneath, let set, then place on cake.
- Outline the eyes. Tint a small amount of frosting black. Fit a piping bag with a small round tip. Pipe a bold black line around each white eye.Clean edges make the face pop.
- Draw the web. Start by piping a vertical line down the center, then a horizontal line across the middle, forming a cross. Add two diagonal lines to make a “spoke” pattern—like a wheel. Next, connect the spokes with curved lines, working from the center outward.Keep the curves gentle and evenly spaced.
- Clean up. Wipe any smudges with a clean, slightly warm spatula or a toothpick. Chill the cake 10 minutes to set the lines.
- Finish and serve. Add sprinkles around the base if you like. Place on a stand and get ready for big smiles.
Keeping It Fresh
- Room temperature: The frosted cake holds well for up to 1 day at cool room temp.Keep it covered with a cake dome or large bowl to prevent drying.
- Refrigerator: Store up to 3–4 days, covered. Let it sit out 30–45 minutes before serving so the buttercream softens.
- Freezer: Wrap unfrosted layers tightly in plastic and foil. Freeze up to 2 months.Thaw wrapped at room temp, then frost.
- Transport tip: Chill the cake until the frosting is firm. Box it, then keep it flat in the car.
⭐ My secret tip – Ever since we started using this kids baking set, my toddler loves helping in the kitchen and is much more willing to try new foods. ✨ This is the blender we use for protein smoothies with yogurt, peanut butter, and fruit.
Why This is Good for You
- Home ingredients you can trust: Real butter, simple sugar, and vanilla—no mystery flavors.
- Built-in portion control: A homemade cake is easy to cut into small slices for little kids.
- Allergy-friendly options: You can swap flour, milk, or butter to fit dietary needs.
- Family fun: Decorating together is creative, hands-on time that kids remember.
What Not to Do
- Don’t frost a warm cake. Heat melts buttercream and makes crumbs everywhere.
- Don’t use liquid food coloring for red. It can water down frosting and never gets truly bright. Gel is best.
- Don’t skip the crumb coat. It keeps your final layer smooth and tidy.
- Don’t pipe web lines with a large tip. Thin lines look cleaner and more like a real web.
- Don’t rush the eyes. Well-shaped eyes sell the whole look.Sketch lightly with a toothpick first if needed.
Variations You Can Try
- Chocolate web: Use melted dark chocolate in a piping bag for the lines. It sets firm and shiny.
- Blue background: Make a blue cake with red webbing for a twist on the classic look.
- Cupcake version: Frost cupcakes red, pipe mini webs, and add small white eyes for easy serving.
- Sheet cake: Bake a 9×13 cake and decorate the same way—great for larger parties.
- Allergy-friendly: Use dairy-free butter and milk, or a gluten-free cake mix. Gel colors are typically gluten-free, but always check labels.
FAQ
How do I get a bright red frosting without a bad taste?
Use a no-taste red gel coloring and add it slowly.
Make the frosting a shade darker than you want, then let it rest 20–30 minutes—the color deepens as it sits.
Can I make the cake the day before?
Yes. Bake and cool the layers, then wrap and refrigerate or freeze. You can also frost it fully a day ahead and chill.
Bring to room temp before serving.
What if I don’t have piping tips?
Snip a small hole in a disposable piping bag or a zip-top bag. Keep the hole tiny for neat web lines. For smooth eyes, cut a slightly larger opening.
How do I fix messy lines?
Chill the cake 10 minutes to firm up the frosting.
Gently lift stray lines with a toothpick, or smooth with a warm, clean spatula. Pipe fresh lines over if needed.
Can I use store-bought frosting?
You can. For best results, beat it with a little powdered sugar to make it stiffer for clean web lines.
Still use gel colors for vibrant red and black.
What flavors work best?
Chocolate, vanilla, funfetti, or marble are all great. Choose something sturdy enough to stack, like a standard butter cake or box mix prepared as directed.
How do I cut clean slices?
Use a warm, dry knife. Wipe between cuts.
This keeps the red frosting from smearing across each slice.
Final Thoughts
This Spiderman birthday cake is simple, bold, and guaranteed to thrill your little superhero. With basic tools, a clear plan, and a few smart shortcuts, you’ll create a cake that looks store-bought but tastes like home. Keep the steps relaxed, chill between stages, and focus on those eyes and web lines.
You’ve got this—and the birthday photos will prove it.
Printable Recipe Card
Want just the essential recipe details without scrolling through the article? Get our printable recipe card with just the ingredients and instructions.