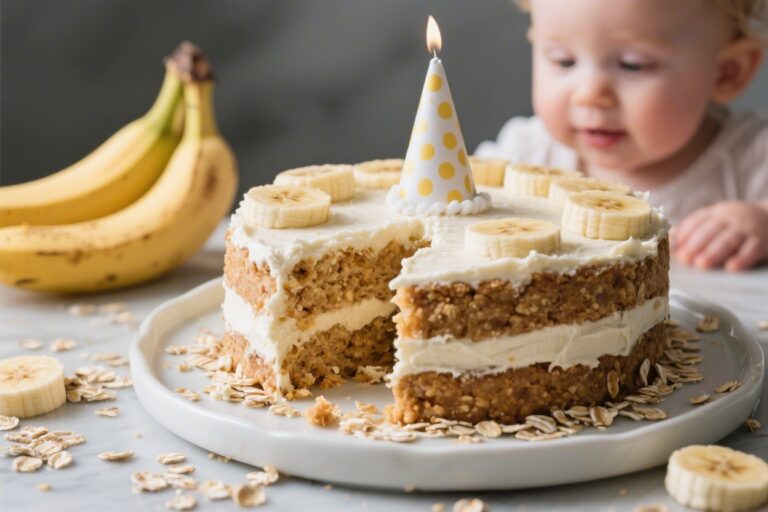
5 Kids Birthday Cake Ideas That Are Creative and Simple You’ll Want to Steal
Planning a kid’s birthday party? These cakes are your new secret weapons. They’re colorful, playful, and big on wow-factor without demanding pastry-chef skills. We’re talking easy techniques, minimal mess, and maximum cheers when you bring them to the table.
Each cake is a crowd-pleaser with smart shortcuts and flexible flavors. You’ll find options for chocolate lovers, sprinkle superfans, fruit-first families, and those who just want something fun and foolproof. Ready to be the hero of the party?
Disclosure: As Amazon Associates, we earn from qualifying purchases at no extra cost to you.
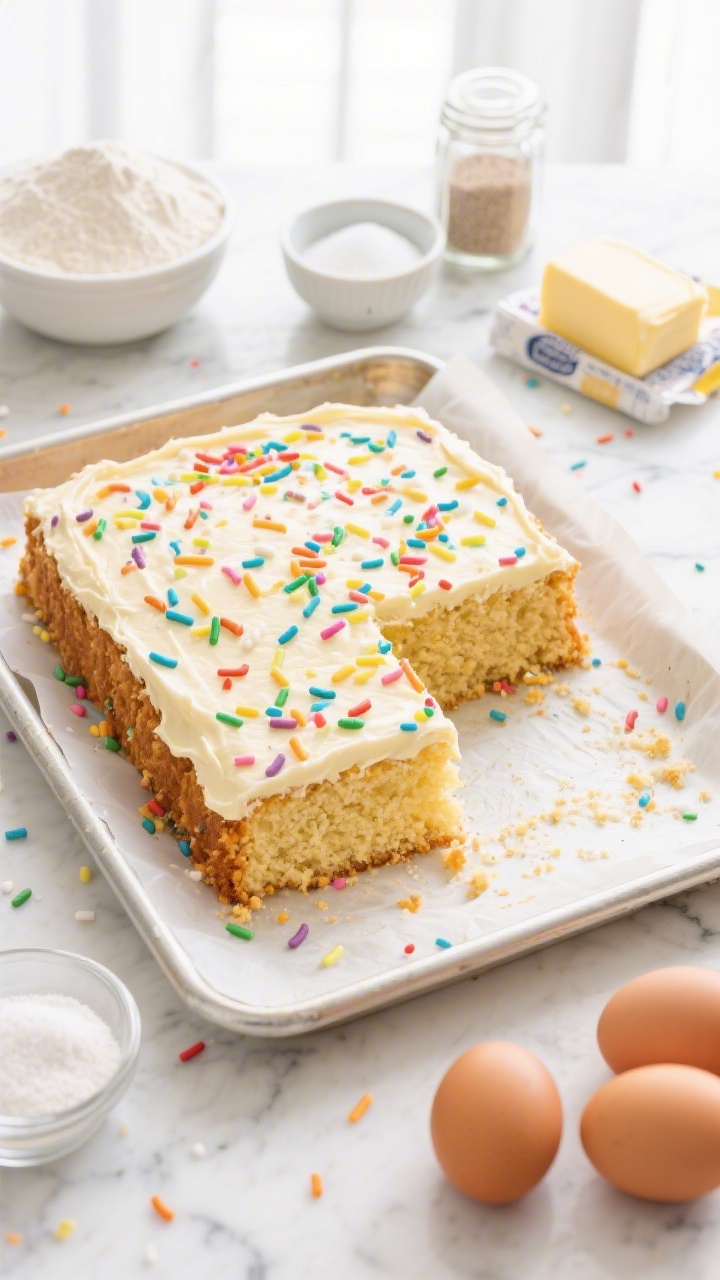
1. Confetti Explosion Sheet Cake That Never Fails
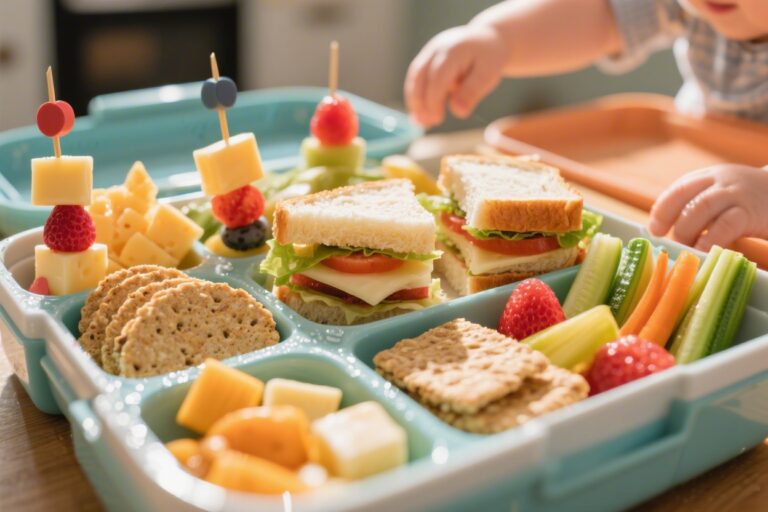
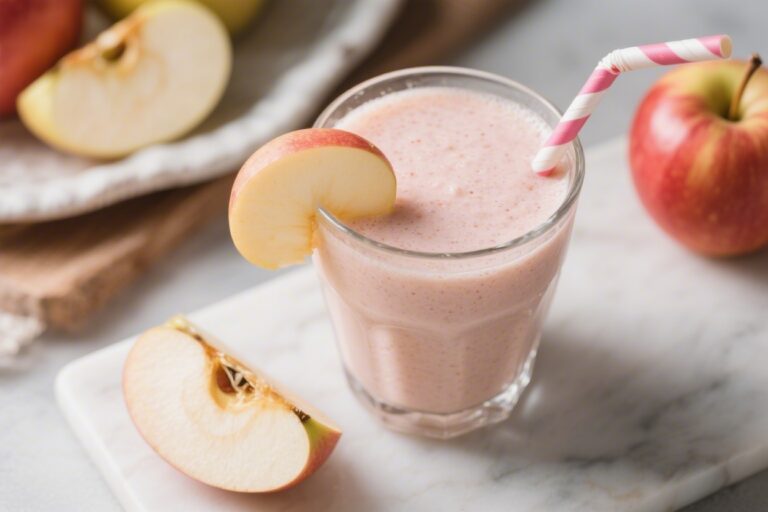
⭐ My secret tip – Ever since we started using this kids baking set, my toddler loves helping in the kitchen and is much more willing to try new foods. ✨ This is the blender we use for protein smoothies with yogurt, peanut butter, and fruit.
This is the ultimate low-stress party cake: a fluffy vanilla sheet cake loaded with rainbow sprinkles and topped with a silky buttercream. It bakes in one pan, transports easily, and slices cleanly for a big crowd. It’s classic, cheerful, and yes—kids will ask for seconds.
Ingredients:
- 2 1/2 cups all-purpose flour
- 2 1/2 tsp baking powder
- 1/2 tsp baking soda
- 1/2 tsp fine salt
- 1 3/4 cups granulated sugar
- 3/4 cup unsalted butter, softened
- 3 large eggs, room temperature
- 1 cup whole milk, room temperature
- 1/2 cup sour cream, room temperature
- 2 tsp vanilla extract
- 1/2 cup rainbow sprinkles (jimmies style, not nonpareils)
Vanilla Buttercream:
- 1 cup unsalted butter, softened
- 3 1/2 cups powdered sugar, sifted
- 2–3 tbsp heavy cream or milk
- 2 tsp vanilla extract
- Pinch of salt
- Extra rainbow sprinkles for topping
Instructions:
- Preheat the oven to 350°F (175°C). Grease and line a 9×13-inch pan with parchment, leaving overhang for easy lifting.
- Whisk flour, baking powder, baking soda, and salt in a bowl.
- In a large bowl, beat butter and sugar until light and fluffy, 2–3 minutes. Add eggs one at a time, mixing well. Stir in vanilla.
- Mix milk and sour cream together. Add dry ingredients to the butter mixture in two additions, alternating with the milk mixture. Stir just until combined. Fold in sprinkles gently.
- Spread batter into the pan and smooth the top. Bake 28–34 minutes, until a toothpick comes out clean. Cool completely.
- For the buttercream, beat butter until creamy. Add powdered sugar in two additions with the salt, then beat in vanilla and 2 tbsp cream. Add more cream if needed for a fluffy, spreadable frosting.
- Frost the cooled cake generously. Shower with extra sprinkles. Slice and serve.
Pro tip: Use jimmies instead of nonpareils to avoid color bleed. Want a theme? Add colored sprinkles to match party decor or line up candy on top to spell the birthday kid’s name. Traveling to the party? Keep the cake in the fridge for 30 minutes to set the frosting before you go.
2. Build-Your-Own Ice Cream Sundae Cake (No-Churn, No-Stress)
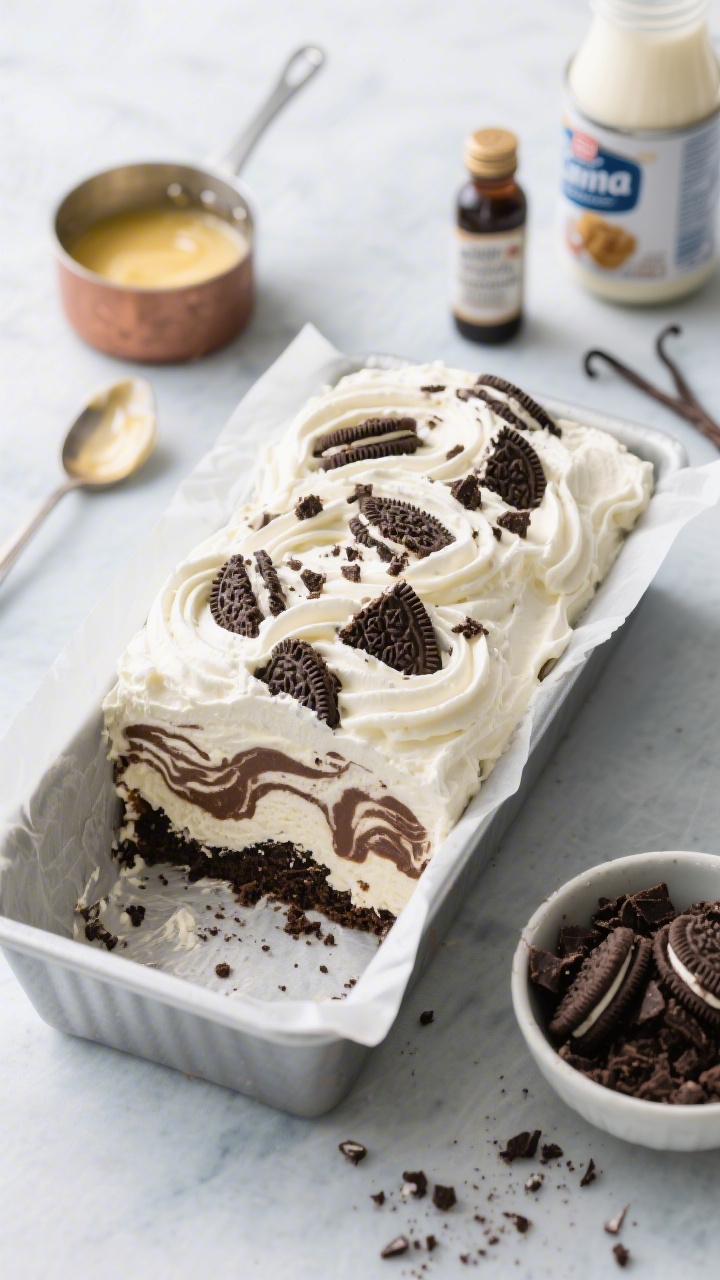
⭐ My secret tip – Ever since we started using this kids baking set, my toddler loves helping in the kitchen and is much more willing to try new foods. ✨ This is the blender we use for protein smoothies with yogurt, peanut butter, and fruit.
Ice cream cake without the drama? Absolutely. This version layers cookie crumbs, no-churn ice cream, and a quick chocolate shell. It looks impressive and you can customize flavors to your kiddo’s favorites—plus it’s a brilliant make-ahead dessert.
Ingredients:
- 2 cups heavy cream, cold
- 1 (14 oz) can sweetened condensed milk
- 2 tsp vanilla extract
- 1/4 tsp fine salt
- 2 cups chocolate sandwich cookies, crushed (about 20 cookies)
- 3 tbsp unsalted butter, melted
- 1 cup chocolate chips
- 2 tbsp coconut oil (refined, neutral)
- Assorted toppings: mini marshmallows, chopped nuts, sprinkles, cherries, crushed cones
Instructions:
- Line an 8- or 9-inch springform pan with parchment on the bottom. Mix crushed cookies with melted butter. Press firmly into the pan to make a base. Freeze 10 minutes.
- In a large bowl, whip heavy cream to stiff peaks.
- In another bowl, whisk condensed milk, vanilla, and salt. Gently fold the whipped cream into the condensed milk in two additions until smooth—this is your no-churn ice cream.
- Spread half the ice cream over the crust. Freeze 20 minutes.
- Melt chocolate chips and coconut oil together until smooth (microwave in 20–30 second bursts). Cool 2–3 minutes, then drizzle half over the ice cream to create a soft shell.
- Add the remaining ice cream. Smooth the top. Freeze at least 6 hours, preferably overnight.
- Before serving, release from the pan. Drizzle remaining chocolate shell and add toppings like a sundae bar—let kids sprinkle their own fun.
Serving idea: Slice with a warm knife for clean edges. For flavors, swap vanilla for strawberry extract, fold in crushed cookies or chopped candy, or do a Neapolitan vibe by splitting the base and swirling strawberry jam and cocoa into separate layers. Seriously, this one disappears fast.
3. Chocolate Dinosaur Dig Cake With Cookie Crumbs
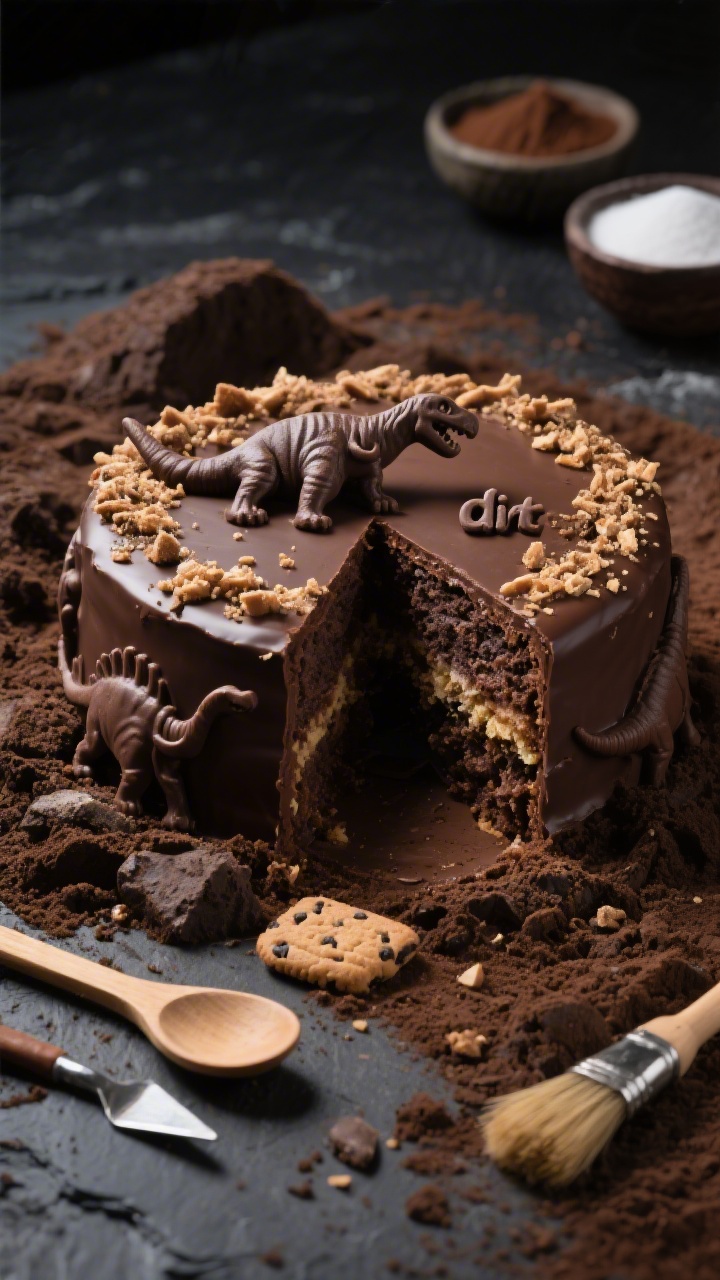
⭐ My secret tip – Ever since we started using this kids baking set, my toddler loves helping in the kitchen and is much more willing to try new foods. ✨ This is the blender we use for protein smoothies with yogurt, peanut butter, and fruit.
Got a kid obsessed with dinos, trucks, or anything that digs? This cake turns dessert into an edible excavation site. It’s a rich chocolate cake topped with whipped chocolate frosting, cookie “dirt,” and toy dinos for instant birthday magic.
Ingredients:
- 1 3/4 cups all-purpose flour
- 3/4 cup unsweetened cocoa powder
- 1 1/2 tsp baking powder
- 1 1/2 tsp baking soda
- 1 tsp fine salt
- 2 cups granulated sugar
- 2 large eggs, room temperature
- 1 cup buttermilk, room temperature
- 1/2 cup neutral oil (canola or vegetable)
- 2 tsp vanilla extract
- 1 cup hot coffee or hot water
Whipped Chocolate Frosting:
- 3/4 cup unsalted butter, softened
- 2 1/2 cups powdered sugar, sifted
- 1/2 cup unsweetened cocoa powder
- 1/4 tsp salt
- 1/3–1/2 cup heavy cream
- 1 tsp vanilla extract
Topping:
- 2 cups chocolate sandwich cookies, crushed into “dirt”
- Clean plastic dinosaur figurines (or trucks), optional
- Assorted chocolate rocks or candy pebbles, optional
Instructions:
- Preheat oven to 350°F (175°C). Grease and line a 9×13-inch pan with parchment.
- Whisk flour, cocoa, baking powder, baking soda, and salt in a bowl.
- In a large bowl, whisk sugar, eggs, buttermilk, oil, and vanilla until smooth. Add dry ingredients and mix until just combined. Carefully whisk in hot coffee; batter will be thin.
- Pour into the pan and bake 30–35 minutes, until a toothpick comes out with a few moist crumbs. Cool completely.
- For frosting, beat butter until creamy. Add powdered sugar, cocoa, and salt; beat to combine. Add vanilla and enough cream to make it fluffy and spreadable. Whip 2 minutes for extra airiness.
- Frost the cake. Mound cookie “dirt” over the top. Create a small “dig site” by pushing some crumbs aside and nestling in dinos or candy rocks.
Party hack: Add a paper banner that says “Dig In!” Kids can “excavate” with spoons. No dinos? Make it a construction cake by adding toy dump trucks and some yellow-striped washi tape for road lines. Bonus: everything looks intentional, even if crumbs go everywhere.
4. Watermelon Lemonade Naked Cake (Fresh, Light, and Gorgeous)
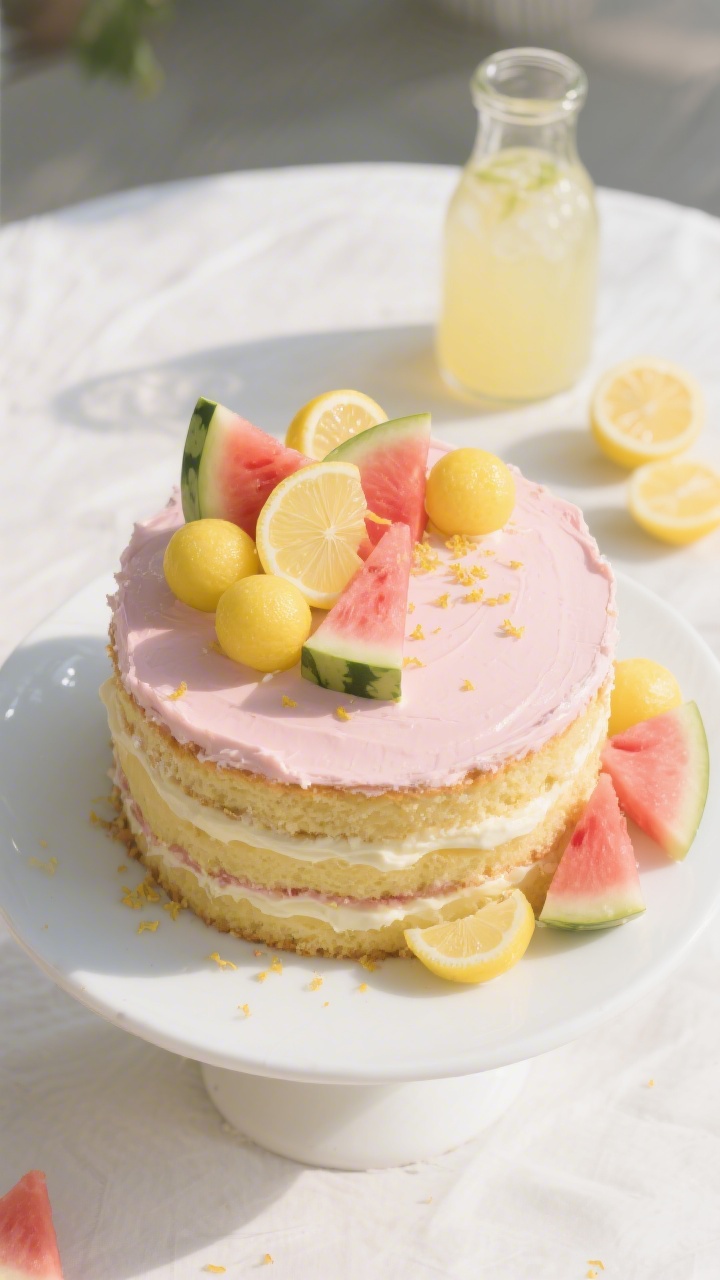
⭐ My secret tip – Ever since we started using this kids baking set, my toddler loves helping in the kitchen and is much more willing to try new foods. ✨ This is the blender we use for protein smoothies with yogurt, peanut butter, and fruit.
For summer birthdays or fruit-loving kiddos, this cake is a sunny twist: tender lemon layers, a blush-pink watermelon cream, and a rustic “naked” finish that looks fancy with almost no effort. It’s bright, lightly sweet, and totally photogenic.
Ingredients:
Lemon Cake Layers:
- 2 1/4 cups all-purpose flour
- 2 tsp baking powder
- 1/2 tsp baking soda
- 1/2 tsp fine salt
- 1 1/2 cups granulated sugar
- 3/4 cup unsalted butter, softened
- 3 large eggs, room temperature
- 3/4 cup buttermilk, room temperature
- 1/4 cup fresh lemon juice
- 1 tbsp lemon zest
- 1 tsp vanilla extract
Watermelon Cream:
- 1 1/2 cups heavy cream, cold
- 6 oz cream cheese, softened
- 1/3 cup powdered sugar
- 1/2 tsp vanilla extract
- 1/2 cup seedless watermelon, pureed and strained (about 3/4 cup cubes)
- Pink food coloring, optional
Decor:
- Small watermelon triangles and thin lemon slices
- Fresh mint leaves (optional)
Instructions:
- Preheat oven to 350°F (175°C). Grease and line two 8-inch round cake pans with parchment.
- Whisk flour, baking powder, baking soda, and salt.
- Cream butter and sugar until light and fluffy, 2–3 minutes. Beat in eggs one by one. Add lemon zest and vanilla.
- Mix buttermilk with lemon juice. Add dry ingredients to the butter mixture in two additions, alternating with the buttermilk mixture. Do not overmix.
- Divide batter between pans and bake 22–27 minutes, until the centers spring back. Cool completely.
- For watermelon cream, beat cream cheese, powdered sugar, and vanilla until smooth. Beat heavy cream to soft peaks, then fold into the cream cheese mixture. Gently fold in strained watermelon puree; tint with a drop of pink if desired. Chill 15 minutes to firm slightly.
- Assembly: Place one cake layer on a stand. Spread a thick layer of watermelon cream. Top with the second layer. Use a thin coat of cream around the sides for a rustic “naked” look, then a bit more on top.
- Decorate with small watermelon wedges, lemon slices, and mint. Chill 30 minutes before slicing.
Tips: Straining the watermelon puree keeps the cream stable—too much juice thins it out. Want extra zing? Brush cake layers with a quick lemon syrup (equal parts sugar and lemon juice, warmed) before frosting. This one screams summer birthday bliss.
5. Donut Tower “Cake” With Chocolate Drip and Berries
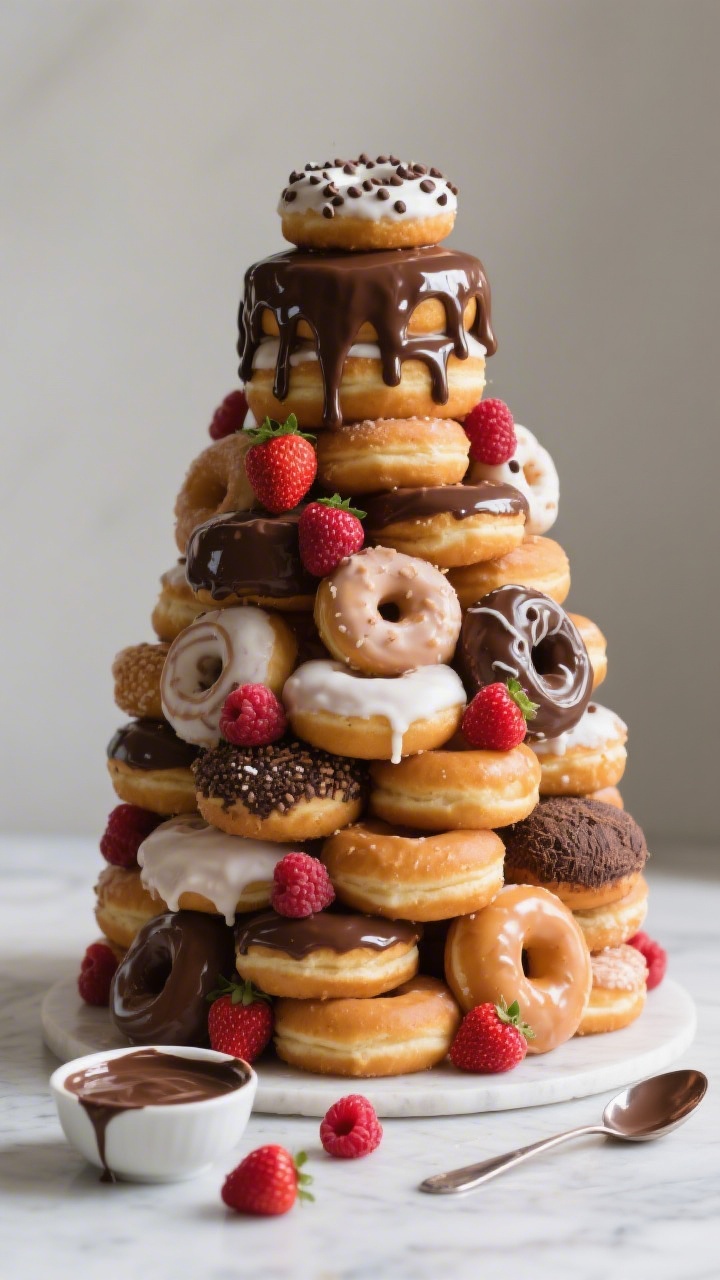
⭐ My secret tip – Ever since we started using this kids baking set, my toddler loves helping in the kitchen and is much more willing to try new foods. ✨ This is the blender we use for protein smoothies with yogurt, peanut butter, and fruit.
No oven? No problem. This whimsical donut tower stacks store-bought donuts into a tall, dramatic centerpiece. Add a glossy chocolate drip and fresh berries, and it instantly feels party-ready—plus kids love choosing their favorite donut from the “cake.”
Ingredients:
- 18–24 assorted glazed donuts (standard size), or a mix of regular and mini
- 1/2 cup chocolate chips
- 1 tbsp coconut oil (or 2 tbsp heavy cream)
- 1 cup fresh berries (strawberries, raspberries, blueberries)
- Sprinkles, optional
- Wooden skewer or dowel for stability
Instructions:
- Choose a cake stand or sturdy plate. Press a small ball of parchment or a dab of frosting in the center to help anchor the bottom donut.
- Stack a base layer of 6–7 donuts in a ring. Insert a wooden skewer or dowel through the center to keep tiers from wobbling.
- Add a second tier of 5–6 donuts, slightly inset to create a tower shape. Continue with 3–4 donuts, then 2–3, finishing with one on top.
- Melt chocolate chips with coconut oil (or cream) until smooth. Let cool slightly so it thickens, then spoon gently over the top to create that dramatic chocolate drip.
- Tuck berries into the gaps and scatter a few on top. Add sprinkles if you like. Remove the skewer just before serving, or leave it if you need extra stability—just warn slicers.
Variations: Theme it up with pink frosted donuts and rainbow sprinkles, or go “s’mores” with mini marshmallows and crushed grahams. For allergies, use plain glazed or vegan donuts and a dairy-free chocolate. It’s festive, fast, and guaranteed to get a big grin.
Final Party Tips
– Keep it simple with bold flavors and playful textures—kids care more about fun than perfection.
– For stress-free timing, bake the day before and frost the morning of. Ice cream cake needs an overnight freeze; donut towers assemble in 10 minutes flat.
– Add a themed cake topper or candles to make any of these feel custom without extra work.
There you have it: five playful, doable cakes that look amazing and taste even better. Pick one that fits your kid’s vibe, grab those sprinkles, and get ready for happy chaos around the dessert table. You’ve got this—save me a slice?
Printable Recipe Card
Want just the essential recipe details without scrolling through the article? Get our printable recipe card with just the ingredients and instructions.