5 Barbie Birthday Cakes for Kids That Are Magical and Fun
Ready to throw the most sparkly, pink-tastic birthday party ever? These Barbie birthday cakes are pure magic: bright colors, buttercream swirls, edible glitter, and big “wow” moments that kids (and secretly, adults) can’t resist. Each one is kid-approved, customizable, and way easier than it looks—because you shouldn’t need a pastry degree to bake a showstopper.
We’re talking simple steps, familiar ingredients, and clever shortcuts. Whether your little one wants a classic doll-in-the-dress cake or a neon Dreamhouse vibe, you’ll find a recipe here that’s party-photo gold. Let’s bake some birthday joy!
Disclosure: As Amazon Associates, we earn from qualifying purchases at no extra cost to you.
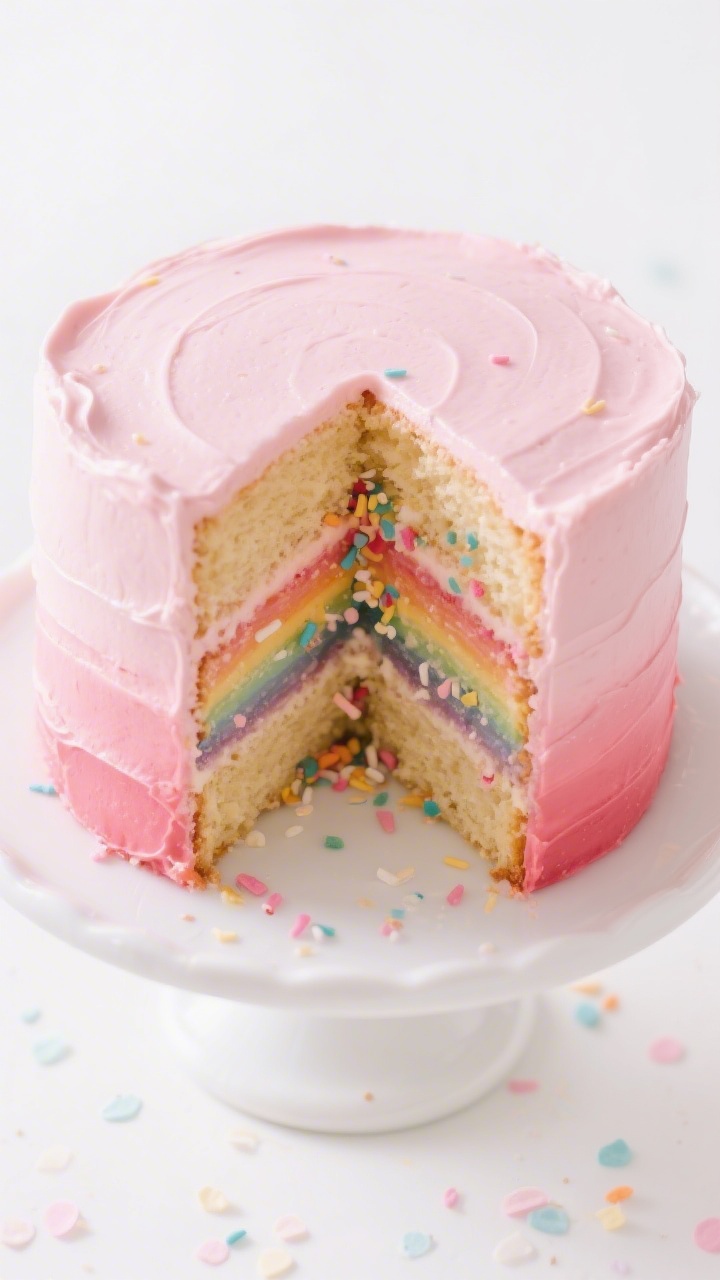
1. Dreamhouse Pink Ombré Layer Cake With Confetti Surprise
⭐ My secret tip – Ever since we started using this kids baking set, my toddler loves helping in the kitchen and is much more willing to try new foods. ✨ This is the blender we use for protein smoothies with yogurt, peanut butter, and fruit.
This is the crowd-pleaser: four layers of pink ombré goodness with a hidden sprinkle pocket inside. Slice it, and a cascade of confetti bursts out like a mini party. It’s dramatic, delicious, and delightfully pink—peak Barbie vibes without complicated sculpting.
Ingredients:
- 3 1/4 cups (400 g) all-purpose flour
- 2 1/2 cups (500 g) granulated sugar
- 1 tbsp baking powder
- 1/2 tsp baking soda
- 1 tsp fine sea salt
- 1 cup (225 g) unsalted butter, room temp
- 1 1/2 cups (360 ml) whole milk, room temp
- 6 large egg whites, room temp
- 2 tsp vanilla extract
- Pink gel food coloring
- 2 cups rainbow confetti sprinkles (jimmies), divided
- Buttercream (see below)
Vanilla Buttercream:
- 1 1/2 cups (340 g) unsalted butter, room temp
- 6 cups (720 g) powdered sugar, sifted
- 1/2 cup (120 ml) heavy cream
- 2 tsp vanilla extract
- Pinch of salt
Instructions:
- Prep the pans: Heat oven to 350°F (175°C). Grease and line four 8-inch round cake pans with parchment. If you have fewer pans, bake in batches.
- Make the batter: In a large bowl, whisk flour, baking powder, baking soda, and salt. In a stand mixer, beat butter and sugar on medium-high until light and fluffy, about 3 minutes. Add egg whites in two additions. Mix in vanilla.
- Alternate dry and milk: Add half the dry mix, then half the milk, repeat, mixing just to combine. Don’t overmix.
- Tint for ombré: Divide batter into four bowls. Leave one bowl light pink (just a dot of gel), the next medium, the next deeper, and the last a bold hot pink. Fold 1/2 cup sprinkles into the lightest two bowls for a fun confetti gradient.
- Bake: Distribute into pans, smooth tops, and bake 22–26 minutes, until a toothpick comes out clean. Cool 10 minutes, then turn out onto racks to cool completely.
- Buttercream time: Beat butter until creamy. Add powdered sugar gradually, then cream, vanilla, and salt. Whip 2 minutes until fluffy. Tint about 1/2 cup a bold hot pink for decorating; leave the rest white or pale pink.
- Build the sprinkle pocket: Level layers. Use a 3-inch round cutter to punch a center hole in two middle layers. Place the darkest pink base layer on a board; spread buttercream. Add a cut-out layer, buttercream, then the second cut-out layer. Fill the cavity with 1 to 1 1/2 cups sprinkles. Top with the lightest layer (uncut). Crumb-coat and chill 20 minutes.
- Frost and finish: Frost smoothly and create a soft ombré by blending a touch of pink into the bottom half. Pipe hot-pink rosettes on top and press extra sprinkles around the base.
Serve it up: Chill 20 minutes before slicing so the sprinkle surprise holds. Swap colors to match the party palette, or add a tiny Barbie sign topper for instant theme. Pro tip: Use jimmies, not nonpareils, for a cleaner inside “pour.”
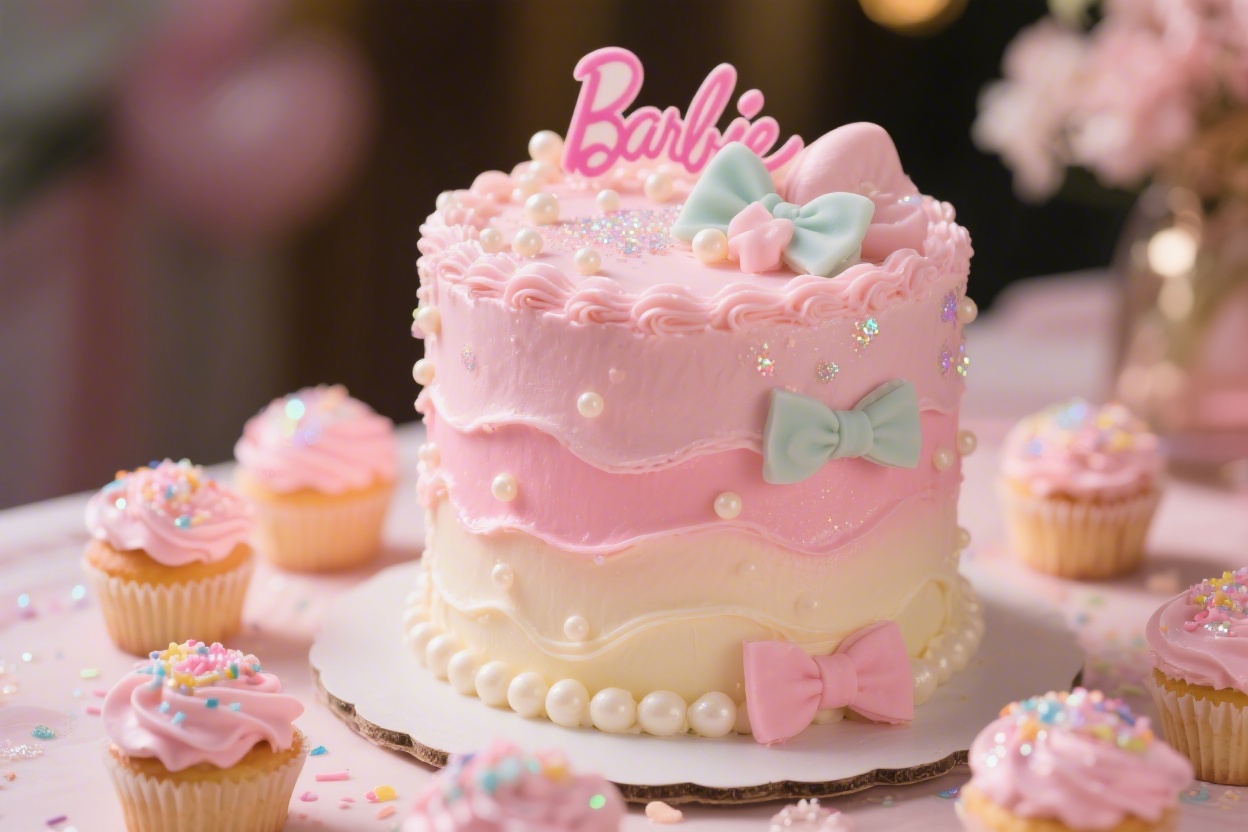
2. Classic Barbie Dress Doll Cake With Ruffle Skirt
Nothing says Barbie birthday like the iconic doll cake. This one has a tall, sculpted “gown” made from stacked cakes, frosted in swooping ruffles. It’s drama in buttercream form—and yes, that is a real Barbie in the middle.
Ingredients:
- Two 8-inch round vanilla cakes (about 1 1/2 inches tall each)
- One 6-inch round cake
- One oven-safe metal or silicone dome pan cake (or use another 6-inch and carve)
- 1 Barbie or compatible fashion doll (wrap lower body in plastic wrap)
- 6 cups vanilla or strawberry buttercream
- Pink and white gel food coloring
- Edible pearls or silver dragees
- Simple syrup (optional): 1/4 cup sugar + 1/4 cup hot water, stirred
Instructions:
- Level and stack: Trim cake domes. Brush layers lightly with simple syrup for moisture. Stack the two 8-inch cakes, then the 6-inch, then the dome on top, using buttercream between each.
- Carve the skirt: Using a serrated knife, carve the stack into a bell shape, tapering toward the top. Keep it symmetrical. Crumb-coat and chill 20–30 minutes.
- Insert the doll: Gently twist a butter-knife hole down the center. Slide the wrapped doll in to waist height.
- Tint and frost: Tint buttercream pale pink. Apply a smooth base coat over the skirt. Chill 10 minutes.
- Pipe ruffles: Fit a petal or ruffle tip (e.g., Wilton 104). Hold the wide end against the cake, thin edge out, and pipe overlapping ruffles from bottom to top. Switch to a slightly deeper pink for the last few rows for gradient flair.
- Create the bodice: Pipe a sweetheart neckline and straps around the doll using a small star or round tip. Add edible pearls as “beading.”
Make it sparkle: Dust the skirt with edible glitter for that fairy-tale shimmer. Want a different look? Try ombré lilac or a two-tone ruffle. If serving to little kids, keep the doll’s hair tied back to avoid frosting flyaways—seriously, it’s a lifesaver.
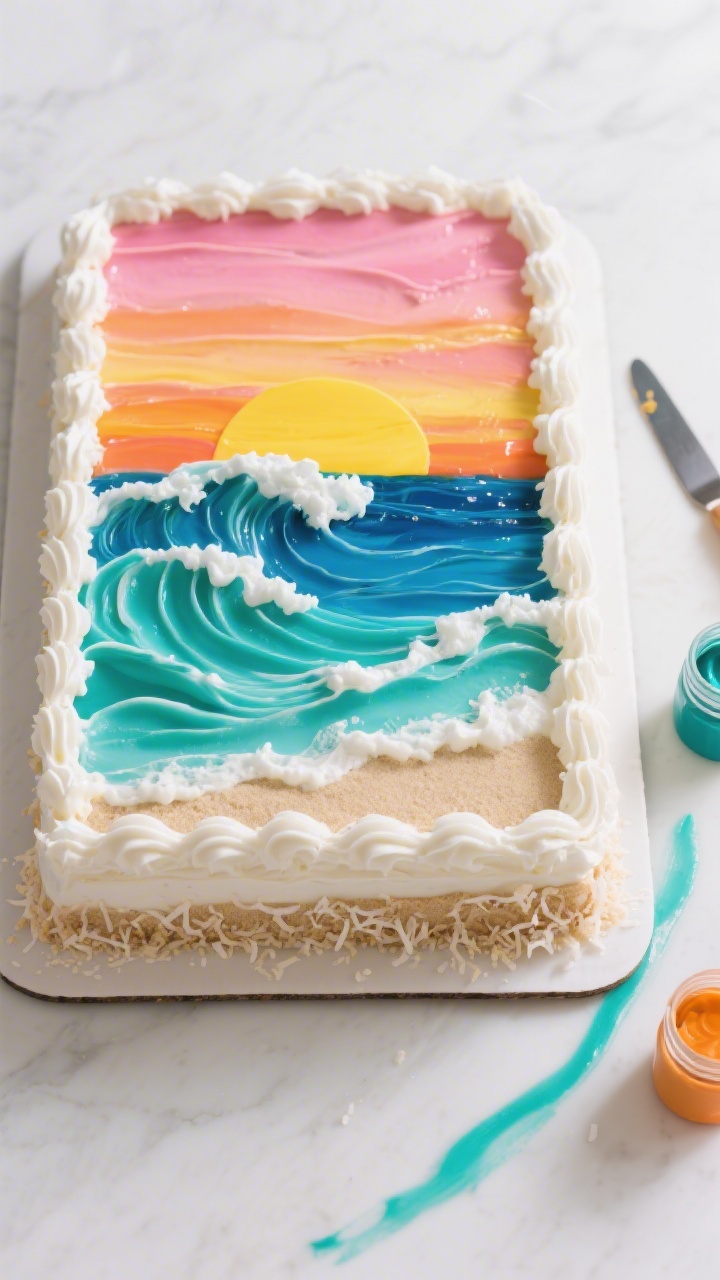
3. Malibu Sunset Sheet Cake With Buttercream Waves
⭐ My secret tip – Ever since we started using this kids baking set, my toddler loves helping in the kitchen and is much more willing to try new foods. ✨ This is the blender we use for protein smoothies with yogurt, peanut butter, and fruit.
For a low-stress, high-impact cake, go sheet cake. This Malibu-inspired design channels Barbie’s beach days: sunset colors, swoopy “ocean” waves, and a surfboard topper. It’s easy to slice, easy to transport, and still totally Instagrammable.
Ingredients:
- 1 13×9-inch vanilla or funfetti cake, baked and cooled
- 5 cups vanilla buttercream
- Gel colors: yellow, orange, pink, sky blue, teal, white
- 1/2 cup shredded coconut (optional, for “sand”)
- Graham cracker crumbs (optional, for “sand”)
- Edible glitter or luster dust
- Paper or fondant surfboard topper and tiny sunglasses picks (optional)
Instructions:
- Level and base-coat: Spread a thin, even layer of buttercream over the cooled cake. Chill 10 minutes.
- Paint the sunset: Divide 2 1/2 cups buttercream into three bowls. Tint yellow, orange, and hot pink. Using an offset spatula, swipe horizontal bands across the top half of the cake, blending where colors meet.
- Make the waves: Tint 1 1/2 cups buttercream sky blue and another 3/4 cup teal. With a spoon or small spatula, swipe curvy “wave” shapes along the bottom half. Add white buttercream swooshes for foam.
- Add “sand”: Press a strip of graham crumbs mixed with coconut along the base where sunset meets waves.
- Finishing touches: Dust lightly with edible glitter. Add surfboard and sunglasses toppers. Pipe a simple “Happy Birthday” in white over the sunset area.
Party tip: This serves a crowd with no balancing acts or cake tiers. Change the palette to purples and blues for a twilight ocean look. For flavor, layer the sheet cake with a quick strawberry jam and vanilla pudding before frosting—instant Malibu shortcake vibes.
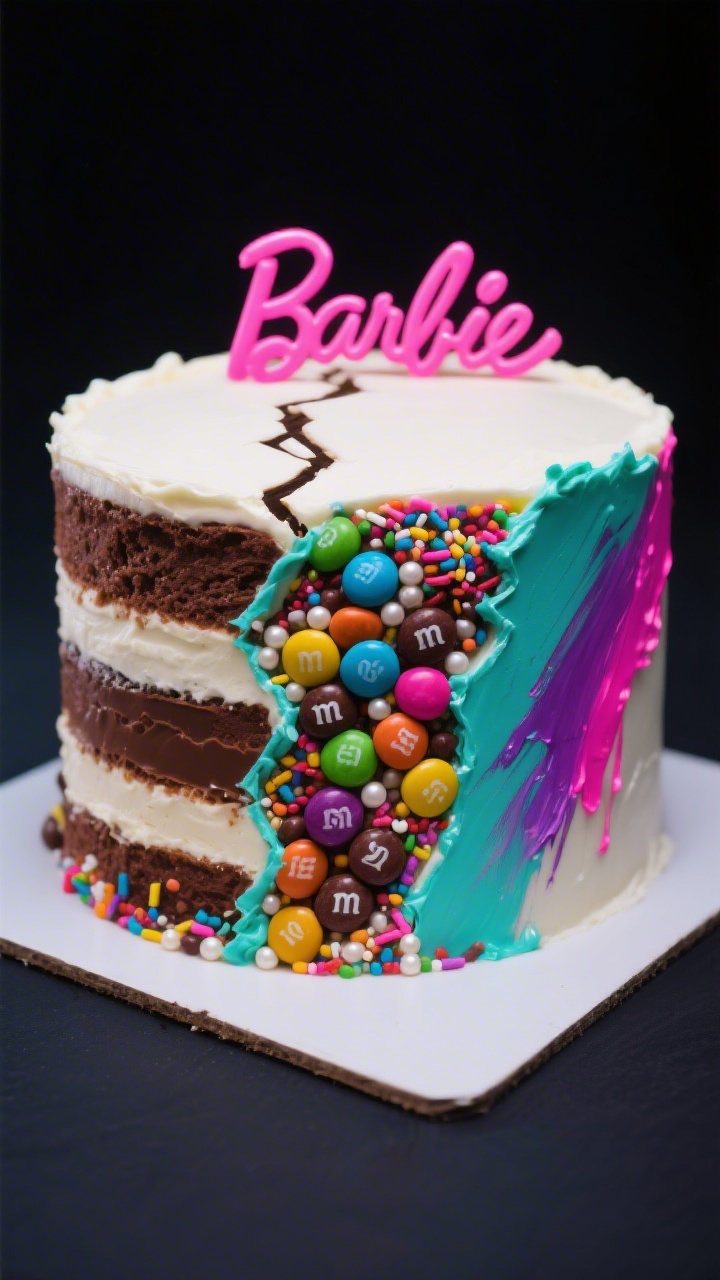
4. Neon Pop Barbie Fault Line Cake With Candy Crunch
⭐ My secret tip – Ever since we started using this kids baking set, my toddler loves helping in the kitchen and is much more willing to try new foods. ✨ This is the blender we use for protein smoothies with yogurt, peanut butter, and fruit.
Want a cake that screams party? The fault line design shows a peek-a-boo candy band around the middle, like the cake’s wearing a sparkly belt. It’s bright, bold, and absolutely kid-mesmerizing.
Ingredients:
- Three 6-inch round chocolate cakes
- 6–7 cups buttercream (vanilla or chocolate)
- Neon gel colors: electric pink, teal, purple
- Assorted small candies: mini M&M’s, confetti sprinkles, mini marshmallows, sugar pearls (about 1 1/2 cups total)
- Edible glitter or disco dust
- Piping bags and a large round tip
Instructions:
- Stack and chill: Level cakes. Fill and stack with buttercream. Crumb-coat and chill 20 minutes.
- Create the candy band: Spread a 2-inch-high band of buttercream around the cake’s center. Immediately press candies and sprinkles into this band to fully cover the strip.
- Fault line frosting: Tint the remaining buttercream electric pink. Apply a thicker coat above and below the candy band, leaving the candies peeking through. Smooth lightly; it’s okay if the edges are slightly raised—this is the “fault line.”
- Neon accents: Tint small amounts of buttercream teal and purple. Pipe random dots and short swooshes around the top and base. Add a glitter dusting for extra sparkle.
- Top it: Pile a small candy mound in the center, or add a Barbie silhouette topper for instant theme magic.
Switch it up: Use freeze-dried strawberry bits in the band for a tangy pop. Not into chocolate? Go strawberry cake with vanilla frosting for a strawberries-and-cream moment. Keep slices narrow—this one’s rich, trust me.
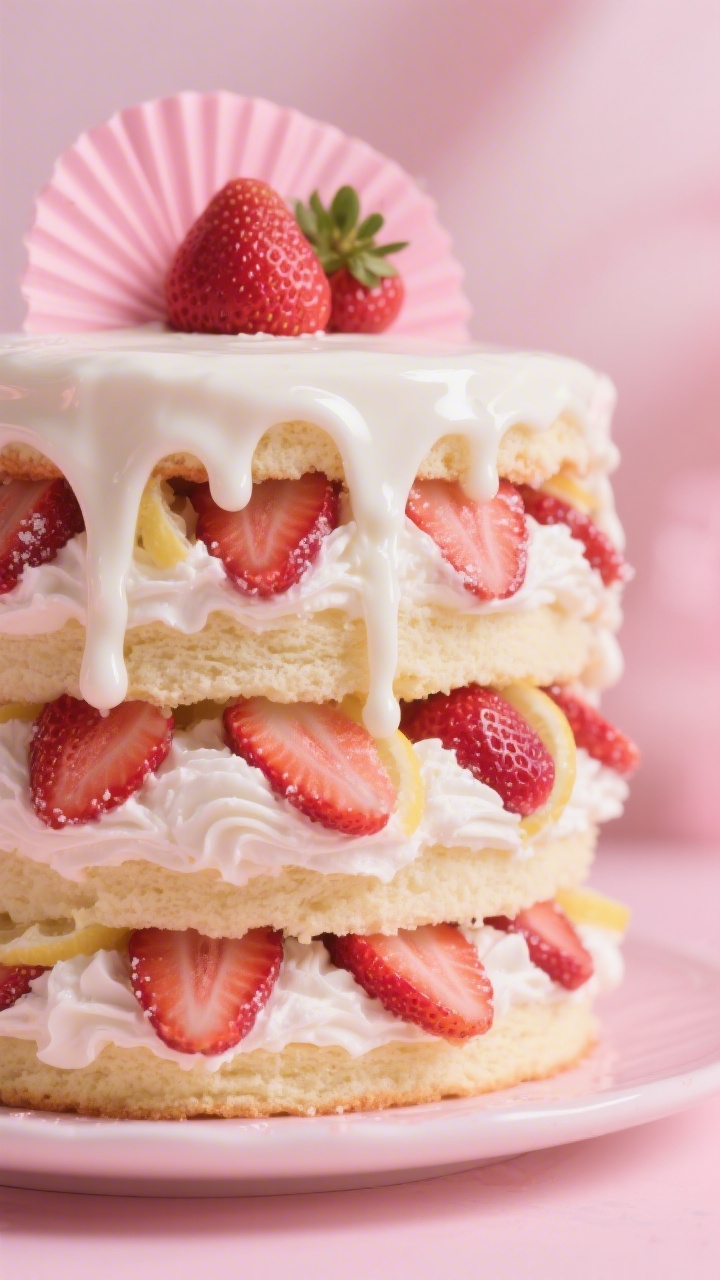
5. Barbiecore Strawberry Shortcake Tower With White Chocolate Drip
⭐ My secret tip – Ever since we started using this kids baking set, my toddler loves helping in the kitchen and is much more willing to try new foods. ✨ This is the blender we use for protein smoothies with yogurt, peanut butter, and fruit.
This one’s for the berry lovers. Think plush vanilla layers, juicy strawberries, clouds of whipped cream buttercream, and a glossy white chocolate drip in baby pink. It tastes like summer in a party dress.
Ingredients:
- Three 8-inch vanilla cakes
- 1 1/2 pounds fresh strawberries, hulled and sliced
- 2 tbsp sugar (for macerating berries)
- 1 tbsp lemon juice
- Whipped cream buttercream:
- 1 cup (225 g) unsalted butter, room temp
- 3 cups (360 g) powdered sugar, sifted
- 1 tsp vanilla
- 1/2 cup (120 ml) cold heavy cream, plus more as needed
- Pinch of salt
- White chocolate drip:
- 6 oz (170 g) white chocolate, finely chopped
- 1/3 cup (80 ml) heavy cream
- Pink gel food coloring
- Edible dried rose petals or heart sprinkles (optional)
Instructions:
- Macerate berries: Toss sliced strawberries with sugar and lemon juice. Let sit 15–20 minutes, then drain well (reserve juices for a simple drizzle, if desired).
- Make whipped cream buttercream: Beat butter until smooth. Add powdered sugar, vanilla, and salt. Stream in cold cream and whip 2–3 minutes until fluffy. If too thick, add 1–2 tbsp more cream.
- Stack with berries: Place first cake layer on a board. Pipe a buttercream “dam” around the edge. Spoon in strawberries (pat dry first) and a spoonful of reserved juice if using. Top with a thin layer of buttercream. Repeat with second layer. Add third layer and crumb-coat. Chill 20 minutes.
- Frost: Apply a smooth final coat of buttercream. Chill 10 minutes.
- Make the drip: Warm cream to steaming, pour over white chocolate, rest 2 minutes, then stir smooth. Tint pale pink. Cool to just warm—about 90–95°F (32–35°C).
- Drip and decorate: Using a spoon or squeeze bottle, drip ganache around the edges, then fill the top and smooth. Add rose petals or heart sprinkles for that Barbiecore finish.
Serving notes: Keep chilled but let it sit 15 minutes at room temp before slicing for the creamiest texture. Try swapping in raspberries or a layer of strawberry jam if berries aren’t peak. It’s elegant but still totally kid-friendly.
Essential Tools And Tips For Barbie Cake Success
- Level like a pro: A serrated knife or cake leveler keeps stacks steady and stress-free.
- Chill between steps: A quick 10–20 minute chill locks in crumbs and makes squeaky-smooth frosting.
- Use gel colors: They’re concentrated, so you get vibrant pinks and purples without thinning the frosting.
- Crumb coat always: That first thin layer is your neatness insurance policy.
- Stability matters: Transporting? Add a central dowel through tiered or tall cakes.
- Flavor boosters: Brush layers with simple syrup, strawberry syrup, or even pink lemonade for extra zing.
Okay, baker bestie—your Barbie cake era has officially begun. Whether you go full ruffle-dress drama or keep it cool with a Malibu sheet cake, these recipes promise maximum sparkle and minimum fuss. Pick your favorite, cue the glitter, and get ready for gasps when you bring it to the table. You’ve got this, and the birthday star is going to remember it forever.
Printable Recipe Card
Want just the essential recipe details without scrolling through the article? Get our printable recipe card with just the ingredients and instructions.